Creating play list, Playing play list, Using play list to edit programmes (con tinued) – Panasonic DMR-E60 User Manual
Page 36: Press [functions] (11), ª to clear the play list screen, ª to specify another scene, Press [play list ] (27), ª to stop play list play
36
Using PLAY LIST to edit programmes (continued)
Creating PLAY LIST
[RAM]
You can specify start and end points to create a scene, then
specify the order in which these scenes are played. These scenes
are not recorded separately so this doesn’t use up much of the
disc’s capacity.
Preparation
≥Switch [DVD, TV] (19) to “DVD”.
≥Insert a disc you have recorded on.
1
While stopped
Press [FUNCTIONS]
(11).
2
Use [
3, 4, 2, 1] (10) to select “CREATE PLAY
LIST” and press [ENTER]
(10).
3
Use search functions such as fast-forward and
slow-motion to find the start point of the scene and
press [ENTER]
(10).
4
Use search functions such as fast-forward and
slow-motion to find the end point of the scene and
press [ENTER]
(10).
5
Use [
3, 4] (10) to select “Exit” and press [ENTER]
(10).
ªTo stop partway through
Press [RETURN]
(28).
ªTo clear the PLAY LIST screen
Press [PLAY LIST]
(27) or [RETURN] (28).
The screen returns to the state it was in before you called up the
play list.
ªTo specify another scene
Select “Next” after step 4 and press [ENTER]
(10), then repeat
steps 3 and 4.
For your reference
≥You can fast-forward, rewind, pause and slow-motion while
playing scenes just as you can during normal play.
≥One disc can have a maximum of 99 play lists and 999 scenes.
These numbers may be reduced under some conditions.
≥You cannot specify an end point before a start point or a start
point after an end point.
≥You can also display the CREATE PLAY LIST screen by
selecting “– –” at the bottom of the play list.
≥If you specify an end point but not a start point, the unit
determines the beginning of the programme as the start point.
Similarly, if you specify a start point but not an end point, the unit
determines the end of the programme as the end point.
≥You may not be able to specify start and end points if the material
is still pictures recorded on other equipment.
≥The unit pauses play when the end of the last programme on the
disc is reached during this procedure.
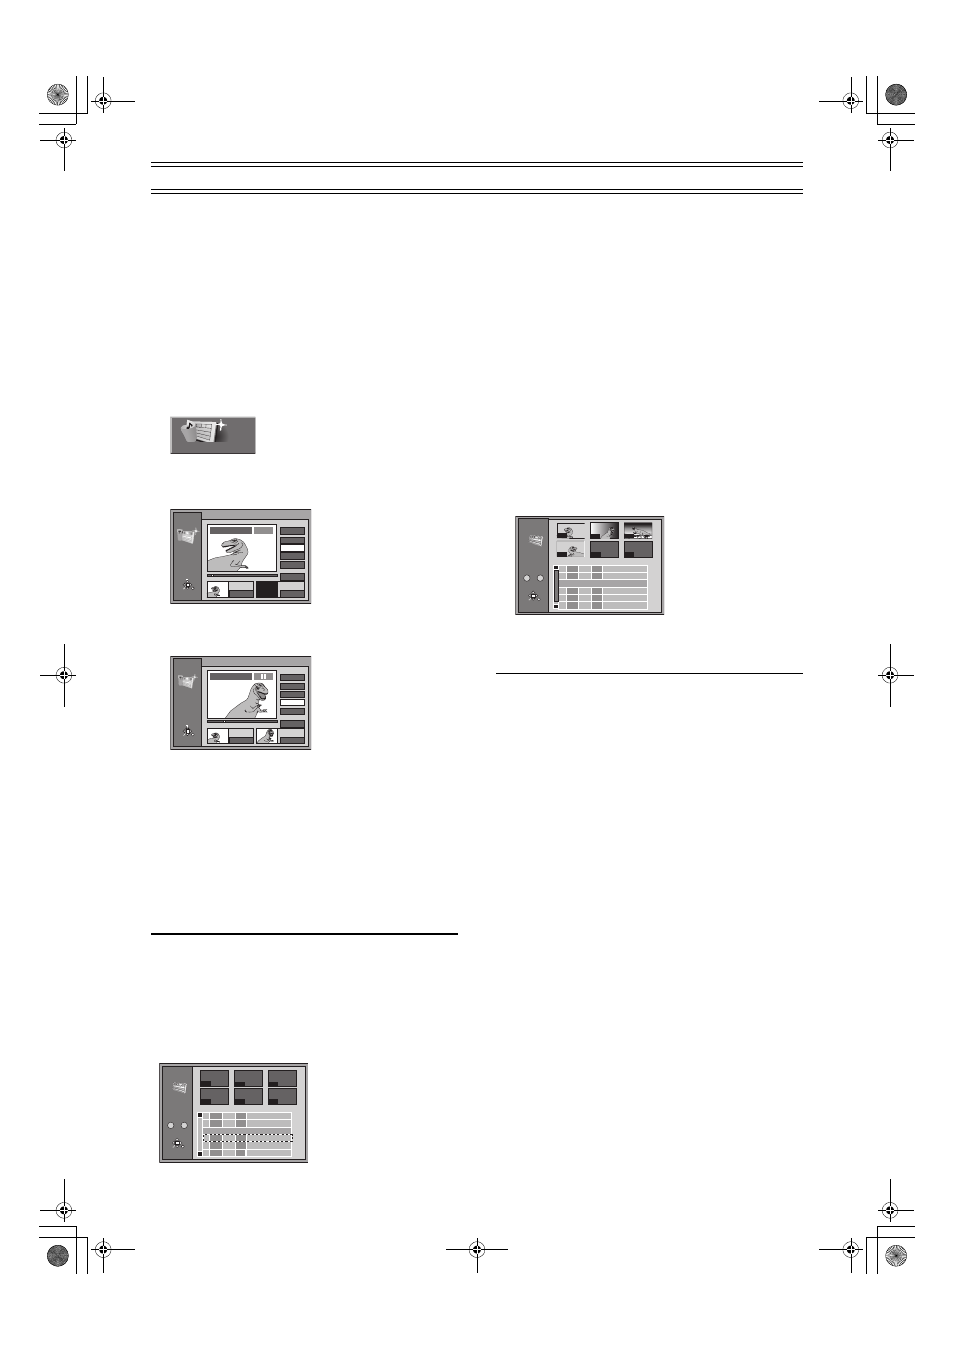
Playing PLAY LIST
[RAM]
Preparation
≥Switch [DVD, TV] (19) to “DVD”.
≥Insert a disc you created play lists on.
1
Press [PLAY LIST]
(27).
2
Use [
3, 4] (10) to select the play list you want to
play and press [ENTER]
(10).
≥The play list you select is played.
≥You can display the play lists after the sixth one by moving
[
4] (10).
ªTo stop PLAY LIST play
Press [
∫] (7).
The play list appears.
For your reference
You can also select play lists from the list in step 2 by entering a 2-
digit number with the numeric buttons
(4).
If you enter a number larger than the total number of play lists, the
last play list is selected.
CREATE PLAY LIST
PLAY LIST
Creation
0 : 00 . 05
Start
End
3
Start
1
End
Next
Exit
Scene No.
0 : 00 . 05
RETURN
ENTER
SELECT
--:--.--
PLAY
01
PLAY LIST No.3 Dinosaur
PLAY LIST
Creation
0 : 00 . 05
Start
End
Start
1
End
Next
Exit
Scene No.
0 : 35 . 20
RETURN
ENTER
SELECT
0 : 35 . 20
3
3
PLAY LIST No.3
01
PLAY LIST
- - -
- - -
No. Date Total Scene
Edit
Title
Auto action
USJ
01 15/7
006
006
0:03
02 15/7 0:07
03 23/7
004
0:06
Dinosaur
3
3
1
1
1
1
1
1
—
–
–
/
–
–
:
–
No.
RETURN
ENTER
SELECT
0
–
9
- - -
- - -
- - -
- - -
—
–
–
/
–
–
:
–
PLAY LIST
- - -
- - -
No. Date Total Scene
Edit
Title
Auto action
USJ
01 12/7
006
006
0:03
02 12/7 0:07
03 20/7
004
0:06
04 21/7
009
0:04
05 21/7
015
0:09
Dinosaur
Baseball
Movie
3
3
1
1
1
1
1
1
002
003
004
001
No.
RETURN
ENTER
SELECT
0
–
9
Football
06 22/7
008
0:05