6 dynamic dns – Planet Technology MH-2001 User Manual
Page 36
MH-2001 Multi-Homing Security Gateway User’s Manual
Enabling DHCP Support
Step 1. In the DHCP window, click Enable DHCP Support.
Domain Name: The Administrator may enter the name of the LAN network domain if preferred.
Automatically Get DNS: Check this box to automatically detect DNS server.
DNS Server 1 : Enter the distributed IP address of DNS Server 1.
DNS Server 2 : Enter the distributed IP address of DNS Server 2.
WINS Server 1 : Enter the distributed IP address of WINS Server 1.
WINS Server 2 : Enter the distributed IP address of WINS Server 2.
LAN interface:
Client IP Address Range 1: Enter the starting and the ending IP address dynamically
assigning to DHCP clients.
Client IP Address Range 2: Enter the starting and the ending IP address dynamically
assigning to DHCP clients. (Optional)
DMZ interface:
Client IP Address Range 1: Enter the starting and the ending IP address dynamically
assigning to DHCP clients.
Client IP Address Range 2: Enter the starting and the ending IP address dynamically
assigning to DHCP clients. (Optional)
Leased Time: Enter the leased time for DHCP. The default time is 24 hours.
Step 2. Click
OK to enable DHCP support.
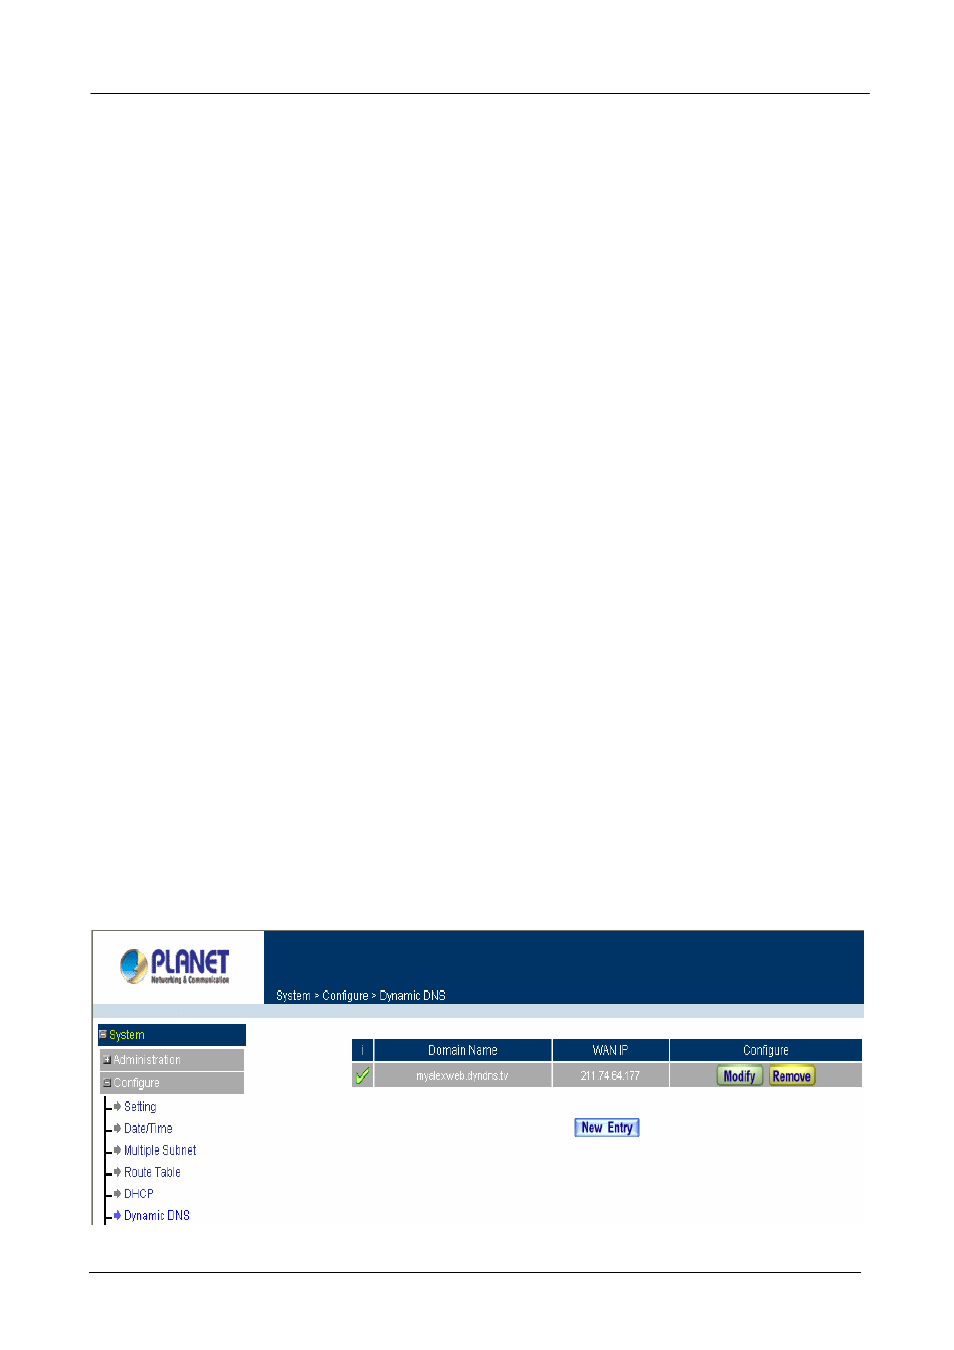
4.2.6 Dynamic DNS
The Dynamic DNS (require Dynamic DNS Service) allows you to assign a dynamic IP address to a static
hostname, allowing your device to be more easily accessed by specific name. When this function is enabled,
the IP address in Dynamic DNS Server will be automatically updated with the new IP address provided by
ISP.
Click Dynamic DNS under System/Configure menu to enter Dynamic DNS window.
- 30 -