Kyocera X-tc M2000 User Manual
Kyocera Mobile Phones
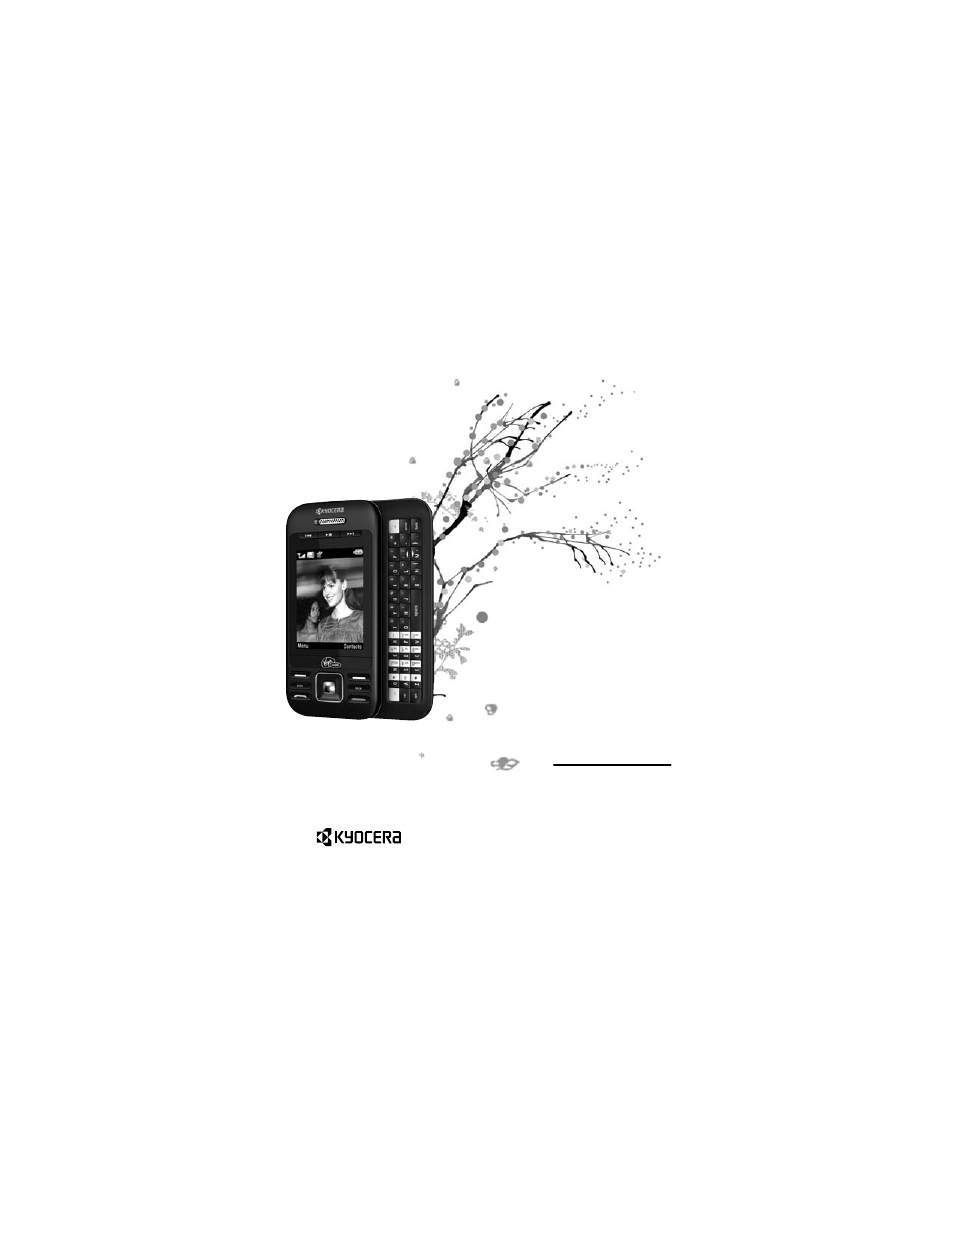
Table of contents
Document Outline
- X-tc User Guide
- X-tc User Guide
- X-tc User Guide
- X-tc User Guide
- This manual is based on the production version of the Kyocera
- This manual is based on the production version of the Kyocera
- This manual is based on the production version of the Kyocera
- 4,901,307 5,109,390 5,267,262 5,416,797 5,506,865
- 5,544,196 5,657,420 5,101,501 5,267,261 5,414,796
- 5,504,773 5,535,239 5,600,754 5,778,338 5,228,054
- 5,337,338 5,710,784 5,056,109 5,568,483 5,659,569
- 5,490,165 5,511,073
- The Kyocera Wireless Corp. (“KWC”) products described in this manual may include copyrighted KWC and third party software stored...
- Furthermore, the purchase of the KWC products shall not be deemed to grant-either directly or by implication, estoppel, or other...
- Kyocera is a registered trademark of Kyocera Corporation. Brick Attack and Race 21 are trademarks of Kyocera Wireless Corp. QUALCOMM is a registered trademark of QUALCOMM Incorporated.
- Openwave is a trademark of Openwave Systems Incorporated. eZiText is a registered trademark of Zi Corporation. TransFlash is a t...
- The “Virgin” name and the Virgin signature logo are registered trademarks of Virgin Enterprises Limited and are used under license. All other trademarks are the property of their respective owners.
- Copyright ©
- 82-R5601-1EN, Rev.
- This manual is based on the production version of the Kyocera
- X-tc User Guide
- X-tc User Guide
- FCC Notice
- FCC Notice
- FCC Notice
- FCC Notice
- This device complies with part 15 of the FCC rules. Operation is subject to the following two conditions: (1) This device may no...
- This device complies with part 15 of the FCC rules. Operation is subject to the following two conditions: (1) This device may no...
- This device complies with part 15 of the FCC rules. Operation is subject to the following two conditions: (1) This device may no...
- Other accessories used with this device for body-worn operations must not contain any metallic components and must provide at least
- THIS MODEL PHONE MEETS THE GOVERNMENT’S REQUIREMENTS FOR EXPOSURE TO RADIO WAVES.
- Your wireless phone is a radio transmitter and receiver. It is designed and manufactured to not exceed the emission limits for e...
- The exposure standard for wireless mobile phones employs a unit of measurement known as the Specific Absorption Rate, or SAR. The SAR limit set by the FCC is 1.6 W/kg.*
- Tests for SAR are conducted using standard operating positions specified by the FCC with the phone transmitting at its highest certified power level in all tested frequency bands.
- Although the SAR is determined at the highest certified power level, the actual SAR level of the phone while operating can be we...
- Before a phone model is available for sale to the public, it must be tested and certified by the FCC that it does not exceed the...
- Body-worn measurements differ among phone models, depending upon availability of accessories and FCC requirements. While there m...
- The FCC has granted an Equipment Authorization for this model phone with all reported SAR levels evaluated as in compliance with...
- Additional information on SAR can be found on the Cellular Telecommunications and Internet Association (CTIA) web-site at
- * In the United States and Canada, the SAR limit for mobile phones used by the public is 1.6 watts/kg (W/kg) averaged over one g...
- This device complies with part 15 of the FCC rules. Operation is subject to the following two conditions: (1) This device may no...
- FCC Notice
- FCC Notice
- Bluetooth® Certification
- Caution
- Caution
- Caution
- Caution
- The user is cautioned that changes or modifications not expressly approved by the party responsible for compliance could void the warranty and user’s authority to operate the equipment.
- Caution
- Caution
- Optimize your phone’s performance
- Air Bags
- Air Bags
- Air Bags
- Air Bags
- If you have an air bag, DO NOT place installed or portable phone equipment or other objects over the air bag or in the air bag deployment area. If equipment is not properly installed, you and your passengers risk serious injury.
- Air Bags
- Air Bags
- Medical devices
- Medical devices
- Medical devices
- Medical devices
- Pacemakers-Warning to pacemaker wearers: Wireless phones, when in the ‘on’ position, have been shown to interfere with pacemakers. The phone should be kept at least six (6) inches away from the pacemaker to reduce risk.
- Pacemakers-Warning to pacemaker wearers: Wireless phones, when in the ‘on’ position, have been shown to interfere with pacemakers. The phone should be kept at least six (6) inches away from the pacemaker to reduce risk.
- Pacemakers-Warning to pacemaker wearers: Wireless phones, when in the ‘on’ position, have been shown to interfere with pacemakers. The phone should be kept at least six (6) inches away from the pacemaker to reduce risk.
- The Health Industry Manufacturers Association and the wireless technology research community recommend that you follow these guidelines to minimize the potential for interference.
- . Always keep the phone at least six inches (15 centimeters) away from your pacemaker when the phone is turned on.
- Hearing aids-Some digital wireless phones may interfere with hearing aids. In the event of such interference, you may want to consult your service provider or call the customer service line to discuss alternatives.
- Other medical devices-If you use any other personal medical device, consult the manufacturer of the device to determine if it is adequately shielded from external RF energy. Your physician may be able to help you obtain this information.
- In health care facilities-Turn your phone off in health care facilities when instructed. Hospitals and health care facilities may be using equipment that is sensitive to external RF energy.
- Pacemakers-Warning to pacemaker wearers: Wireless phones, when in the ‘on’ position, have been shown to interfere with pacemakers. The phone should be kept at least six (6) inches away from the pacemaker to reduce risk.
- Medical devices
- Medical devices
- Potentially unsafe areas
- Potentially unsafe areas
- Potentially unsafe areas
- Potentially unsafe areas
- Posted facilities-Turn your phone off in any facility when posted notices require you to do so.
- Posted facilities-Turn your phone off in any facility when posted notices require you to do so.
- Posted facilities-Turn your phone off in any facility when posted notices require you to do so.
- Aircraft-FCC regulations prohibit using your phone on a plane that is in the air. Turn your phone off or switch it to Airplane Mode before boarding aircraft.
- Vehicles-RF signals may affect improperly installed or inadequately shielded electronic systems in motor vehicles. Check with the manufacturer of the device to determine if it is adequately shielded from external RF energy.
- Blasting areas-Turn off your phone where blasting is in progress. Observe restrictions, and follow any regulations or rules.
- Potentially explosive atmospheres-Turn off your phone when you are in any area with a potentially explosive atmosphere. Obey all signs and instructions. Sparks i...
- They include:
- . fueling areas such as gas stations
- . fueling areas such as gas stations
- . below deck on boats
- . transfer or storage facilities for fuel or chemicals
- . vehicles using liquefied petroleum gas, such as propane or butane
- . areas where the air contains chemicals or particles such as grain, dust, or metal powders
- . any other area where you would normally be advised to turn off your vehicle engine
- Posted facilities-Turn your phone off in any facility when posted notices require you to do so.
- Potentially unsafe areas
- Potentially unsafe areas
- Use with care
- Avoid magnetic environments
- Keep your phone dry
- Resetting the phone
- Resetting the phone
- Resetting the phone
- Resetting the phone
- If the screen seems frozen and the keypad does not respond to keypresses, reset the phone by completing the following steps:
- If the screen seems frozen and the keypad does not respond to keypresses, reset the phone by completing the following steps:
- Resetting the phone
- Resetting the phone
- Accessories
- Accessories
- Accessories
- Accessories
- Use only Kyocera-approved accessories with Kyocera phones. Use of any unauthorized accessories may be dangerous and will invalidate the phone warranty if said accessories cause damage or a defect to the phone.
- Accessories
- Accessories
- Radio Frequency (RF) energy
- Radio Frequency (RF) energy
- Radio Frequency (RF) energy
- Radio Frequency (RF) energy
- Your telephone is a radio transmitter and receiver. When it is on, it receives and sends out RF energy. Your service provider’s network controls the power of the RF signal. This power level can range from 0.006 to 0.6 watts.
- Your telephone is a radio transmitter and receiver. When it is on, it receives and sends out RF energy. Your service provider’s network controls the power of the RF signal. This power level can range from 0.006 to 0.6 watts.
- Your telephone is a radio transmitter and receiver. When it is on, it receives and sends out RF energy. Your service provider’s network controls the power of the RF signal. This power level can range from 0.006 to 0.6 watts.
- In August 1996, the U.S. Federal Communications Commission (FCC) adopted RF exposure guidelines with safety levels for hand-held...
- . ANSI C95.1 (American National Standards Institute, 1992)
- Your phone complies with the standards set by these reports and the FCC guidelines.
- Your telephone is a radio transmitter and receiver. When it is on, it receives and sends out RF energy. Your service provider’s network controls the power of the RF signal. This power level can range from 0.006 to 0.6 watts.
- Radio Frequency (RF) energy
- Radio Frequency (RF) energy
- E911 mandates
- Hearing Aid Compatibility (HAC) Features
- Hearing Aids and Wireless Phones
- ANSI Standard
- ANSI Standard
- ANSI Standard
- ANSI Standard
- To diminish interference between wireless phones and hearing aids, the FCC requires wireless carriers to offer phones that meet ...
- To diminish interference between wireless phones and hearing aids, the FCC requires wireless carriers to offer phones that meet ...
- To diminish interference between wireless phones and hearing aids, the FCC requires wireless carriers to offer phones that meet ...
- The higher the phone’s “M” rating, the more likely the phone is compatible with a hearing aid operating in the microphone setting. Hearing aids also have ratings similar to wireless phones. Most newer hearing aid models receive at least an M2 rating.
- To determine the level of compatibility between your hearing aid and this Virgin Mobile HAC certified phone, combine the M ratin...
- . Any combined rating equal to or greater than 6 provides excellent performance.
- T-Ratings-Phones rated T3 or T4 meet FCC requirements and are likely to be more usable with a hearing device’s telecoil (“T Swit...
- Hearing devices may also be measured for immunity to this type of interference. Your hearing device manufacturer or hearing heal...
- Please visit
- To diminish interference between wireless phones and hearing aids, the FCC requires wireless carriers to offer phones that meet ...
- Kyocera Wireless Corp.
- ANSI Standard
- ANSI Standard
- Table of Contents
- 1 Getting Started
- 1 Getting Started
- 1 Getting Started
- Phone Battery
- Phone Battery
- Install the Battery
- Install the Battery
- Install the Battery
- Install the Battery
- To
- To
- 1. With the back of the phone facing you, press on the back cover and slide it to the bottom of the phone.
- 1. With the back of the phone facing you, press on the back cover and slide it to the bottom of the phone.
- 2. Lift the back cover from the bottom to remove.
- 3. Place the battery in the phone casing with the metal contacts toward the top of the phone.
- 4. Align the back cover side tabs with the slots on each side of the phone.
- 5. Slide the back cover to the top of the phone until it is securely in place.
- Install the Battery
- Install the Battery
- Charge the Battery
- Charge the Battery
- Charge the Battery
- Charge the Battery
- You must have at least a partial charge in the battery to make or receive calls.
- You must have at least a partial charge in the battery to make or receive calls.
- 1. Remove the rubber USB cover and connect the AC adapter to the microUSB jack on the side of the phone
- 1. Remove the rubber USB cover and connect the AC adapter to the microUSB jack on the side of the phone
- 2. Plug the adapter into a wall outlet.
- 2. Plug the adapter into a wall outlet.
- The battery icon in the upper-right corner of the screen shows whether the phone is:
- Charge the Battery
- Charge the Battery
- Battery Safety Guidelines
- Battery Safety Guidelines
- Battery Safety Guidelines
- Battery Safety Guidelines
- . Do not disassemble or open the battery.
- . Do not disassemble or open the battery.
- . Do not disassemble or open the battery.
- . Do not disassemble or open the battery.
- . Do not crush, bend, deform, puncture, or shred the battery.
- . Do not attempt to insert foreign objects into the battery.
- . Do not immerse the battery or expose it to water or other liquids. Even if a battery appears to dry out and operate normally, internal parts can slowly corrode and pose a safety hazard.
- . Always keep the battery between 15 ˚C and 25 ˚C (59 ˚F and 77 ˚F). Do not expose the battery to extremes of temperature (heat or cold), fire, or other hazards such as a cooking surface, iron, or radiator.
- . Never use any damaged battery.
- . Only use the battery for its intended phone.
- . Only use the battery with a qualified charger. Use of an unqualified battery charger may present a risk of fire, explosion, leakage, or other hazard. If you are unsure about whether a charger is qualified, contact customer support.
- . Do not short-circuit the battery or allow metallic conductive objects-such as keys, coins, or jewelry-to contact the battery’s terminals.
- . Replace the battery only with another qualified battery. Use of an unqualified battery may present a risk of fire, explosion, leakage, or other hazard. If you are unsure about whether a replacement battery is compatible, contact customer support.
- . Promptly dispose of used batteries in accordance with local regulations and recycle if possible. Do not dispose as household waste.
- . Supervise all battery usage by children.
- . Avoid dropping the phone or battery. If the phone or battery is dropped, especially on a hard surface, an internal short-circuit can occur and pose a safety hazard. If you suspect battery damage, take it to a service center for inspection.
- . Improper battery use may result in a fire, explosion, or other hazard.
- . Do not disassemble or open the battery.
- . Do not disassemble or open the battery.
- Battery Safety Guidelines
- Battery Safety Guidelines
- Common Causes of Battery Drain
- Common Causes of Battery Drain
- Common Causes of Battery Drain
- Common Causes of Battery Drain
- . Playing games or using the Web.
- . Playing games or using the Web.
- . Playing games or using the Web.
- . Playing games or using the Web.
- . Keeping backlighting on.
- . Operating in digital mode when far away from a base station or cell site.
- . Using data cables or accessories.
- . Operating when no service is available, or service is available intermittently.
- . High earpiece and ringtone volume settings.
- . Repeating sound, vibration, or lighted alerts.
- . Playing games or using the Web.
- . Playing games or using the Web.
- Common Causes of Battery Drain
- Common Causes of Battery Drain
- Memory Card
- Memory Card
- Install the Memory Card
- Install the Memory Card
- Install the Memory Card
- Install the Memory Card
- To
- To
- 1. With the front of the phone facing you, locate the rubber memory card cover on the lower right hand side.
- 1. With the front of the phone facing you, locate the rubber memory card cover on the lower right hand side.
- 2. Remove the cover.
- 3. Insert the memory card with the metal contacts facing toward the front of the phone until it is securely in place.
- 4. Put the rubber cover back into place.
- Install the Memory Card
- Install the Memory Card
- Remove the Memory Card
- Remove the Memory Card
- Remove the Memory Card
- Remove the Memory Card
- Accessories
- Activate your Account
- Activate your Account
- Find the Serial Number
- Program your Phone
- Program your Phone
- Program your Phone
- Program your Phone
- Once you have activated your account, you need to program your Virgin Mobile phone number into your phone. When ready, follow these steps:
- Once you have activated your account, you need to program your Virgin Mobile phone number into your phone. When ready, follow these steps:
- 1. Turn on your phone.
- 1. Turn on your phone.
- 2. Dial ##VIRGIN# (that’s #-#-8-4-7-4-4-6-#).
- 3. Select
- 4. To activate your phone, select
- 5. When your phone connects to the network, select
- 6. When your phone displays your new Virgin Mobile phone number, write it down.
- 7. Select
- Program your Phone
- Program your Phone
- Get to Know your Phone
- Get to Know your Phone
- Get to Know your Phone
- Get to Know your Phone
- The following shows the front of the phone with the slide closed
- The following shows the front of the phone with the slide closed
- The following shows the front of the phone with the slide closed
- 1. LED indicator. See
- 1. LED indicator. See
- 2. Rewind,
- 3. Phone screen.
- 4. Left option button accesses menus and functions. At the main screen, selecting the
- 5. Speakerphone key activates the speakerphone and answers calls.
- 6. Send key starts or answers calls. Press once to display the recent calls list and twice to redial the last number dialed. Press and hold to activate voice commands.
- 7. Navigation key scrolls through lists and text entry fields and accesses the following shortcuts from the main screen.
- 8. Phone speaker.
- 9. Right option button accesses the contacts list and other menu options. At the main screen, selecting the
- 10. Back key erases characters in text entry or returns you to the previous screen when navigating through menus.
- 11. End key turns the phone on and off, ends calls or browser session, and returns you to the main screen.
- 12. OK key selects a menu item or option. At the main screen, short press of the
- The following shows the front of the phone with the slide closed
- The
- The
- 1. Right option button accesses the contacts list and other menu options.
- 1. Right option button accesses the contacts list and other menu options.
- 2. Enter key begins a new line in text entry.
- 3. Back key erases characters in text entry or returns you to the previous screen when navigating through menus.
- 4. Navigation keys, with the slide open, scroll through lists and text entry fields and access the same shortcuts from the main screen as the
- 5. QWERTY keypad.
- 6. Number keypad.
- 7. Sym key lets you type symbol characters or toggle between letters and symbols. Press the
- 8. CAP key lets you change the case of the letters. Press once to change the case of the next letter; press twice (within 2 seconds) to toggle between case modes.
- 9. Left option button accesses menus and functions.
- The following shows the back of the phone with the slide closed
- The following shows the back of the phone with the slide closed
- 1. Accessory eyelet (for optional straps and lanyards).
- 1. Accessory eyelet (for optional straps and lanyards).
- 2. Jack for AC adapter (included) and microUSB cable (sold separately).
- 3. Jack for a hands-free headset (sold separately).
- 4. Slot for a memory card (sold separately).
- 5. Camera lens.
- 6. Camera key activates Camera mode. To activate camera mode, press and hold the
- 7. Volume key raises or lowers ringtone volume.
- The following shows the back of the phone with the slide closed
- The following shows the front of the phone with the slide closed
- Get to Know your Phone
- Get to Know your Phone
- LED Indicator
- LED Indicator
- LED Indicator
- LED Indicator
- Your phone’s LED indicator displays different colors depending on the alert.
- Your phone’s LED indicator displays different colors depending on the alert.
- Your phone’s LED indicator displays different colors depending on the alert.
- Your phone’s LED indicator displays different colors depending on the alert.
- LED Indicator
- LED Indicator
- 1 Getting Started