9 margin erase area, 1”. see, P.150 “3-9 margin – Savin 5450 User Manual
Page 170: Erase area, P.150 “3-9, Margin erase area
USER TOOLS
150
3
G
Enter the number of students
with the Number keys. Then
press the
{{{{
Enter
}}}} key.
Note
❒ Repeat steps
F and G until you
have finished registering num-
ber of students in each class.
H
Press the
[OK]
key.
Note
❒ Repeat steps
D through H until
you have finished registering
number of students in each class
for the other grades.
I
Press the
[OK]
key.
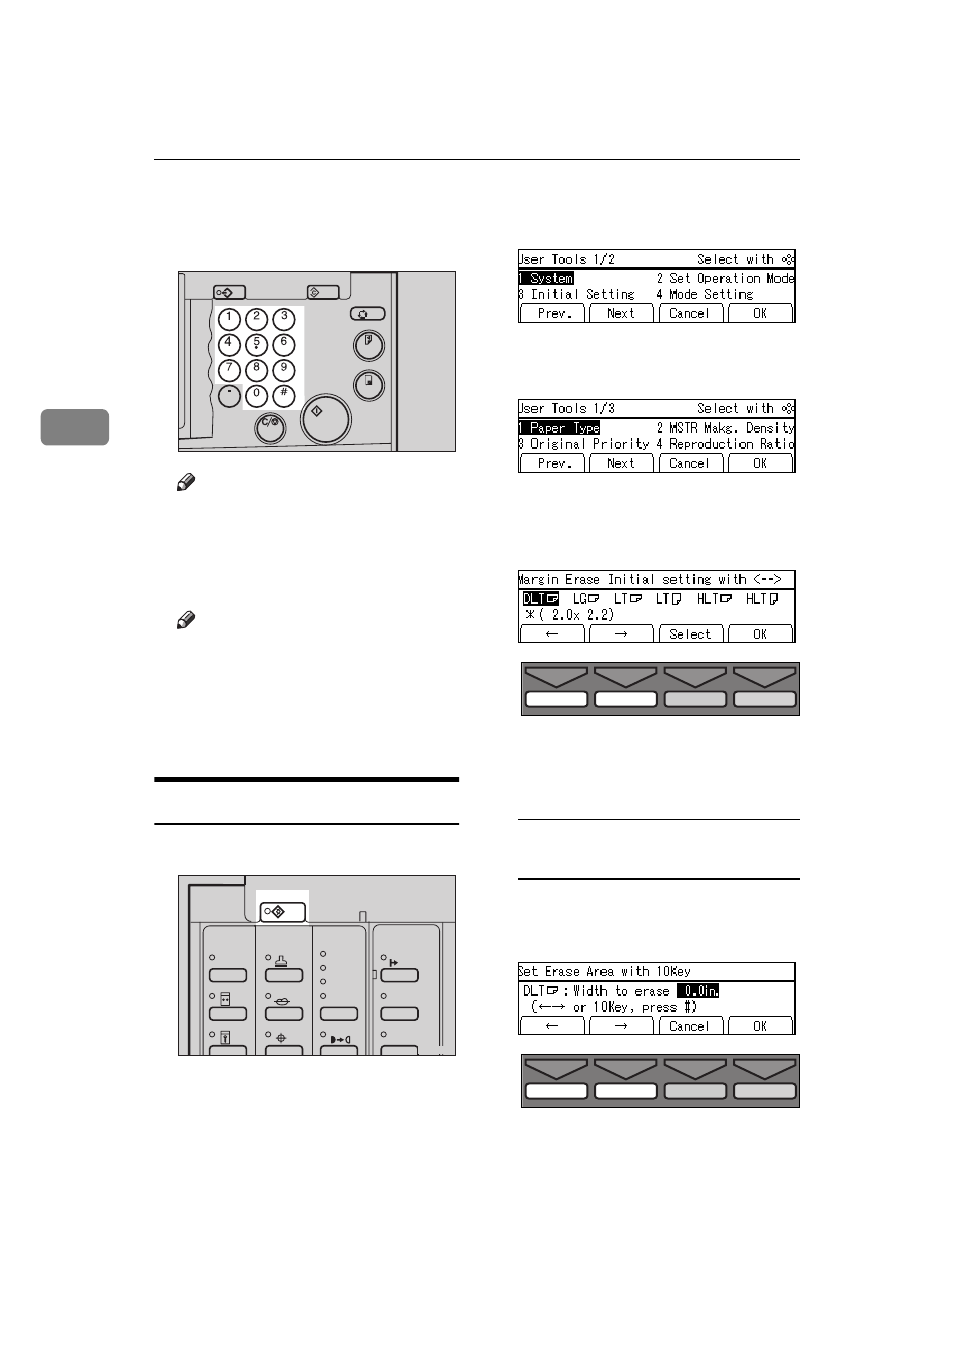
3-9 Margin Erase Area
A
Press the
{{{{
User Tools
}}}} key.
B
Enter 3 with the Number keys.
Then press the
[OK]
or
{{{{
Enter
}}}} key.
C
Enter 9 with the Number keys.
Then press the
[OK]
or
{{{{
Enter
}}}} key.
D
Select the original size you will
use with the
[
←
←
←
←
]
,
[
→
→
→
→
]
,
{{{{~
~
~
~}}}}, or {{{{}
}
}
}}}}}
key.
E
Press the
[Select]
key.
F
Adjust the erase edge margin.
If you selected A3 to A6 or 11"
×
17" to 5
1
/
2
"
×
8
1
/
2
"
A Adjust the erase edge margin
with the
[
←
←
←
←
]
,
[
→
→
→
→
]
,
{{{{~
~
~
~}}}}, or {{{{}
}
}
}}}}}
key.
Program
Clear Modes
Auto Cycle
Proof
Enter
Start
Clear/Stop
TPES120N
User Tools
Stamp
Make-Up
Overlay
Tint
Darker 2
Darker 1
Normal
On Line
Lighter
Image Density
TPES250N
TPES530E
TPES530E