Alternate configuration, Configuring end gears – Southbend South Bend SB1051 User Manual
Page 55
For Machines Mfg. Since 5/11
13" x 40" Heavy 13
®
EVS Lathe
-53-
O P E R A T I O N
Alternate Configuration
Use the alternate end gear configuration for
cutting modular or diametral threads. The 57T
end gear is positioned on the outside so that it
meshes with the 44T transposing gear instead of
the 56T gear, as illustrated in Figure 71.
Figure 71. Alternate end gear configuration.
57T
44T
24T
Modular and Diametral
Pitch Turning
56T
Configuring End Gears
Tools Needed
Qty
Hex Wrench 6mm .................................................1
Wrench 22mm .......................................................1
To configure the end gears:
1.
DISCONNECT LATHE FROM POWER!
2.
Remove the headstock end gear cover.
3.
Remove the cap screw, lock washer, and
flat washer from the 57T end gear (see
Figure 72).
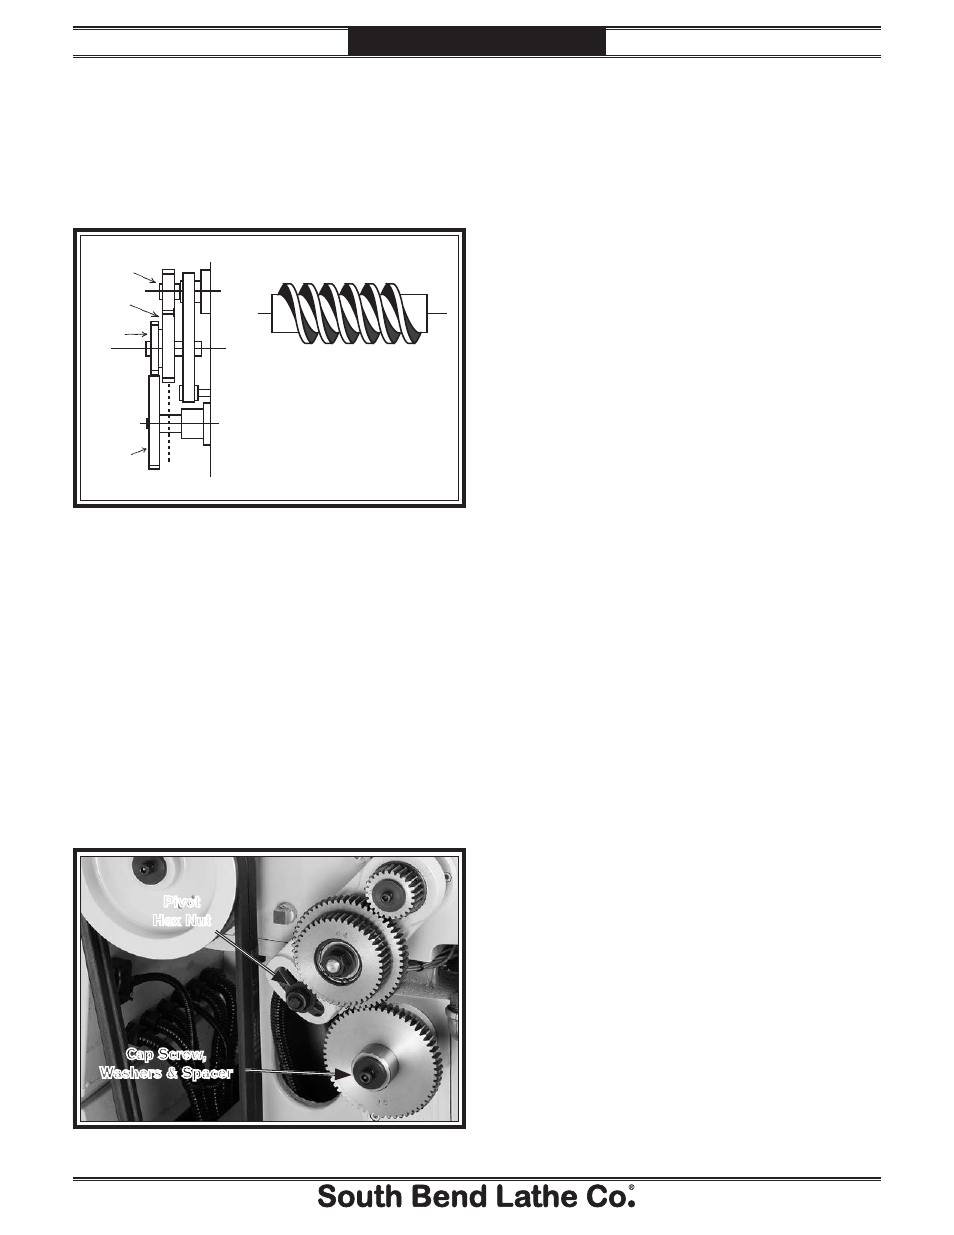
Figure 72. End gear components.
Pivot
Hex Nut
Cap Screw,
Washers & Spacer
4.
Loosen the pivot hex nut shown in Figure
72, then swing the pivot arm to the left so
that 44T/56T gears are away from the 57T
gear. Hand tighten the hex nut to keep the
arm in place.
5.
Use a stiff brush and mineral spirits to clean
away the debris and grime from the gears
and shafts, then lubricate these devices as
instructed in the End Gears lubrication
subsection on Page 70.
6.
Making sure to keep the key seated in the
shaft, remove the spacer and the 57T gear,
then re-install them as follows:
— For the standard end gear configuration,
slide the 57T gear on first, then the spacer
on the outside.
— For the alternate end gear configuration,
slide the spacer on first, then the gear.
7.
Re-install the cap screw, lock washer, and
flat washer you removed in Step 3 to secure
the spacer and 57T gear.
Note:
DO NOT overtighten the cap screw—
it merely holds the gear in place.
Overtightening it will make it harder to
remove later and may restrict the rotation of
the gears.
8.
Slide the pivot arm back in place to mesh the
gears, keeping approximately 0.002" play
between the gears, then retighten the pivot
hex nut.
9.
Replace and secure the end gear cover before
connecting the lathe to power.