J Page 38
Page 38
-35-
N(/()Fne\ijDXelXcD]^%j`eZ\*&'0
J
M
@:<
J
This section covers the most common service adjustments
or procedures that may need to be made during the life
of your machine.
If you require additional machine service information
not included in this section, please contact Woodstock
International Technical Support at (360) 734-3482 or send
an e-mail to:
k\Z_$jlggfik7j_fg]fo.Y`q.
>\e\iXc
If the feed motor fails, is noisy, warmer than usual, or
appears to run sluggishly, the brushes may need to be
replaced.
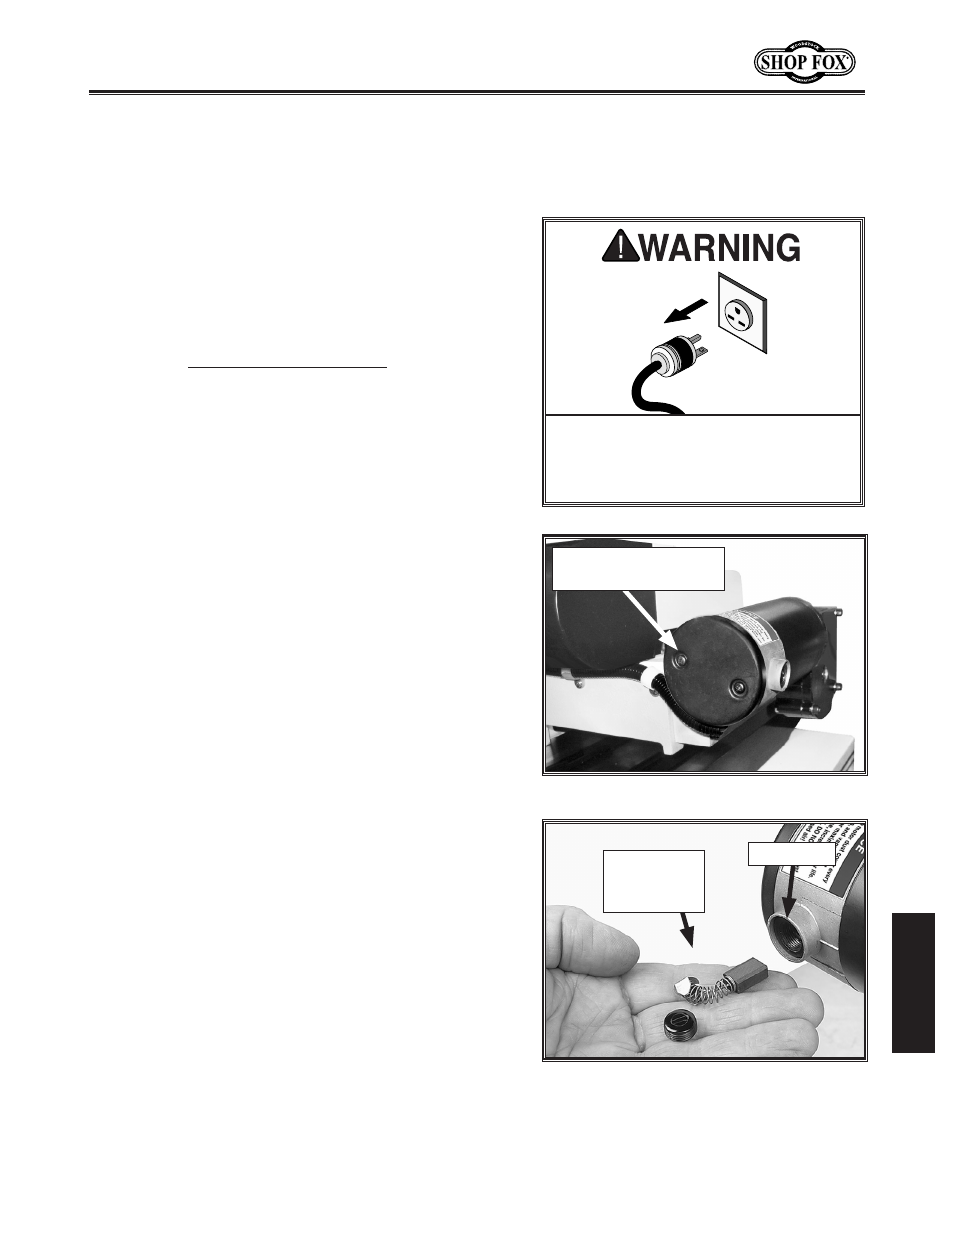
To replace feed motor brushes, do these steps:
1. DISCONNECT THE PLANER/MOULDER FROM POWER!
2. Unscrew the both motor dust cover retaining screws
and remove the dust cover Figure 52.
3. Unscrew the brush covers from both sides of the
motor, and remove the brushes, shown in Figure 53.
4. Vacuum out carbon dust from the motor and both
brush bores. DO NOT blow dust out with compressed
air!
5. Insert new brushes into the slots in the motor housing,
ensuring that the brush caps are threaded in com-
pletely until they stop.
6. Screw the brush caps in place.
7. Reinstall the motor dust cover.
8. Test run the feed motor.
:_Xe^`e^=\\[Dfkfi
9ilj_\j
D8B< JLI< k_Xk pfli dXZ_`e\ `j
legcl^^\[ [li`e^ Xcc j\im`Z\ gifZ\$
[li\j @] k_`j nXie`e^ `j `^efi\[# j\i`$
fljg\ijfeXc`ealipdXpfZZli.
Figure 52. Feed motor end view.
Figure 53. One of two feed motor
brushes.
Brush Bore
Motor Brush
Cap and
Spring
Motor Dust Cover and
Retaining Screws