Erase mode – Minolta CF910 User Manual
Page 160
5-10
3. Copy Track Functions
Sett
ing
t
h
e
Utilit
y Mo
d
e
Chapter 5
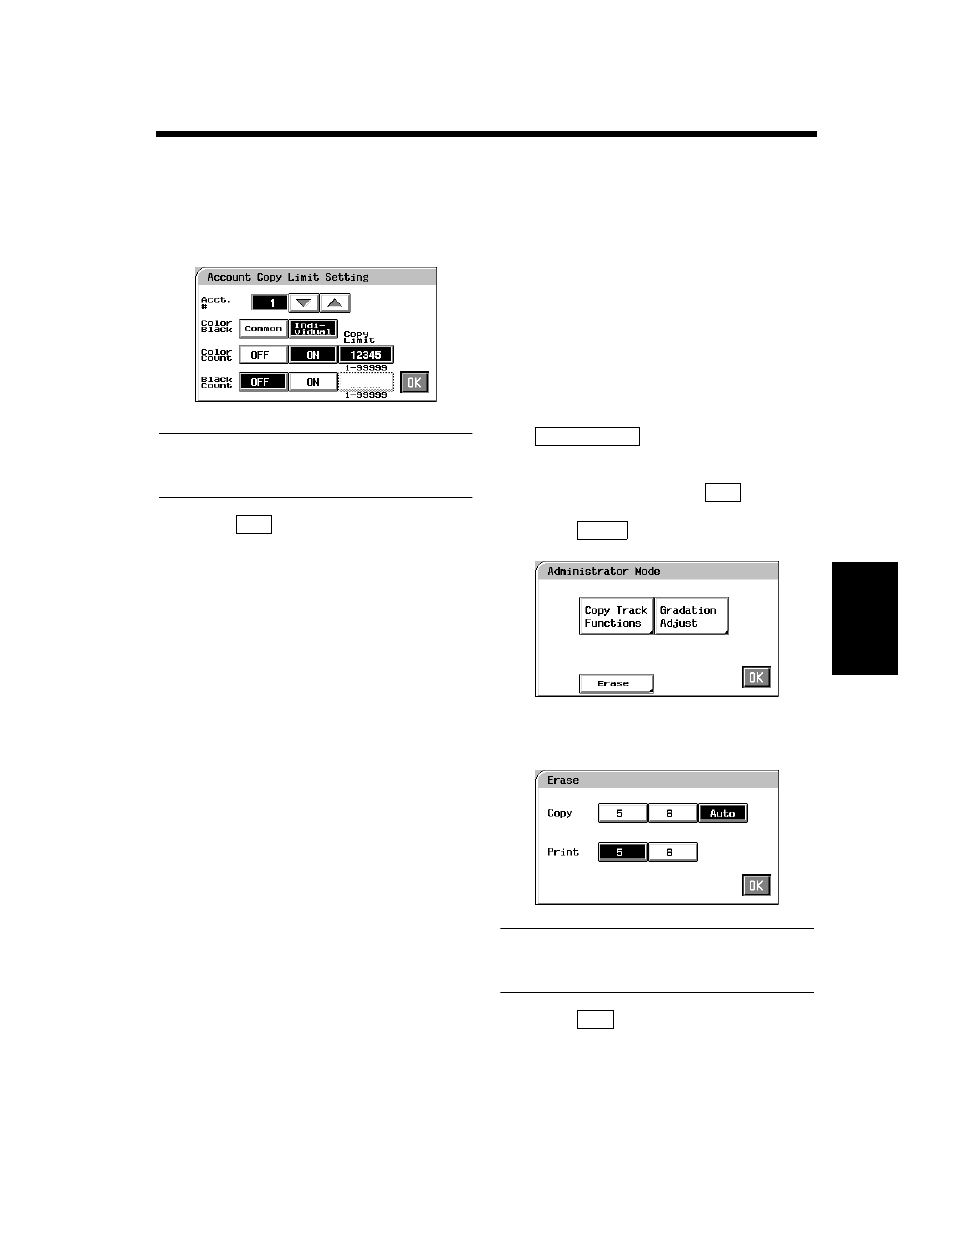
Touch the respective “Copy Limit” key and
then enter the copy limit from the 10-Key
Pad.
Useful Tip
If you want to set a Copy Limit for another
account, repeat steps 6 to 8.
Touch
.
Erase Mode
You can choose the lost image width for the
leading edge of the copy from “5mm”, “8mm”
and “Auto(8mm)”.
5mm: The lost image is 5mm.
8mm: The lost image is 8mm.
Auto: The lost image is automatically switched
between 5mm and 8mm according to the
mode setting made.
The initial setting is “Auto(8mm)” for copy and
“5mm” for print.
Press the Utility key and touch
.
Enter your administrator code number from
the 10-key Pad, then touch
.
Touch
.
Select the lost image width for Copy and
Print respectively.
NOTE
When you change the Erase Mode setting,
consult your Technical Representative.
Touch
.
8
1154P549CA
9
OK
1
Admin. Mode
2
OK
3
Erase
1154P417CB
4
1154P555CA
5
OK