Minolta CF910 User Manual
Page 118
4-2
Pr
of
es
si
on
al
W
a
y t
o
Ma
k
e Co
lo
r
Cop
ies
Chapter 4
1. Using the Applied Input
Output Functions
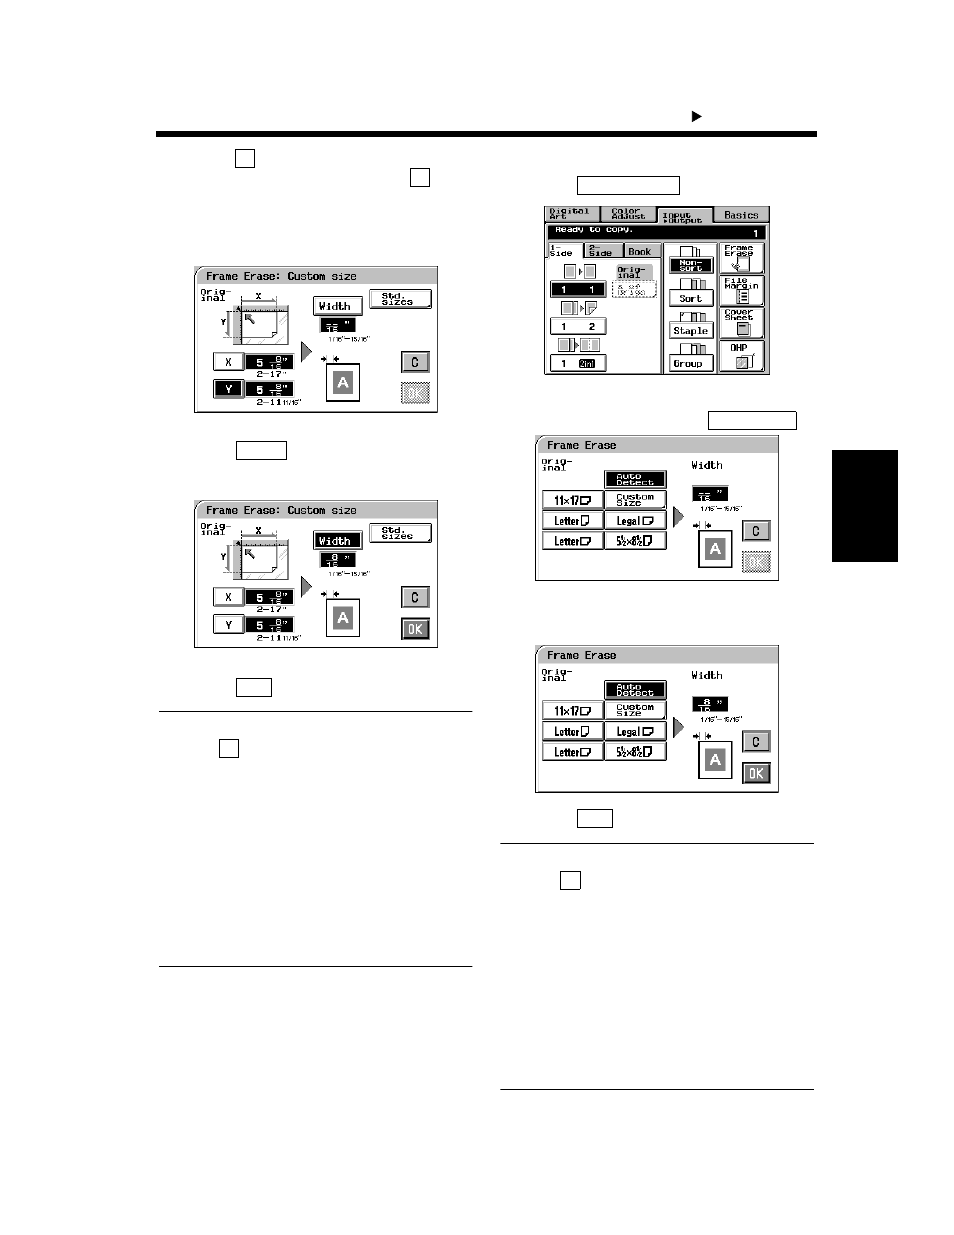
Touch
and enter the length of the original
from the 10-Key Pad. Then, touch
and
enter the width of the original.
(To correct a value entered, press the Clear
Key.)
Touch
and enter the frame erase
width from the 10-Key Pad.
Touch
.
Useful Tips
• Touch
(cancel) to cancel the settings made
for, and exit from, Frame Erase.
• This copier has been designed to have a lost
image of a width of 8 mm on the leading edge,
4 mm on the trailing edge, and 3 mm each on
the front and rear edges in the full size mode.
Set a frame erase “Width” wider than each of
these values to have a frame erase effect at all.
• A shadow can at times be produced along the
edges when you make an 12”
×
18” copy from
an 11”
×
17” original. We recommend that
Frame Erase be used in such cases.
Touch
.
Select the applicable “Original Size.”
Touch the exact size key or
.
Enter the frame erase “Width” from the 10-
key Pad.
Touch
.
Useful Tips
• Touch
(cancel) to cancel the settings made
for, and exit from, Frame Erase.
• This copier has been designed to have a lost
image of a width of 8 mm on the leading edge,
4 mm on the trailing edge, and 3 mm each on
the front and rear edges in the full size mode.
Set a frame erase “Width” wider than each of
these values to have a frame erase effect at all.
• A shadow can at times be produced along the
edges when you make an 12”
×
18” copy from
an 11”
×
17” original. We recommend that
Frame Erase be used in such cases.
3
X
Y
1154P291EA
4
Width
1154P292EA
5
OK
C
1
Frame Erase
1154P140CA
2
Auto Detect
1154P289EA
3
1154P290EA
4
OK
C