Sanding belt, Notice – Grizzly G0486/G0487 User Manual
Page 19
G0486/G0487 Wide Belt Sander
-17-
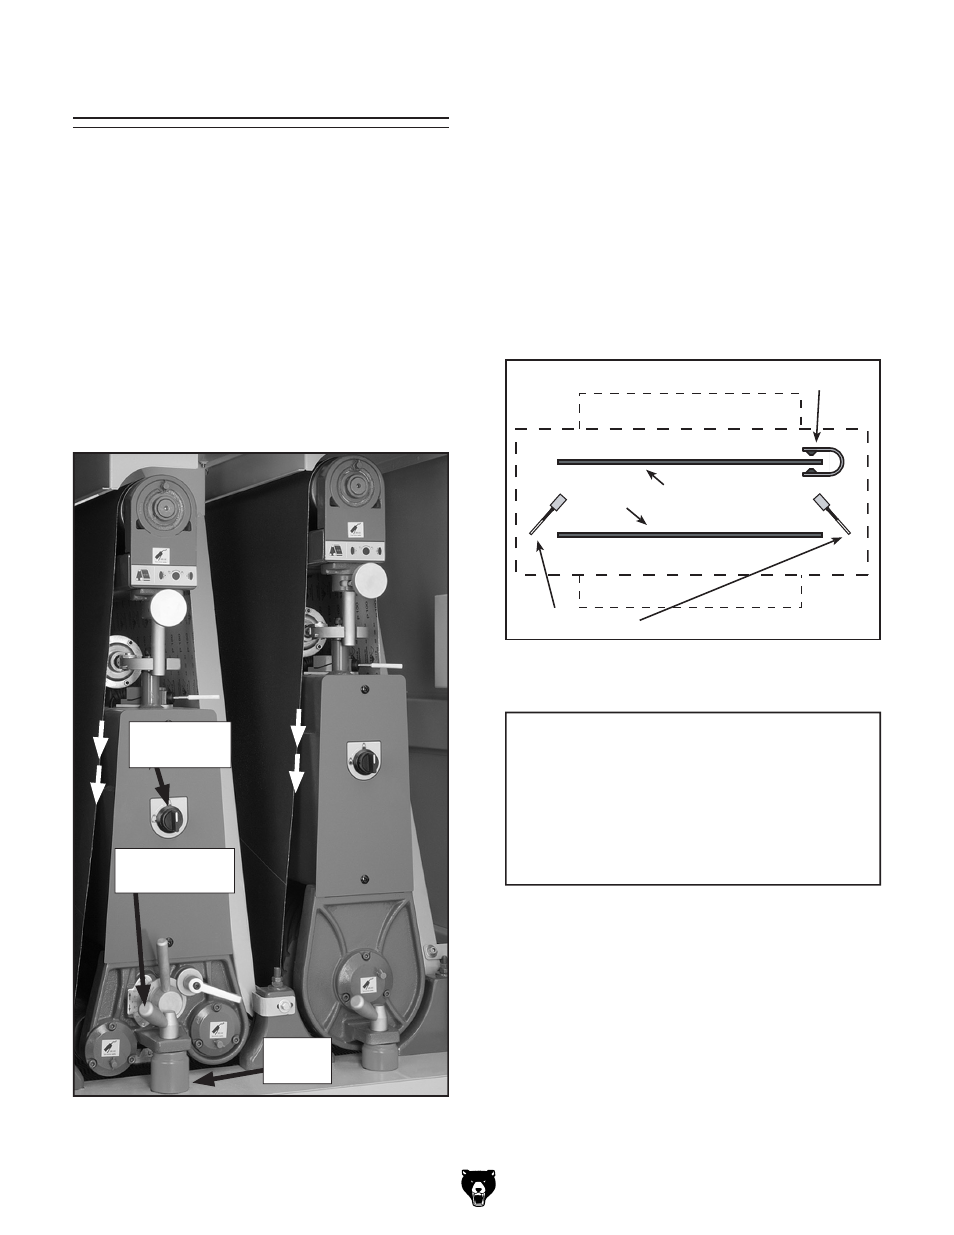
To install the sanding belt:
1.
DISCONNECT THE SANDER FROM THE
POWER SOURCE AND REMOVE AIR
PRESSURE COMPLETELY
!
2. De-activate the belt tension piston by turning
the belt tension knob (
Figure 14).
3. Remove the lock post release lever (Figure
14) by turning it counterclockwise
1
⁄
2
turn and
pulling it up and out of the mounting hole.
4. Remove the spacer block (Figure 14).
Sanding Belt
5. Ensuring the rotation arrows on the sanding
belt point the same direction as those shown
in
Figure 14, install the sanding belt by start-
ing first on the upper roller, and then the
lower roller.
Note: The sanding belt must be centered
between the limit switches and the edge of
the sanding belt must be between tongs of
the oscillation controller as shown in
Figure
15. Damage to the sanding belt could occur
if the sander is turned
ON before the sanding
belt is correctly positioned.
6. Replace the spacer block and tighten down
the lock handle bolt.
7. With your hands clear of all moving parts,
tension the belt by turning the belt tension
knob.
Figure 15. Sander Outline (Top View). Proper
position of belt between the limit switches.
Sanding Belt
(Back)
(Front)
Oscillation Controller
Limit Switches
NOTICE
The directional arrow on the back of the
sanding belt must be pointing in a coun-
terclockwise direction during installation.
Failure to install the sanding belt correctly
could result in damage to the sanding belt
or the sander itself.
Figure 14. Components used when changing a
sanding belt.
Belt Tension
knob
Lock Post
Release Lever
Spacer
Block
ROTATION
ROTATION