Configuring the chipdisk, 2 configuring the chipdisk – FUJITSU PRIMERGY B120 User Manual
Page 61
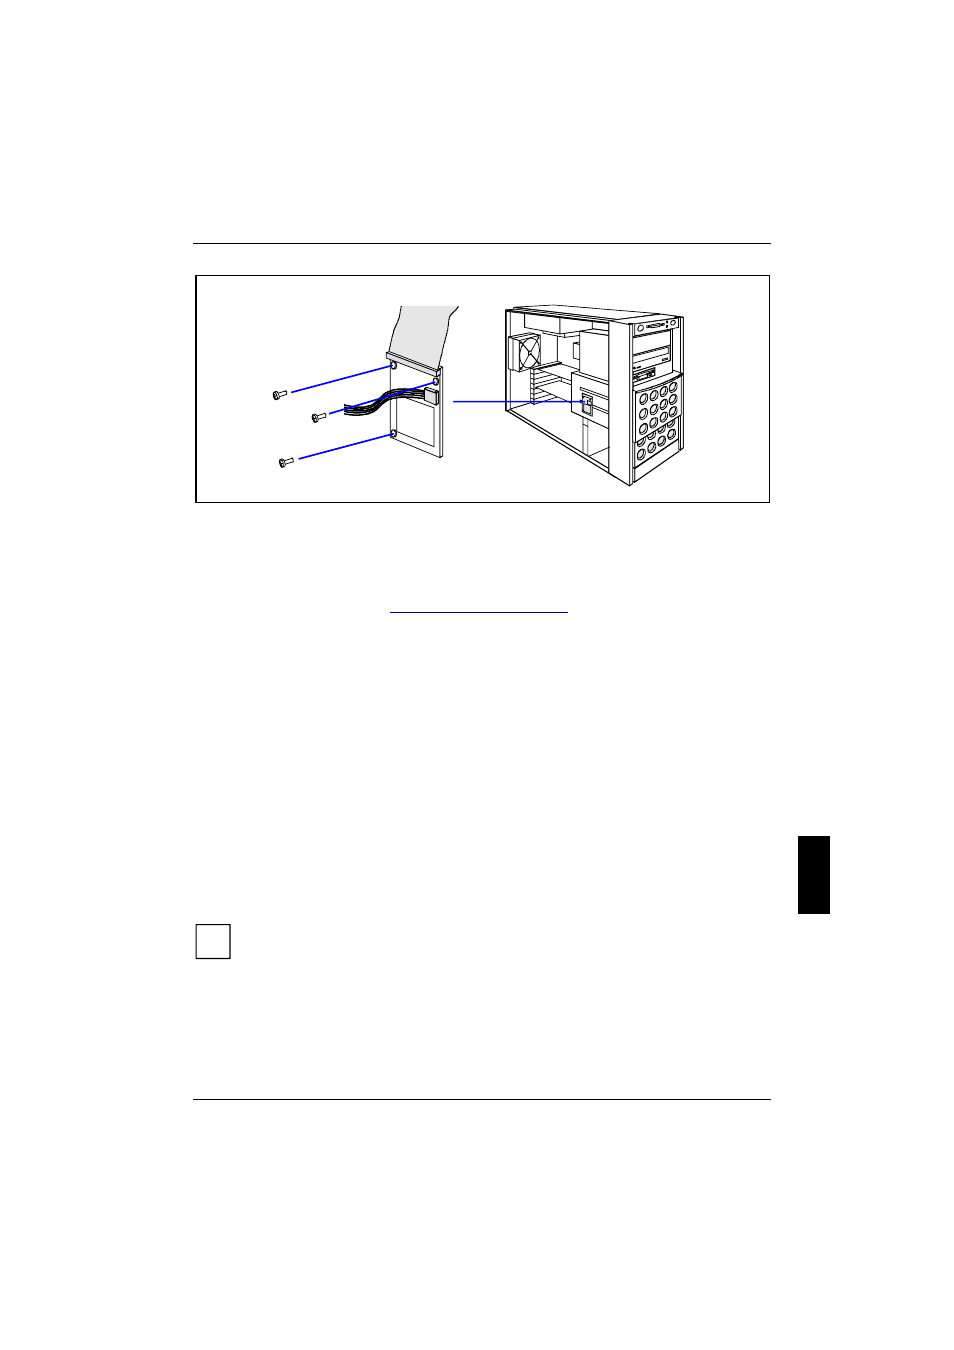
chipDISK for RemoteView
System components and expansions
A26361-K646-Z102-1-7619
53
1
Ê
Screw the chipDISK onto the side of the drive cage (1).
Ê
Connect the IDE data cable provided to the chipDISK (1) and to the primary IDE interface of
the system board.
Ê
Connect the other end of the power supply cable to the appropriate connection on the system
board. (see also the technical manual for the system board).
Ê
Close the server again (see "
Opening and closing the server
").
Removing is performed in the reverse order.
8.4.2 Configuring the chipDISK
You must enter the chipDISK parameters (hard disk parameters) in
BIOS Setup
and boot from the
chipdisk once using these parameters in order for
RemoteView
to be started automatically later.
Proceed as follows:
Ê
Reboot the server.
Ê
Press the function key [
F2]
F2]
F2]
F2]
if the message
Press
is displayed on the screen.
Ê
In the
BIOS-Setup
, select the menu item
IDE Drive 1
from the
Main
monitor page.
Ê
Set the value for
Type
to
Auto
.
Ê
Select the
Server
menu in the
BIOS setup
.
Ê
Set the value for
Diagnostic System
to
enabled
. Change the setting for
Next Boot Uses
to
Diagnostic System
.
Ê
Save the setting and terminate
BIOS Setup
.
The server boots MS-DOS and the RemoteView from the chipDISK.
i
If the RemoteView software is not yet installed on the chipDISK, install the software as
described in the manual for RemoteView.
Ê
To terminate
RemoteView
, use the menu item
Boot Original OS
.
The server boots the standard operating system. How to operate
RemoteView
is described in the
corresponding documentation of
RemoteView
.