Enterprise manager configuration steps, Time display configuration – AltiGen MAXCS 7.5 Polycom Configuration Guide User Manual
Page 13
Polycom Configuration Guide
Page 13 of 24
13.
Continue with the steps in the next section.
Enterprise Manager Configuration Steps
Follow these steps to confirm various settings in Enterprise Manager.
1.
Log into MAXCS Administrator. In Enterprise Manager, click the Codec button on the toolbar.
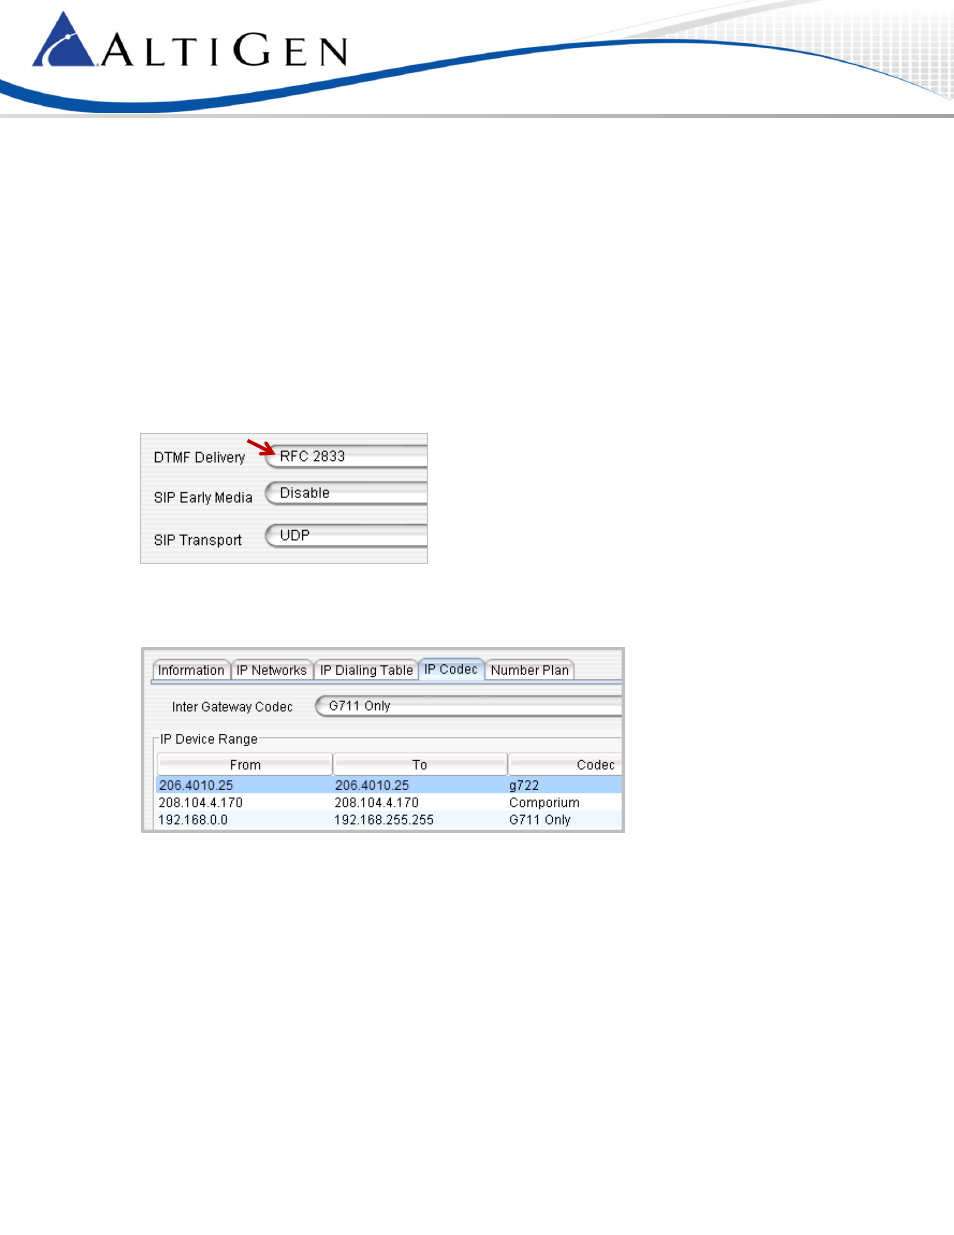
2.
Confirm that the codec profile for the Polycom IP phones has DTMF Delivery set to RFC 2833.
3.
Confirm that SIP Early Media is set to Disabled.
4.
Confirm that SIP Transport is set to UDP.
When a Polycom phone is used and the voice stream goes direct, SIP Tie-Trunks need to use RFC2833 instead
of SIP INFO. In addition, the Release-Link-Tie over SIP Tie-Trunk feature is not supported with DTMF Delivery
set to RFC2833.
Figure 18: The Enterprise Manager Codec panel
5.
Click Servers on the toolbar; on the IP Codec tab, confirm that the IP Device range and the codec profile
are configured properly.
Time Display Configuration
Follow these steps to configure user time format.
1.
In MAXCS Administrator, select PBX > AltiGen IP Phone Configuration. Select the extension.
2.
On the General tab, select an Offset option; this is the IP phone’s time offset relative to the MAXCS server.
In most cases, Daylight saving time is automatically considered.
3.
Select a Format option; this is the time display format. While there are three choices, Polycom IP phones
only support two: 12-hour format and 24-hour format.
If you choose the third format, AltiGen 12-hour format, then the Polycom phone will display time in the
12-hour time format.
Figure 19: The Enterprise Manager Servers > IP Codec tab