Wall finishing – Heat & Glo Fireplace LUX60 User Manual
Page 47
Heat & Glo • LUX60 • 4062-116 • Rev. G • 4/11
47
14
14
Wall Finishing
WARNING! Risk of Fire!
Comply with all minimum clear-
ances to combustibles as specifi ed. Framing or fi nishing
material closer than the minimums listed must be construct-
ed entirely of noncombustible materials (i.e., steel studs,
concrete board, etc).
Non-Combustible Zone
0 in.
0 in.
0 in.
Finish wall material may
be combustible,
Top and
Sides
High Temperature Sealant (300° F/149° C min.)
These joints
may be taped
and covered
with joint
compound.
WARNING! Risk of Fire! DO NOT apply combustible ma-
terials beyond the minimum clearances. Comply with all
minimum clearances to combustibles as specifi ed in this
manual. Overlapping materials could ignite and will inter-
fere with proper operation of doors and openings.
• This appliance requires the use of noncombustible
materials above the appliance. The use of the steel stud
kit and noncombustible cement board is required.
Figure 14.1 Noncombustible Facing Diagram
It is very important when framing and setting this appli-
ance, to consider what type of wall fi nishing will be used
(i.e. sheet rock, tile, marble, rock, etc.).
The LUX60 is shipped with a steel stud kit and cement
board. BOTH MUST BE USED above the appliance
opening in the noncombustible zone (see Figure 14.1)
regardless of the wall fi nishing to be used.
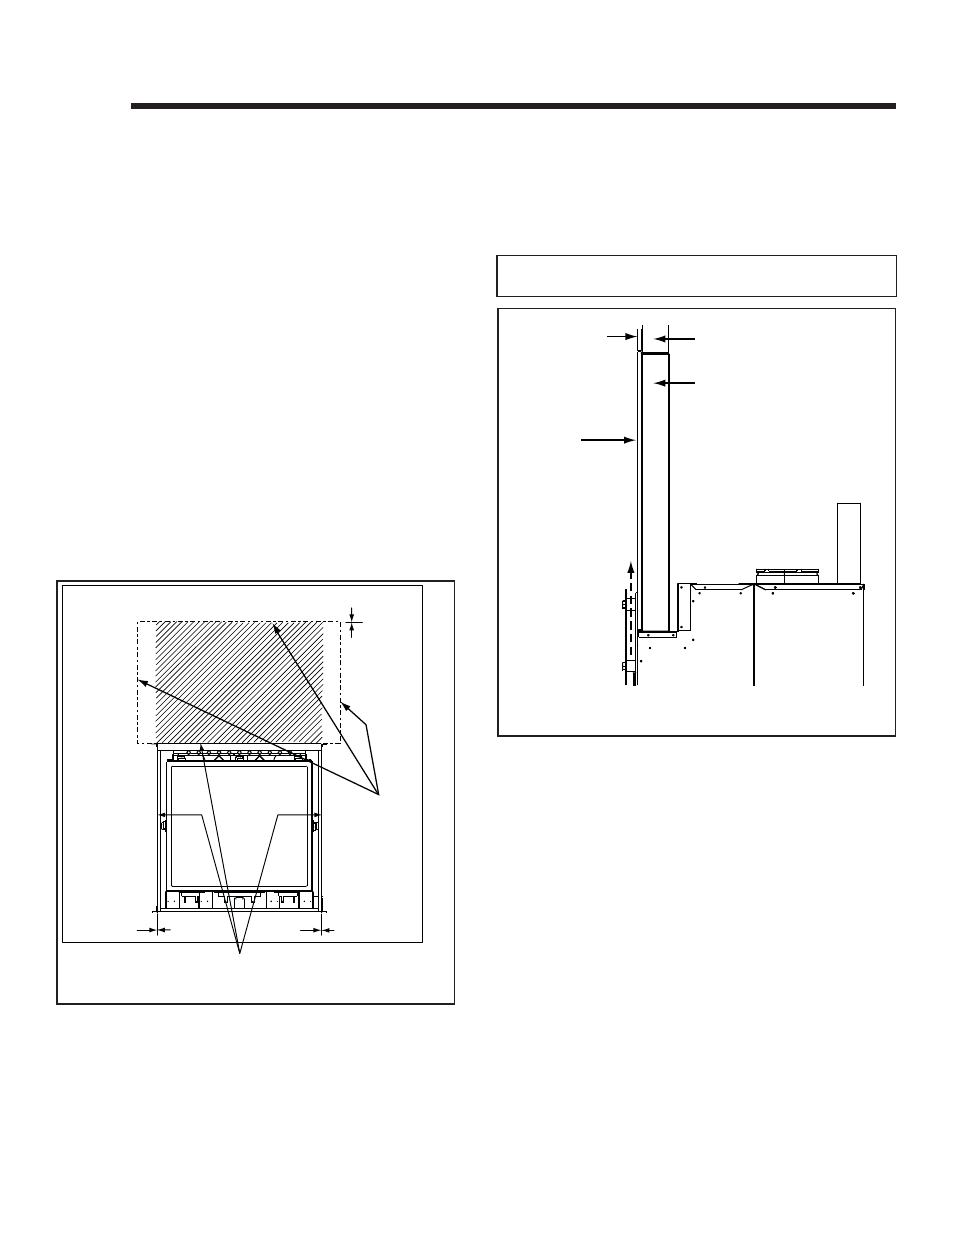
A. Standard 1/2 in. (13 mm) Sheetrock
If a standard 1/2 in. sheetrock wall fi nishing is to be
used, the front edge of the appliance must be set 1/2 in.
(13 mm) out in front of the framing to achieve a fl ush fi t
with the SSF-LUX-BK Surround Kit. See Figure 14.2.
Steel Stud Assy
1/2 in.
Cement Board
Wood Framing
Sheetrock
Air Flow
Figure 14.2 1/2 in. Wall Finishing - Sheetrock
Note: If using additional decorative facing on top of the
sheetrock, see following instructions.