Heat & Glo Fireplace LUX60 User Manual
Page 17
Heat & Glo • LUX60 • 4062-116 • Rev. G • 4/11
17
Light Glass Replacement/Cleaning
Frequency:
Annually
By:
Qualifi ed Service Technician
Tools
needed: Protective gloves
• Disconnect power to fi replace.
• Remove the “L” plates and inner surround frame (see
surround install). This will make the valve compartment
and glass accessible.
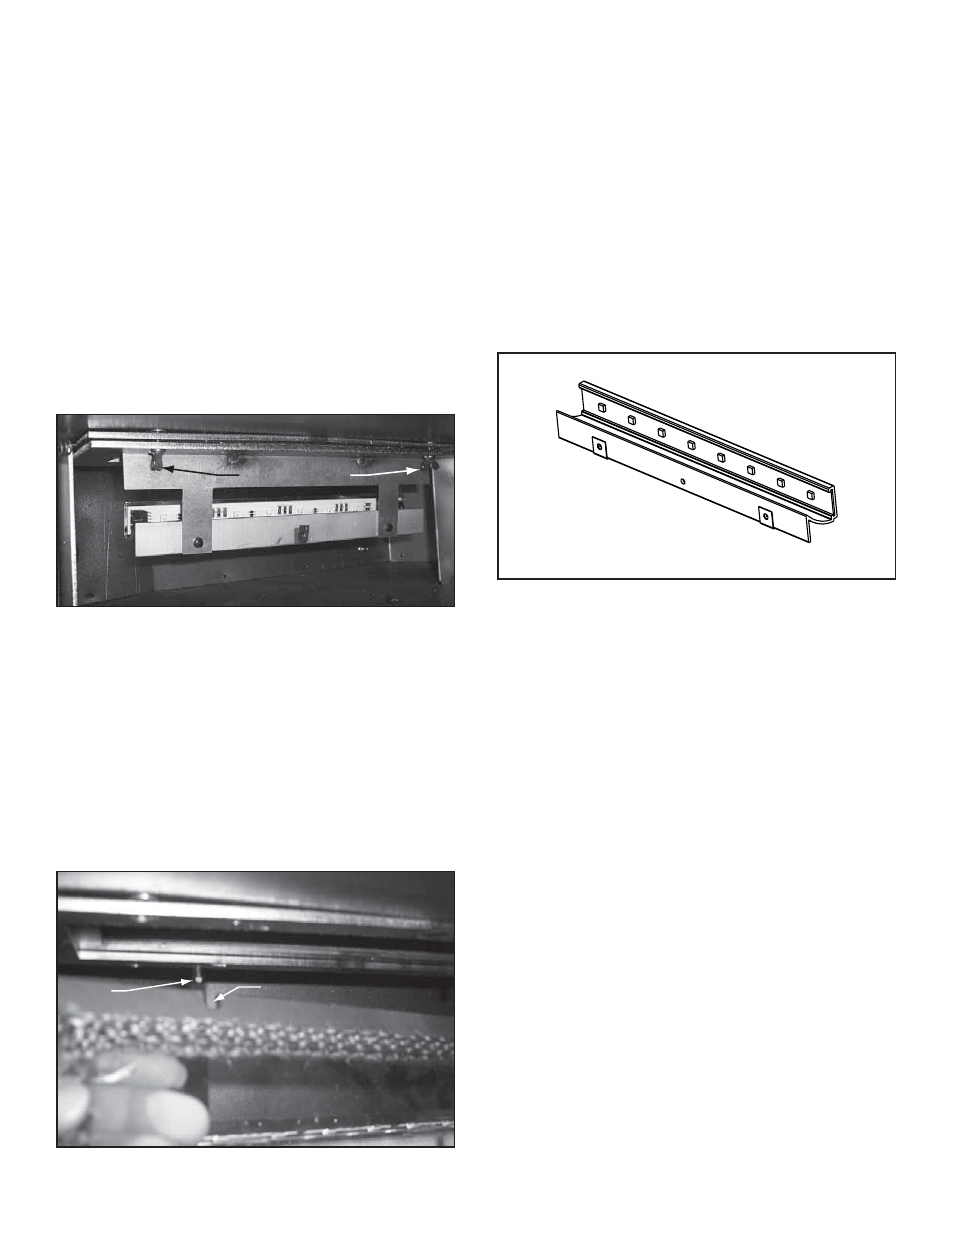
Thumb Screws
Figure 3.4
Loosen Glass Frame
•
Loosen the two thumb screws on the glass frame above
the LED light bar. See Figure 3.4.
• Slide the frame forward and out. Unplug LED light bar
and remove glass frame assembly.
• Ensure glass frame is clean of debris or replace if
needed..
CAUTION! The surround kit is heavy.
We recommend
two installers to move the frames.
Glass & Gasket
Slot
Shoulder
Screw
Figure 3.5
Reinstall Glass Frame
• Reinstall glass frame. The frame must be hooked
on both shoulder screws on the fi rebox bottom. See
Figure 3.5.
• Slide glass and gasket into glass frame ensuring the
glass is centered into inner frame.
• Install both thumb screws through glass frame and into
fi rebox bottom.
• Ensure the glass is fully seated and that the thumb
screws are tight.
• Plug in light bar.
• Reinstall “L” plates.
LED Light Bar Replacement
Frequency:
As needed
By:
Qualifi ed Service Technician
Tools
needed: Protective gloves, phillips screwdriver
• Disconnect power to fi replace.
• Remove the “L” plates and inner surround frame (see
surround install). This will make the valve compartment
and light bar accessible.
• Remove the two screws securing the light bar on the
front of the bracket.
• Release the 4-pin connector jumper wire between the
lights to remove the light strip.
• Install new light bar (shown in Fig. 3.6).
Figure 3.6
Light Bar