5installation, 28 / 63 en, 3 recirculating (non-vented ductless type c) – Beko 30 Inch Over the Range Convection Microwave Installation Guide User Manual
Page 28
Over The Range Convection Microwave Oven / Installation Manual
28 / 63 EN
5
Installation
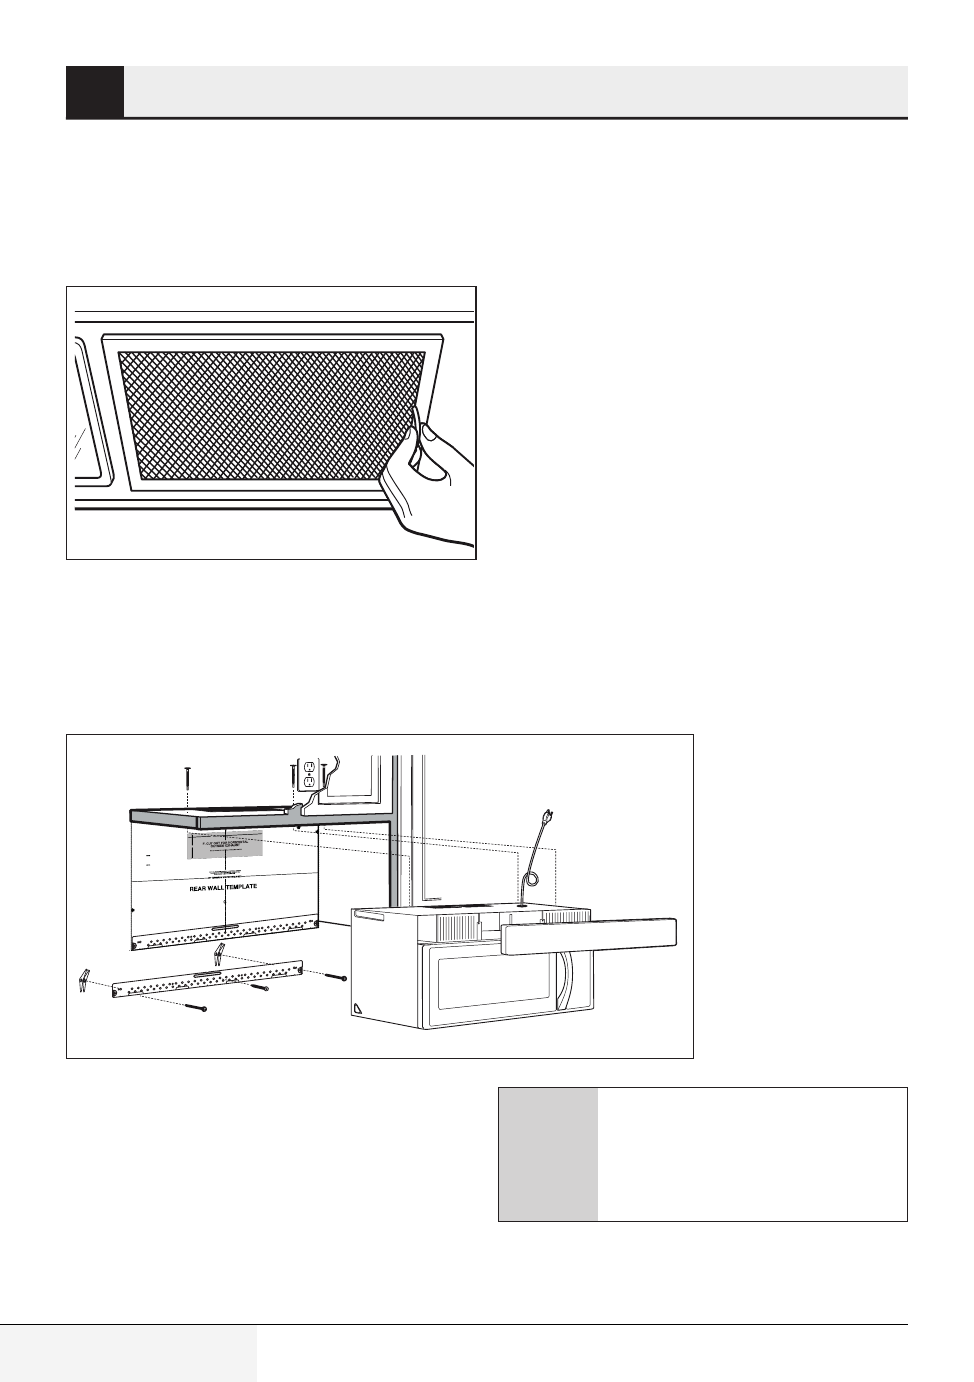
7. Tighten the outer two screws to the top of the
microwave oven. (While tightening screws, hold
the microwave oven in place against the wall
and the top cabinet.)
8. Install grease filters. See the Owner’s Manual
packed with the microwave.
5.2.3 Recirculating (non-vented
ductless type C)
3/8" TO EDGE
NOTE: IT IS VERY IMPORTANT
TO
READ AND FOLLOW THE DIREC
TIONS
IN THE INSTALLATION INSTR
UCTIONS
BEFORE PROCEEDING WITH
THIS
REAR WALL TEMPLATE.
This Rear Wall Template serves to
position the bottom
mounting plate and to locate the h
orizontal exhaust
outlet.
1. Use a level to check that the tem
plate is positioned
accurately.
2. Locate and mark at least one st
ud on the left or
right side of the centerline.
It is important to use at least one w
ood
screw mounted firmly in a stud to s
upport the weight
of the microwave. Mark two additio
nal, evenly spaced
locations for the supplied toggle b
olts.
3. Drill holes in the marked locatio
ns. Where there is
a stud, drill a 3/16" hole for wood s
crews. For holes
that do not line up with a stud, dril
l 5/8" holes for
toggle bolts.
DO NOT INSTALL THE MOUNTIN
G PLATE
AT THIS TIME.
4. Remove the template from the
rear wall.
5. Review the Installation Instructio
n book for your
installation situation.
Locate and mark holes to align
with holes in the
mounting plate.
IMPORTANT:
LOCATE AT LEAST ONE STUD
ON EITHER SIDE OF
THE CENTERLINE.
MARK THE LOCATION FOR 2
ADDITIONAL, EVENLY
SPACED TOGGLE BOLTS IN
THE MOUNTING PLATE
AREA.
Locate and mark holes to align
with holes in the
mounting plate.
IMPORTANT:
LOCATE AT LEAST ONE STU
D ON EITHER SIDE OF
THE CENTERLINE.
MARK THE LOCATION FOR 2 A
DDITIONAL, EVENLY
SPACED TOGGLE BOLTS IN T
HE MOUNTING PLATE
AREA.
Trim the rear wall template al
ong the dotted line.
Trim the rear wall template al
ong the dotted line.
12"
4"
Darle vuelta a la hoja para cons
ultar la
versión en Español.
Installation overview
C1. Attach Mounting Plate to Wall
C2. Prepare Top Cabinet
C3. Check Blower Plate
C4. Mount the Microwave Oven
C5. Install or change Charcoal Filter
A
Make sure the screws for the blower
motor and blower plate are securely
tightened when they are reinstalled.
This will help to prevent excessive
vibration.