Settings and operation of the camera recorder, Sh ooting – JVC GY-HC900STU 2/3" HD Connected Cam Studio Camcorder (Body Only) User Manual
Page 79

1
Input the external synchronizing signal to
the external time code generator and the
[GENLOCK] terminal of this camera
recorder.
Memo :
0
BB signals or HDTV tri-level synchronizing
signals are used as the external synchronizing
signal.
0
If the power of the camera recorder is turned on/
off during input of external synchronizing
signals, the screen may appear disrupted for a
few seconds. This is not a malfunction.
2
Input the SMPTE/EBU LTC time code from
the external time code generator to the [TC
IN] terminal of this camera recorder.
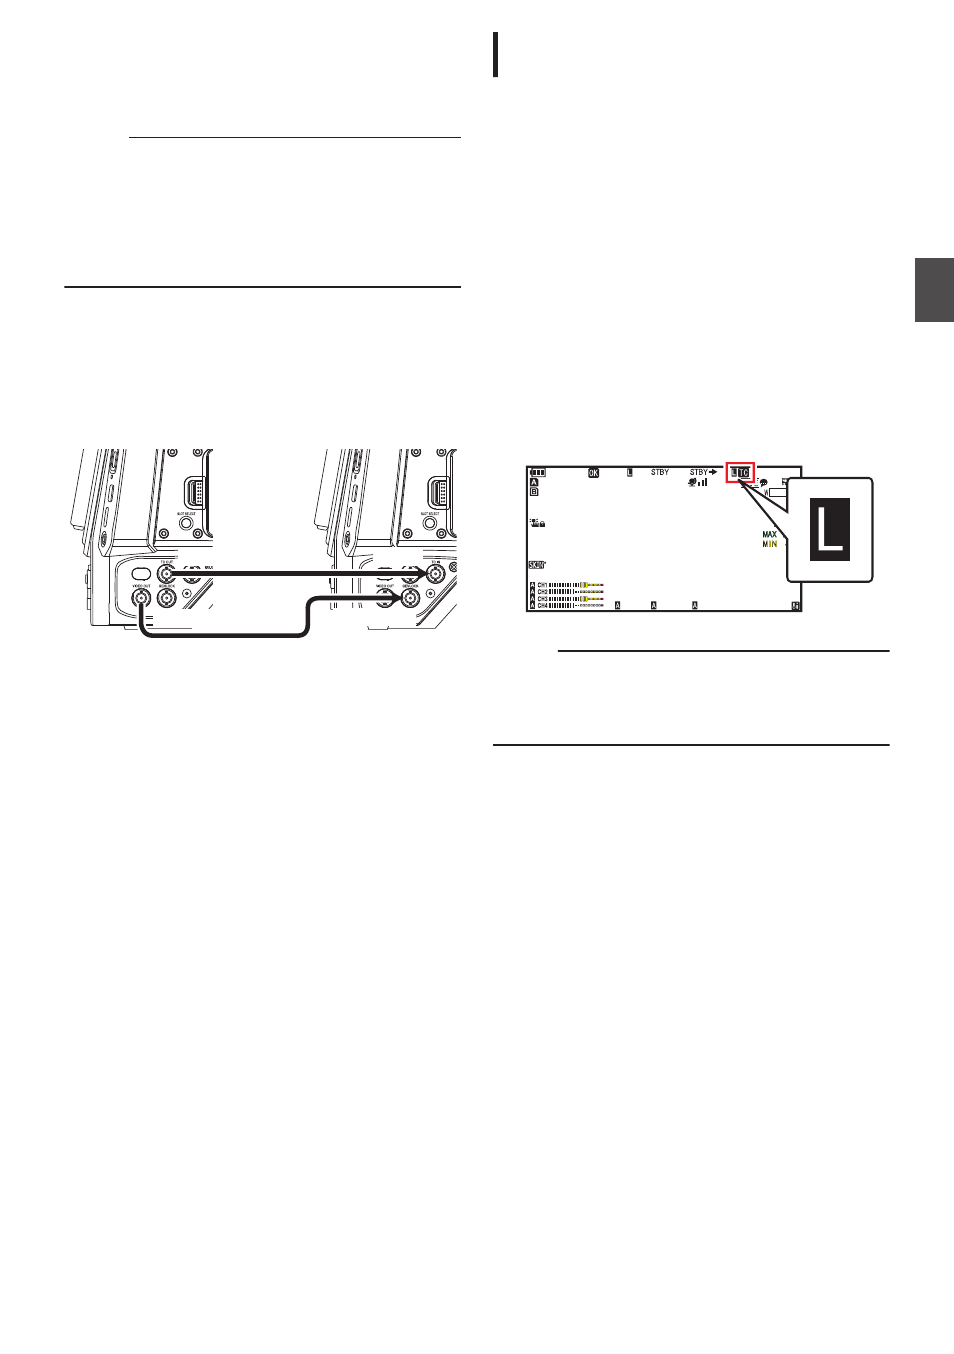
Connecting multiple devices, with one as the
master unit and the others as slave units
.
TC OUT
TC IN
GENLOCK
VIDEO OUT
Master Device
Slave Device
1
Connect the [TC OUT] terminal of the
master device with the [TC IN] terminal of
the slave device.
2
Connect the [VIDEO OUT] terminal of the
master device with the [GENLOCK]
terminal of the slave device.
Settings and Operation of the Camera
Recorder
1
Set to Camera mode.
2
Set [A/V Set]
B
[Video Set]
B
[Genlock
Input] to “GENLOCK”.
3
Set the [TC GEN] switch to “F-RUN”.
4
Set LCD monitor or viewfinder to Display
screen.
5
Set the external time code generator or the
master device, and run the time code.
0
When the built-in time code generator is
synchronized with the external time code
data input, the
Z
icon on Display screen lights
up.
0
When time code is not synchronized or time
code input is not available, the
Z
icon goes
out.
.
100min
50min
282min
1/ 60
F2. 8
AE
±
0
ND
1 /64
12 :34 : 56
ISO
102400
00: 00: 00.00
1080 /30p
SDI IN
ITU709
COMPRESS
5 . 6f t
B 5600
K
Memo :
0
The built-in time code generator will continue
operation even when the master device is
disconnected after synchronization.
0
User’s bit will become data in the master device.
Synchronizing the Time Code with an External Time Code Generator
79
Sh
ooting
