Epson Universal Projector Mount with 3" Extension Column User Manual
Page 9
Installation Instructions
ELPMBPJG
9
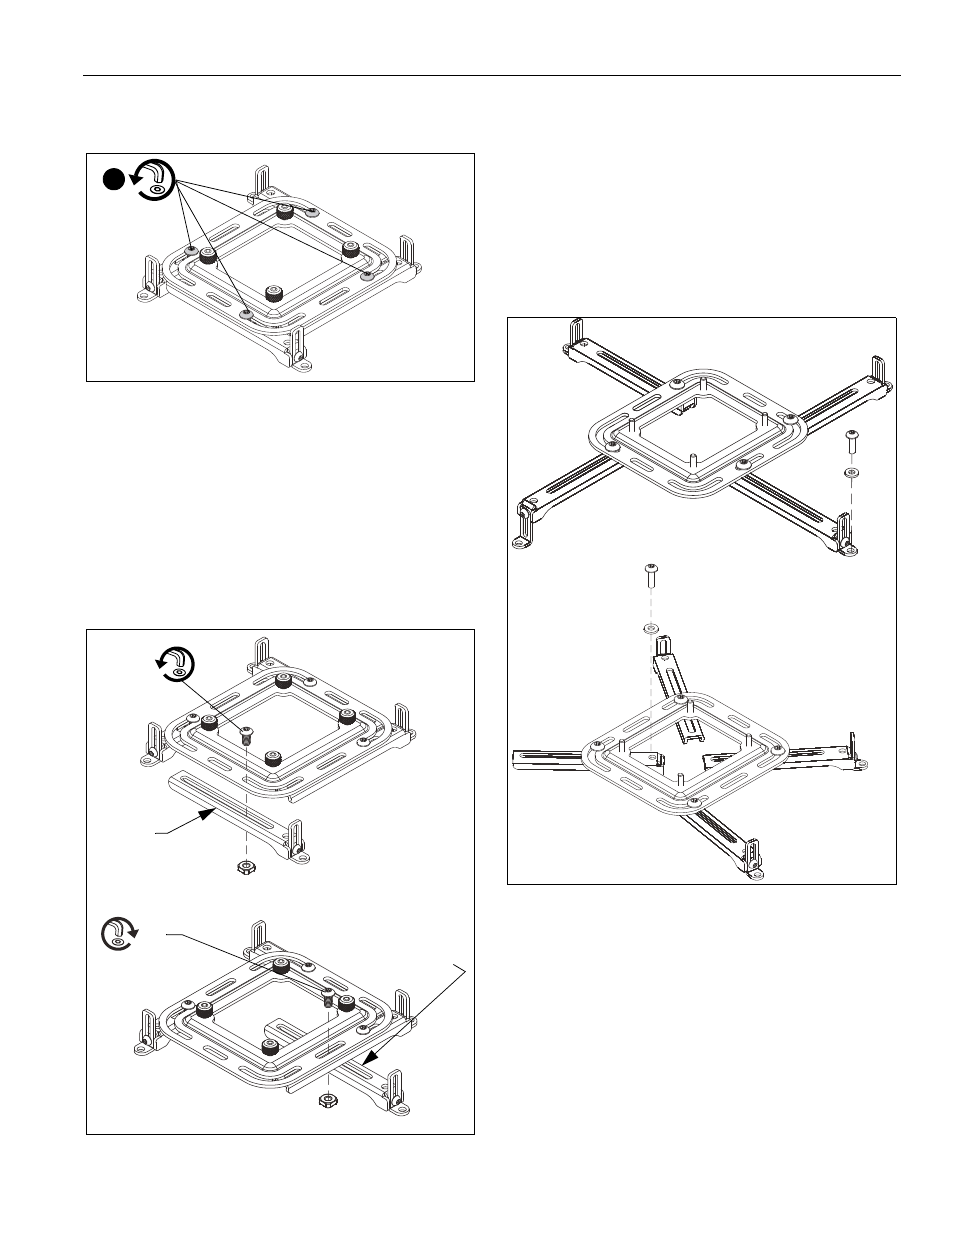
2.
Loosen, but do NOT remove, the screws holding the legs to
the universal interface. (See Figure 12)
Figure 12
NOTE:
Remove one security screw, hex nut and leg if the
projector only has three mounting holes. (See Figure 13)
NOTE:
The universal interface legs may be adjusted into
numerous configurations. The interface legs may be
extended out or brought into the center of the interface.
NOTE:
If it is not possible to align the adjustable legs with the
mounting hole pattern on the projector, a leg or legs
may be moved and/or removed so that the interface
may be aligned using a horizontal slot.
Figure 13
3.
Place the universal interface on the projector.
4.
Adjust legs on interface as needed to align the legs with
projector mounting holes.
5.
Secure universal interface to the projector by selecting the
security screws (A1-D) that fit the mounting holes in the
projector.
NOTE:
If using M3 x 8mm security screws (A1), also use the M3
washers (A2).
6.
Attach the universal interface to the projector either through
the bracket feet, or directly through the legs. (See Figure 14)
Figure 14
7.
Do NOT tighten screws at this time.
2
x 1
Remove one
leg if the
projector has three
mounting holes.
Legs may be
attached through
horizontal slot
x 1
Attaching
through interface
feet
Attaching directly
through interface leg