Copying a recorded song to a usb flash drive, Song copy), Selecting and deleting multiple songs – Roland FP-E50 88-Key Portable Digital Piano User Manual
Page 53: Song delete), P. 53)
Convenient Functions (Song Utility)
53
53
Copying a Recorded Song to a USB Flash
Drive
(Song Copy)
This shows how to copy the songs saved in internal memory to a USB
flash drive. You can also copy the songs stored on a USB flash drive to
internal memory.
NOTE
This operation is unavailable if a USB flash drive is not connected to the
USB Memory port .
1.
On the Song Utility screen, use the [
дд
] [
ее
] buttons to
select “Song Copy” and press the [Enter] button .
The Song Copy (Source Select) screen appears.
2.
Use the [
дд
] [
ее
] [
зз
] [
жж
] buttons and [Dec] [Inc] buttons
to select the copy source song .
If you decide to cancel, press the [Exit] button.
Copy source
Copy destination
USB Memory
Internal Memory (root directory)
Internal Memory
USB Memory (current folder)
* The root directory is selected if you haven’t accessed the USB
flash drive since you turned on this instrument.
3.
Press the [Enter] button .
The copy is executed.
NOTE
Never turn off the power or remove the USB flash drives while the screen
indicates “Executing . . .” .
MEMO
If a song with the same filename already exists, the confirmation message
“Overwrite?” appears .
To overwrite the song, use the [
з
] [
ж
] buttons to select “OK”, and then
press the [Enter] button .
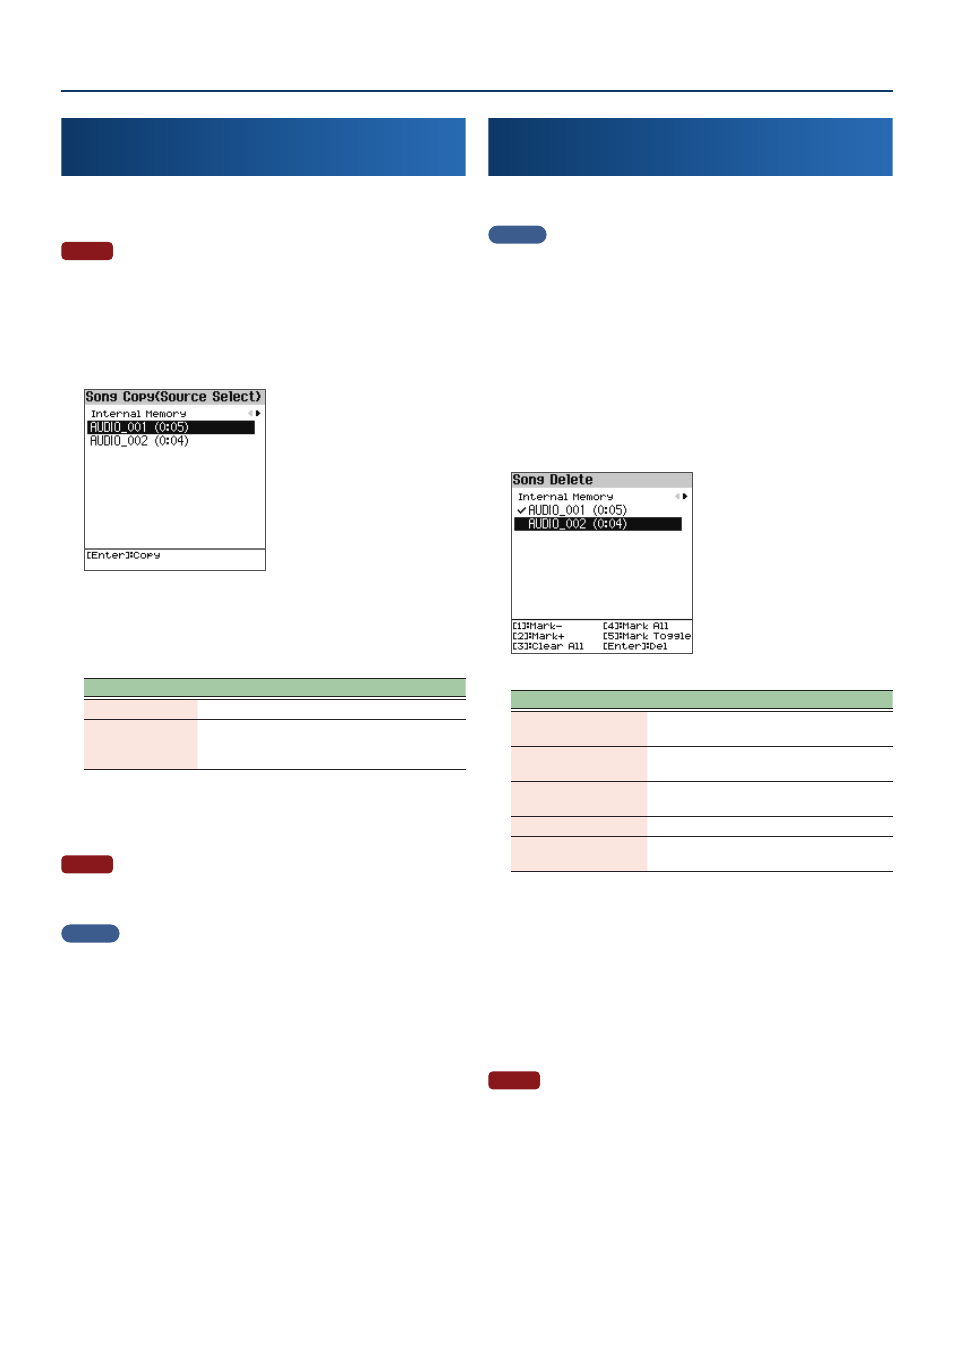
Selecting and Deleting Multiple Songs
(Song Delete)
You can also delete the songs that are stored in internal memory or
on a USB flash drive.
MEMO
To delete songs from a USB flash drive, first make sure that the USB flash
drive is connected to the USB Memory port .
You can long-press the [Enter] button on the Song screen to delete a
song .
1.
On the Song Utility screen, use the [
дд
] [
ее
] buttons to
select “Song Delete” and press the [Enter] button .
The Song Delete screen appears.
2.
Use the [
дд
] [
ее
] buttons to select the song you wish to
delete, and press the [1] ([Piano])–[5] ([Other]) buttons
to select the appropriate check boxes .
Controller
Explanation
[1] Mark-
Removes the check mark and selects the
next song.
[2] Mark+
Adds a check mark and selects the next
song.
[3] Clear All
Removes the check marks from all songs in
the folder.
[4] Mark All
Adds check marks to all songs in the folder.
[5] Mark Toggle
Toggles between selected/unselected
(checked/unchecked).
* Moving the folder deselects all of the check marks.
3.
Press the [Enter] button .
A confirmation message appears.
If you decide to cancel, select “Cancel” and press the [Enter] button.
4.
Use the [
зз
] [
жж
] buttons to select “OK”, and then press
the [Enter] button .
The deletion is executed.
NOTE
Never turn off the power or remove the USB flash drives while the screen
indicates “Executing . . .” .