Input/output device settings, P. 21, Audio input/output device – Roland OCTA-CAPTURE - High-Speed USB Audio Interface User Manual
Page 21: Midi input/output device
21
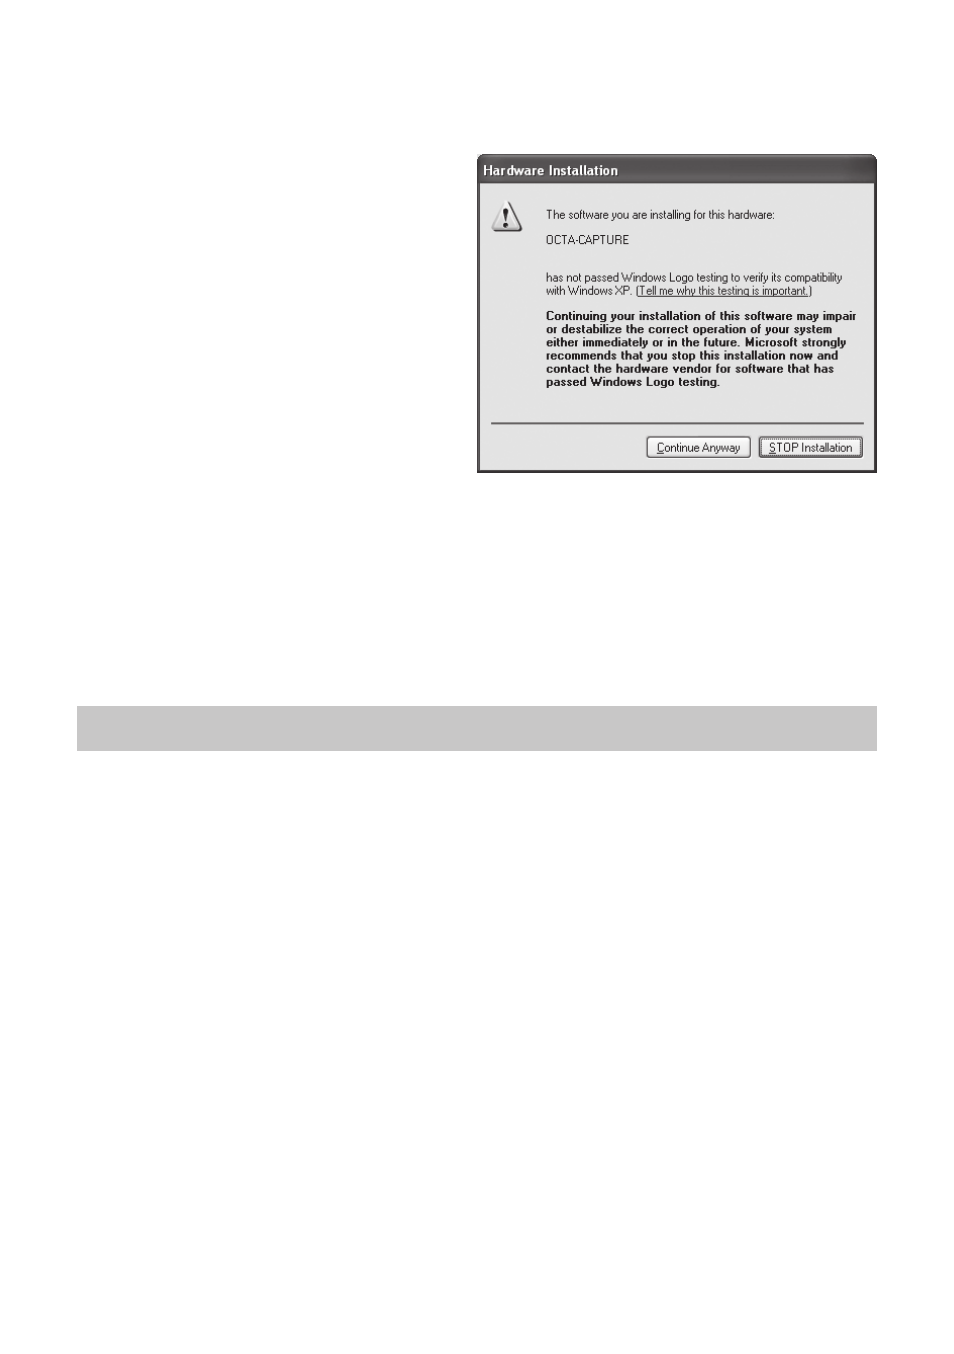
11.
If the “Hardware Installation” dialog
box appears, click [Continue Anyway]
to continue the installation .
If you are unable to proceed, click [OK] in the
dialog box to terminate the installation. Then
change the setting as described in “Driver
Signing Option Settings (Windows XP)” (p. 72),
and perform the installation once again.
12.
The screen will indicate “Completing the Found New Hardware Wizard .” Click [Finish] .
When installation is complete, the “OCTA-CAPTURE Driver Setup” dialog box will indicate “Installation
has been completed.”
13.
Click [Close] to close the “OCTA-CAPTURE Driver Setup” dialog box .
If the “System Settings Change” dialog box appears, click [Yes] to restart Windows.
Input/Output Device Settings
In order to use the OCTA-CAPTURE with your software, you must select the OCTA-CAPTURE as the
audio input/output device. For details on how to make this setting, refer to the documentation for
the software you’re using.
*
If you’re unable to select the OCTA-CAPTURE as the audio input/output device in your software,
it may be that a problem has occurred . Refer to “Problems with Settings” (p . 84) in the Trouble-
shooting section .
Audio input/output device
For details about this device, refer to “Device Name (Windows)” (p. 81).
If you’re using ASIO compatible software, select the OCTA-CAPTURE in the ASIO settings of your
software.
MIDI input/output device
For details about this device, refer to “Device Name (Windows)” (p. 81).