Quick scan settings – TA Triumph-Adler 1855 User Manual
Page 150
7-24
System Menu and Client Tool > Default Settings on the PC (Client Tool)
Quick Scan Settings
No.
Item
Description
7
Original image
Select original image type.
Value
: Text, Photo, Text+Photo
8
Destiny
Select the density.
Value
: -3 (Lighter) to 3 (Darker)
To automatically set the density depending on the density of originals, select the [
Auto
] checkbox.
(This item can be set only if [
Monochrome
] is set for Scan color.)
9
Reverse image
When this is selected, the image color reverses.
10
Reset
Reset the settings to the previous settings.
11
Help
Displays the Help screen.
12
Authentication
Enter assigned account ID to manage the scan count accumulated of Quick Scan/TWAIN jobs by
using job accounting.
13
OK/Close
Clicking [
OK
] exits the TWAIN Settings after applying the modified scan settings.
Clicking [
Close
] exits the TWAIN Settings without applying the modified scan settings.
No.
Item
Description
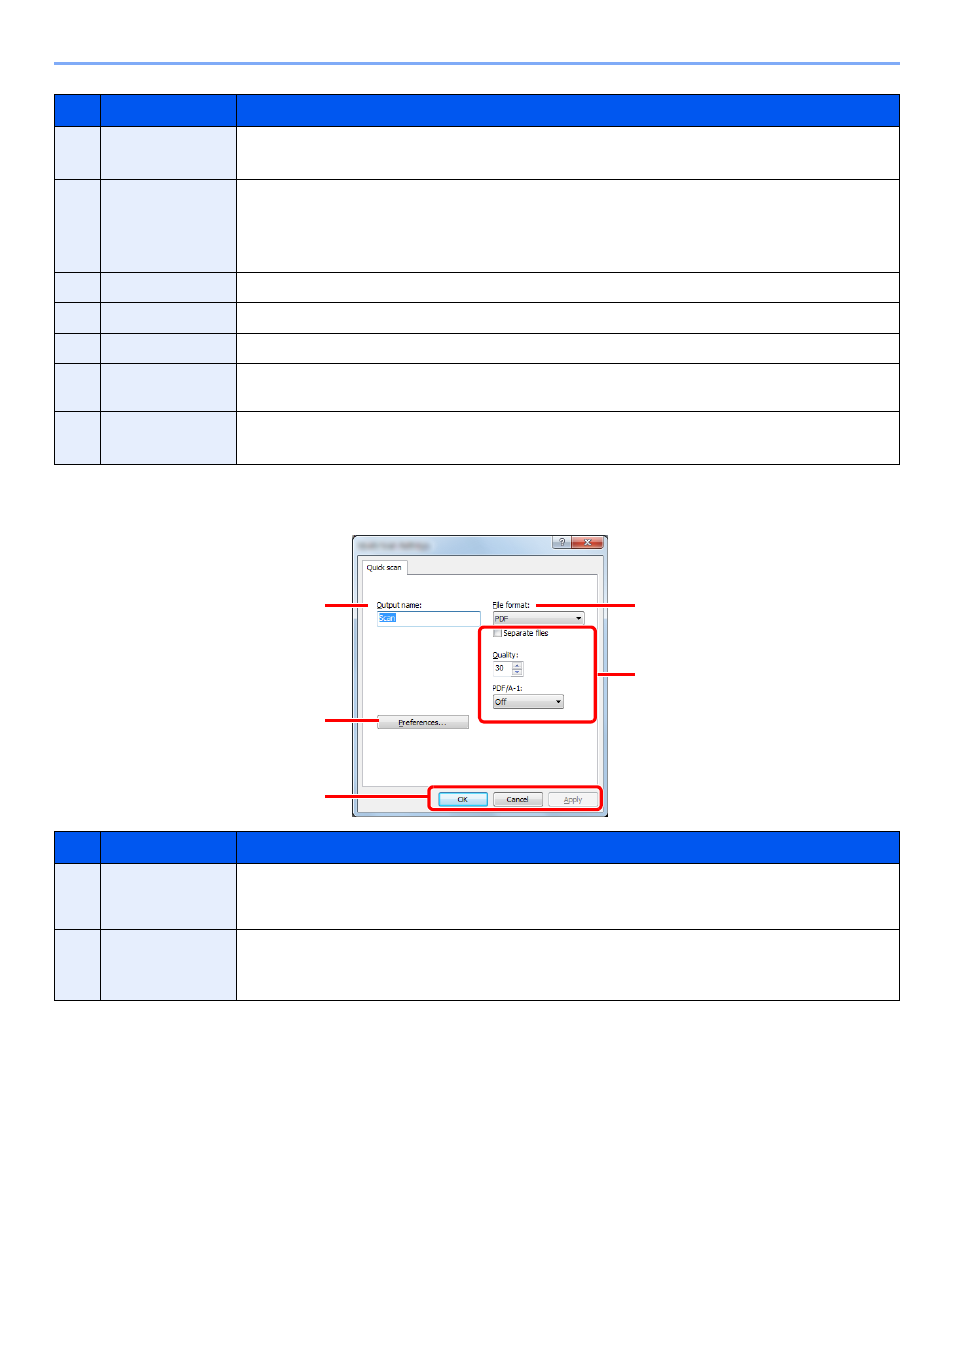
1
Output name
Assign a document name to scanned images. When multiple images are saved in the same folder, a
three-digit incrementing number such as Scan_001, Scan_002... is appended to the end of the file
name. Up to 16 characters can be entered.
2
File format
Specify the image file format.
Value
: BMP, JPEG, PNG, TIFF, PDF, High-Compression PDF, CCITT Group 4, Image Mask, High-
Compression PDF, JBIG2, Mask + Image Mask
1
4
5
3
2