To set the rs232 parameters – RIGOL DP832A User Manual
Page 111

Chapter 2 Front Panel Operations
RIGOL
DP800A User’s Guide
2-57
To Set the RS232 Parameters
Connect the RS232 interface to the PC or data terminal equipment (DTE) using
RS232 cable and set the interface parameters (baud rate, parity bit, etc.) that match
the PC or terminal equipment. At this point, you can control the instrument remotely.
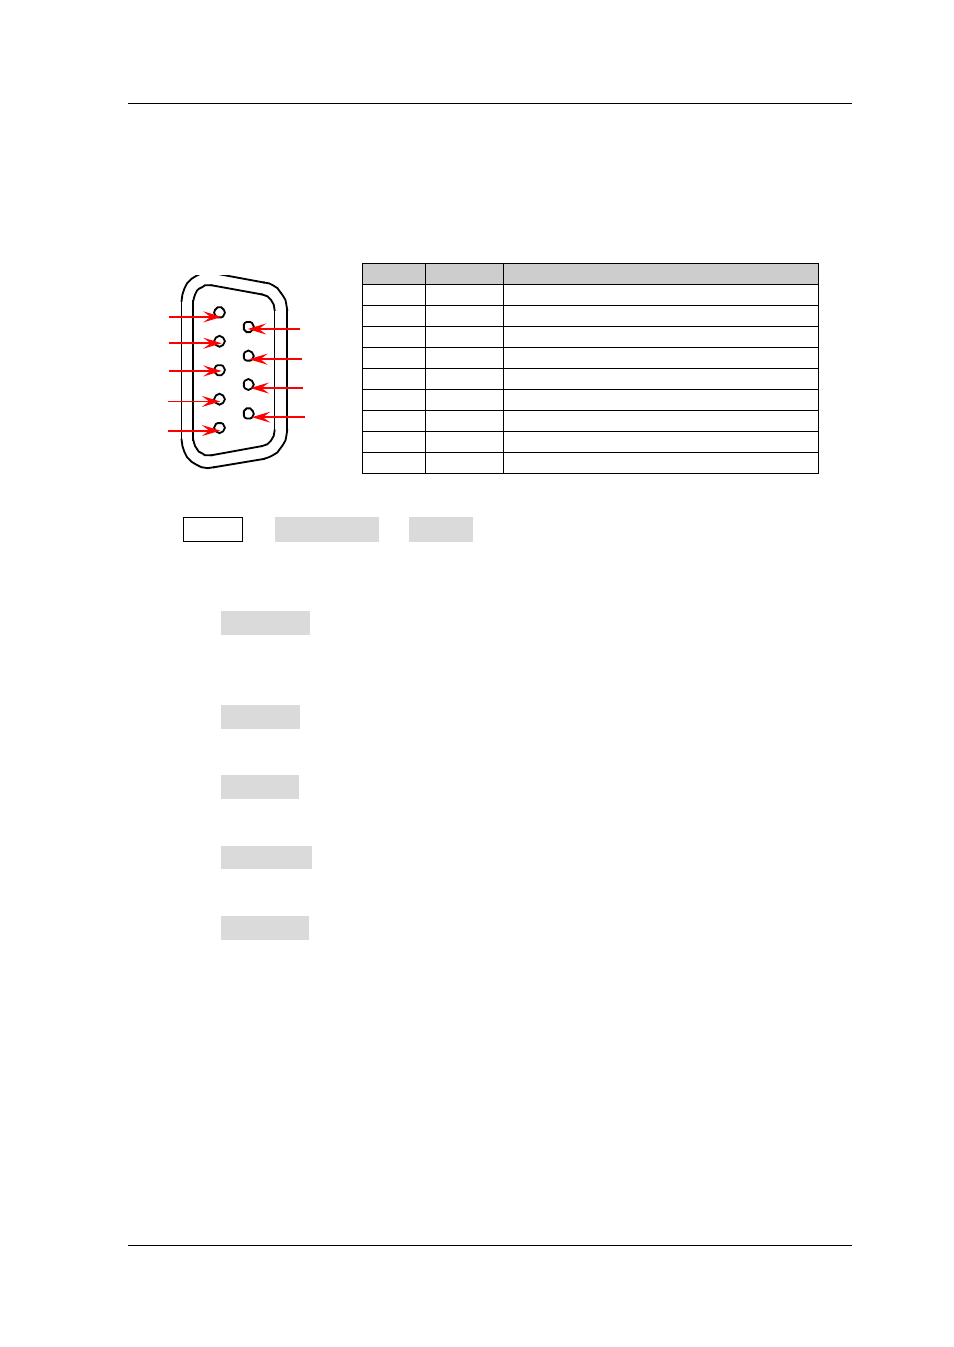
RS232 Interface
Press Utility I/O Config RS232 to open the RS232 parameter setting
interface.
1. Baud Rate
Press Baudrate to select the desired baud rate (4800, 7200, 9600, 14400,
19200, 38400, 57600, 115200 or 128000, the unit is Baud).
2. Data Bit
Press Data Bit to select the desired data bit (5, 6, 7 or 8).
3. Stop Bit
Press Stop Bit to select the desired stop bit (1 or 2).
4. Parity Bit
Press Parity Bit to select the desired parity mode (“None”, “Odd” or “Even”).
5. Hardware Flow Control
Press Flow Ctrl to enable or disable the hardware flow control.
This power supply uses RTS/CTS hardware flow control mode. The instrument
monitors the status of the CTS pin. When the status is “True”, the instrument
sends data; when the status is “False”, the instrument stops sending data. The
instrument sets the CTS pin to “False” when the input buffer area is almost full
and sets the CTS pin to “True” when the input buffer area is available again.
Pin
Name
Definition
1
DCD
Data Carrier Detect
2
TXD
Transmitted Data
3
RXD
Received Data
4
DTR
Data Terminal Ready
5
SGND
Signal Ground
6
DSR
Data Set Ready
7
CTS
Clear To Send
8
RTS
Request To Send
9
RI
Ring Indicator
6
7
4
5
2
3
1
8
9
