How to re-install clamp band – MINOURA BikePit3 User Manual
Page 3
- 3 -
Rear Wheel Support will be installed on the Bottom Pillar so it doesn't
need the plastsic shim.
The bike just being hung from top hook will not become vertical due
to weight balance. In order to minimize the storage space as much as
possible, it's crucial to keep the rear wheel position correctly.
Set the clamp position that the bike beomes vertial when the stay pulls
the rear wheel at the furthest point.
Do not hook rim nor spoke.
The support stay should move, not fixed.
M6x12 Bolt
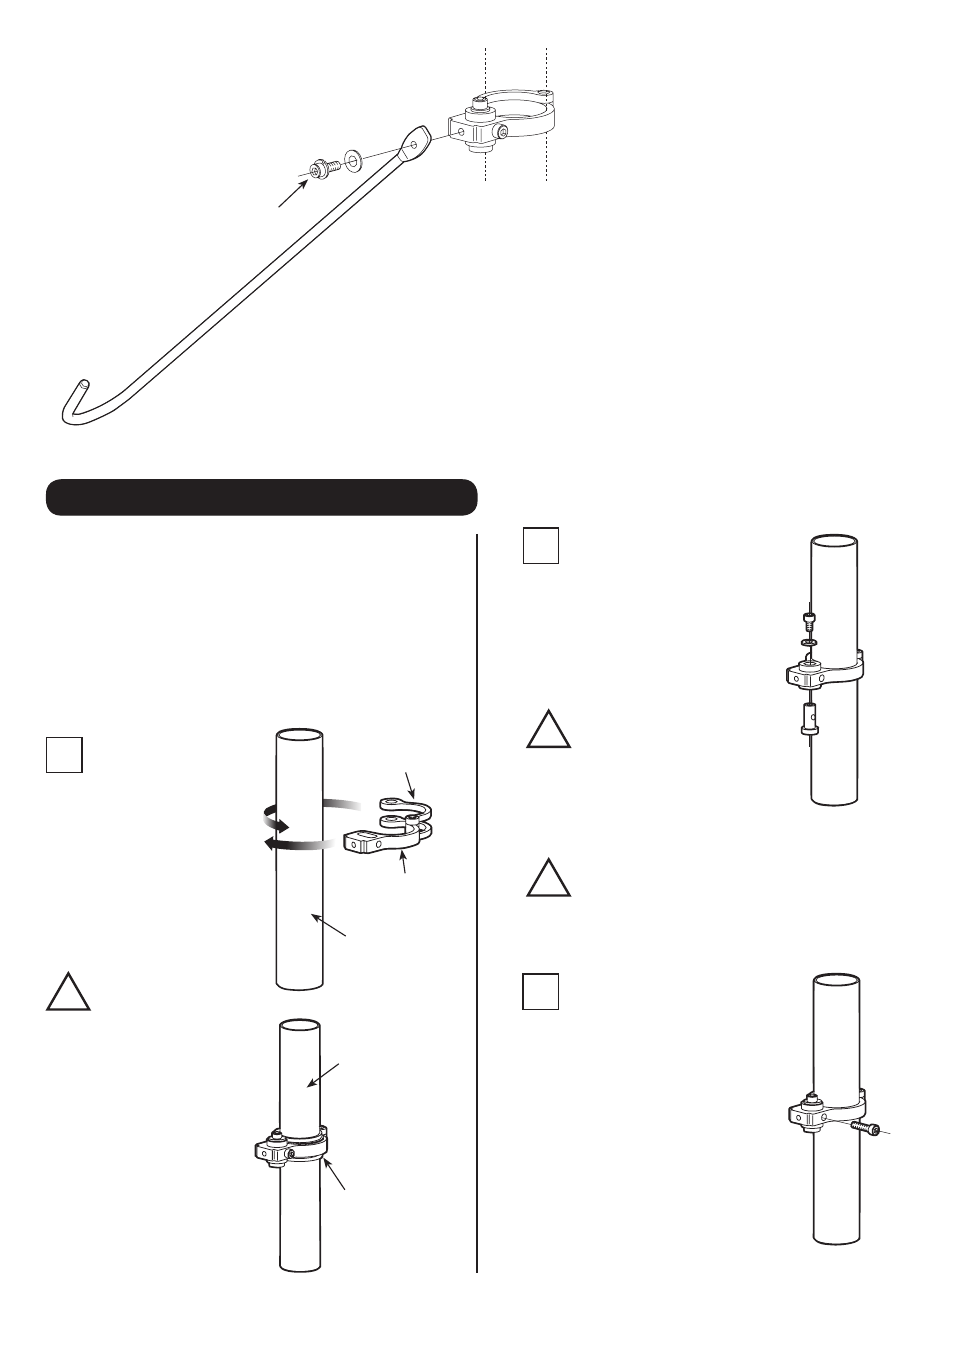
How To Re-Install Clamp Band
The clamp bands come pre-installed and they
should not need to be removed. However, there may
come time when adding options to the BikePit that
you will need to remove them.
The band direction is absolutely fixed. You must
install the clamp band in proper direction.
Failure to do so will cause serious trouble that the
bike will slide down or the parts will be damaged.
1
Stand to the front of the
pillar first, wind Clamp
Arms around the pillar.
Make sure the single side
arm is on YOUR right, and
the double side arm is on
YOUR left.
When installing the
clamp band to the
smaller diameter Top
Pillar, you must put the
plastic shim between
the band and pillar as a
spacer.
Make sure the dual
ribs are located on the
single arm side.
!
Bottom Pillar
(larger
diameter)
Top Pillar
(smaller
diameter)
Put the Shim
Single arm
Dual arm
2
Put Pivot Pin through all 3
holes on the clamp band from
bottom side, and screw Pivot-Pin
Fixing Bolt with a flat washer
temporally.
!
Make sure to insert
Pivot Pin from the
bottom. If you don't,
you will not be able to
tighten the bolt using a
hex wrench.
!
Do not tighten Pivot-
Pin Fixing Bolt firmly
yet. The next job will
become difficult.
3
Turn Pivot Pin to align the thread
hole to the side hole on the clamp
band.
Screw the clamp tightening bolt
into Pivot Pin.
To fix the clamp band firmly,
tighten the clamp side pin first
then tighten the pivot bolt later.