MINOURA LiveRide LR340 User Manual
Page 4
- 4 -
4.
Place your rear wheel in between the couplings.
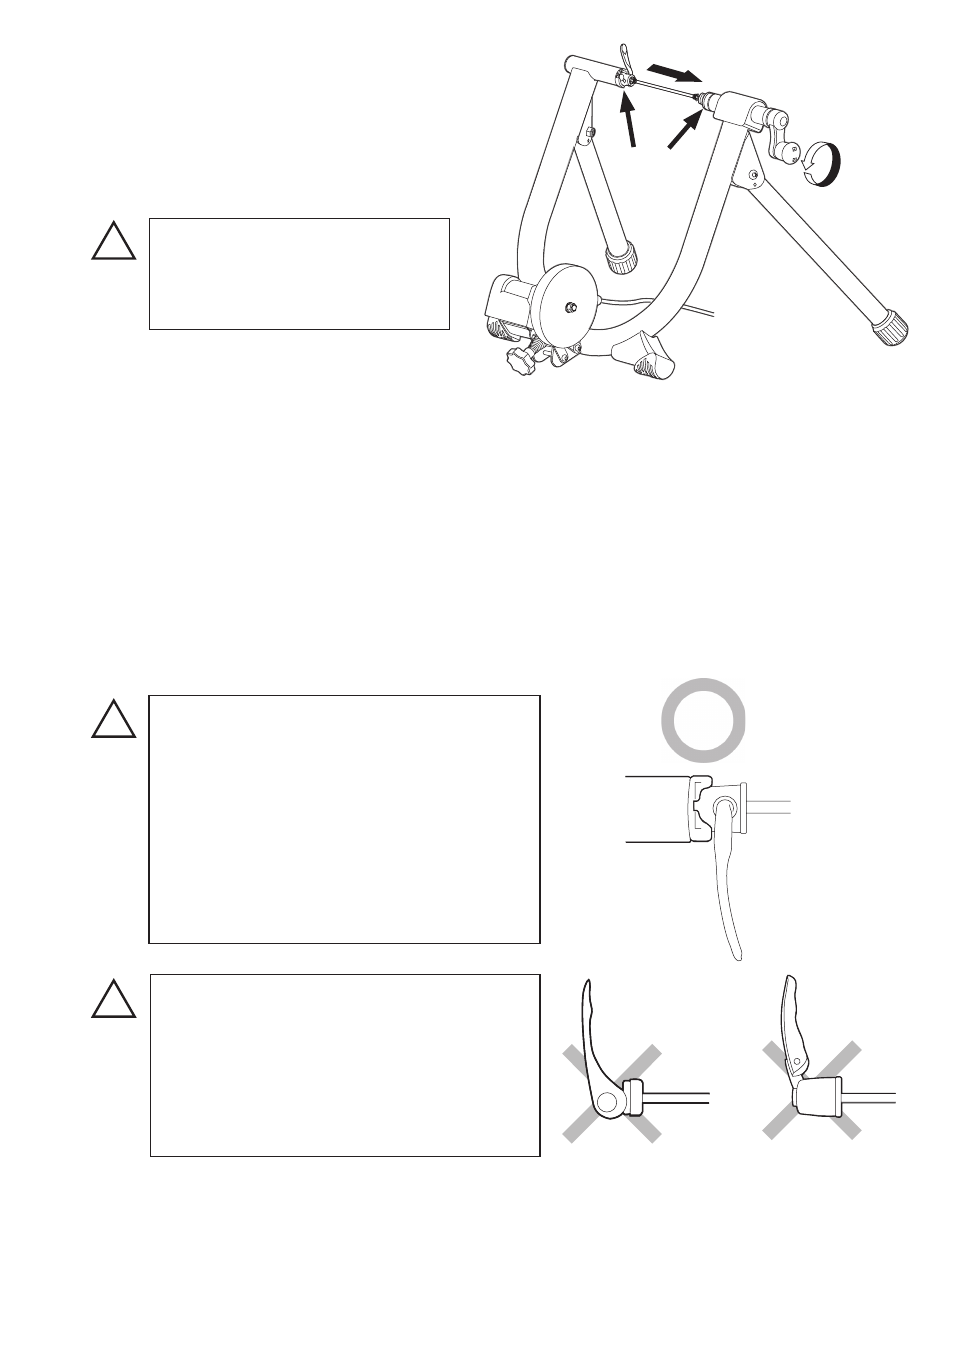
1) Turn the Hub Handle counter-clockwise
to open the trainer. You should almost
completely open the coupling using the hub
handle for easier wheel installation.
(see Fig. D)
2) Insert the left side (quick lever side) skewer
into the left side coupling first.
Both right and left side couplings are
designed to suit the supplied quick release
skewer. The left side coupling must fit
perfectly in the skewer head to get correct
stability. (see Fig. E)
Any skewer type which lever is located on
the end of the axle (like Fig. F) or the lever
will not be bent over right angle (like Fig. G)
cannot be used on LR340.
!
(Fig. E)
(Fig. F)
(Fig. G)
!
Do not try to over-tighten the Hub Handle
to keep the correct thightness of rear hub
clamping.
Too tight of a setting will cause damage to
both the LR340 and your bike frame.
Too loose of a setting may cause the bike
to come out of the trainer during use.
(Fig. D)
!
Be careful not to over-loosen the
Hub Handle. It will loosen the
inside nut and proper tightening
can no longer be expected.
Coupling
The quick lever shaft must be inserted into the cut-out on the coupling to hold the bike stable.
Turn the coupling to adjust the cut-out position prior to tightening the Hub Handle.
3) While keeping this position, slowly lower the bike to align the right side acorn nut to the right
side coupling.
4) Turn the Hub Handle clockwise to hold the rear wheel.
Once the rear wheel hub is securely clamped between the couplings and you cannot rock the bike
in the coupling at all, stop tightening.
5) At this point, turn the Hub Handle two more rotations. Do not try to over-tighten the Hub
Handle.
(Wheel is not shown here)