2 inserting the cable, Inserting the cable – SMA AUTOMATIC SWITCH BOX M-20 User Manual
Page 27
SMA Solar Technology AG
5 Electrical Connection
Installation Guide
AS-BOX-M_L-IA-IEN110320
27
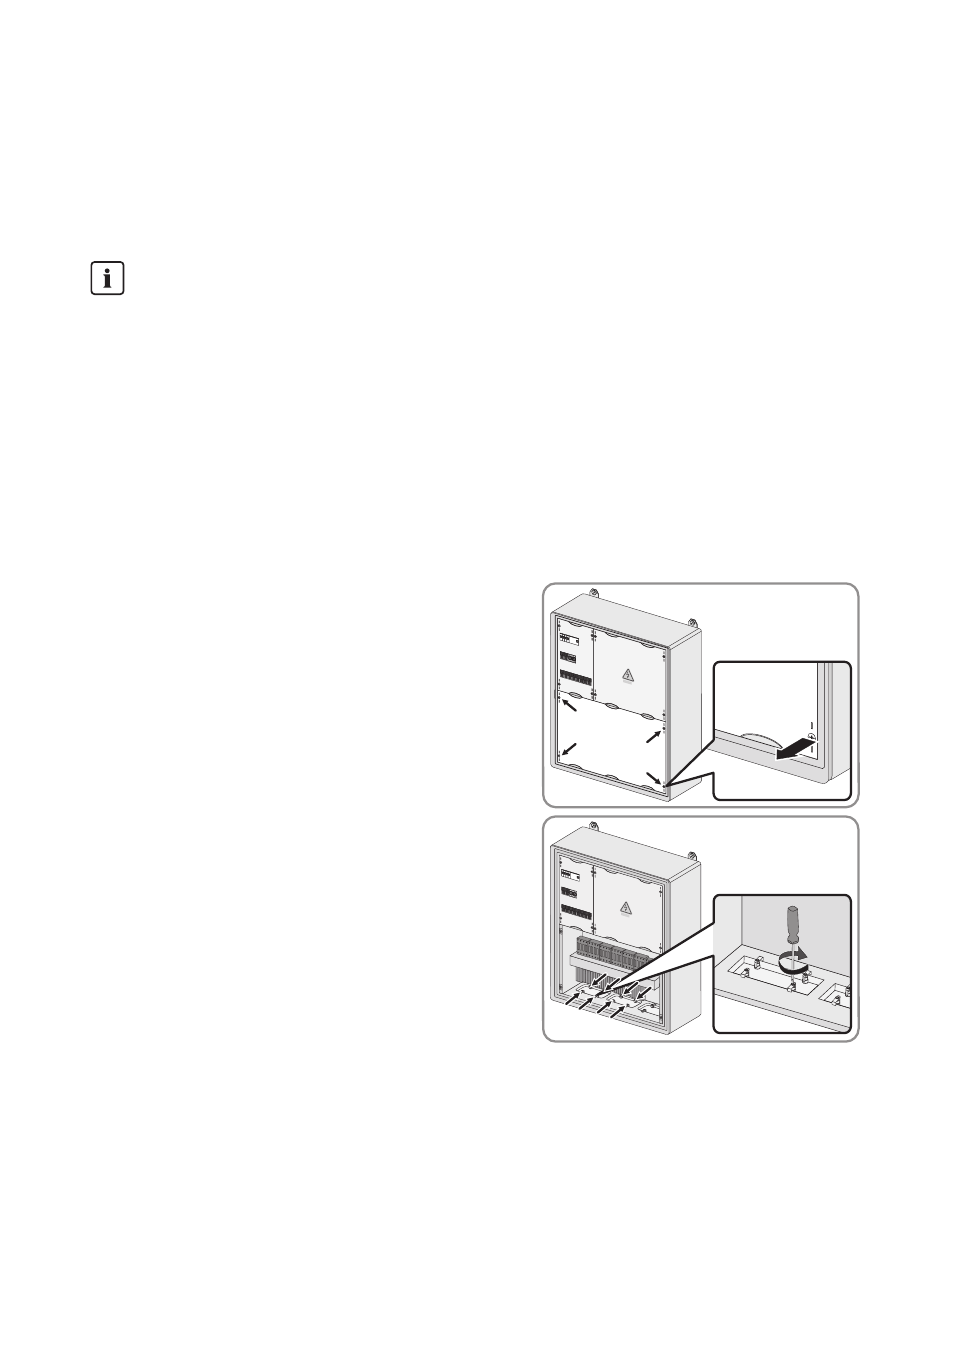
5.2 Inserting the cable
Insert each cable into the Automatic Switch Box according to the following procedure. Insert the
communication cable as described in section 5.12 ”Connecting the Communication
Cables”, page 44.
Preparing the Flange Plate
Prepare the left and right flange plate of the Automatic Switch Box M according to the following
procedure.
Prepare only the left and middle flange plate of the Automatic Switch Box L according to the following
procedure. The right flange plate does not need to be prepared.
1. Open the Automatic Switch Box with the switch cabinet key.
2. Loosen the screws of the lower contact protection
and remove the contact protection.
3. Loosen all retaining clips of the flange plates using
a screwdriver.
Displayed graphics
As an example, only the Automatic Switch Box L will be graphically displayed in this section.
The procedure for the Automatic Switch Box M is identical.