Grass Valley K2 Level 2 RAID Oct.10 2006 User Manual
Page 33
September 8, 2006
Level 2 RAID Instruction Manual
33
Inserting the K2 Level 2 RAID Storage chassis in the rack
3. Loosen the rail adjustment screws so that the inner rail slides freely.
4. Align the mounting holes on the outer rail guide bracket with the front channel
mount holes. The protrusions on the guide bracket guide the rail to appropriate
positions on the rack.
5. Place the two M3 mounting screws through the rack bracket, through the front
channel mount holes, and into the mounting holes on the guide bracket. Tighten the
screws to secure the outer rail to the front channel mount.
6. Move to the rear of the rack and pull the inner rail toward you to align the inner rail
guide bracket mounting holes with the back channel mount holes. The protrusions
on the guide bracket guide the rail to appropriate positions on the rack.
7. Place the two mounting screws through the rack bracket, through the back channel
mount holes, and into the mounting holes on the guide bracket. Tighten the screws
to secure the outer rail to the back channel mount.
8. Firmly tighten the rail adjustment screws.
9. Repeat this procedure for the other side rail.
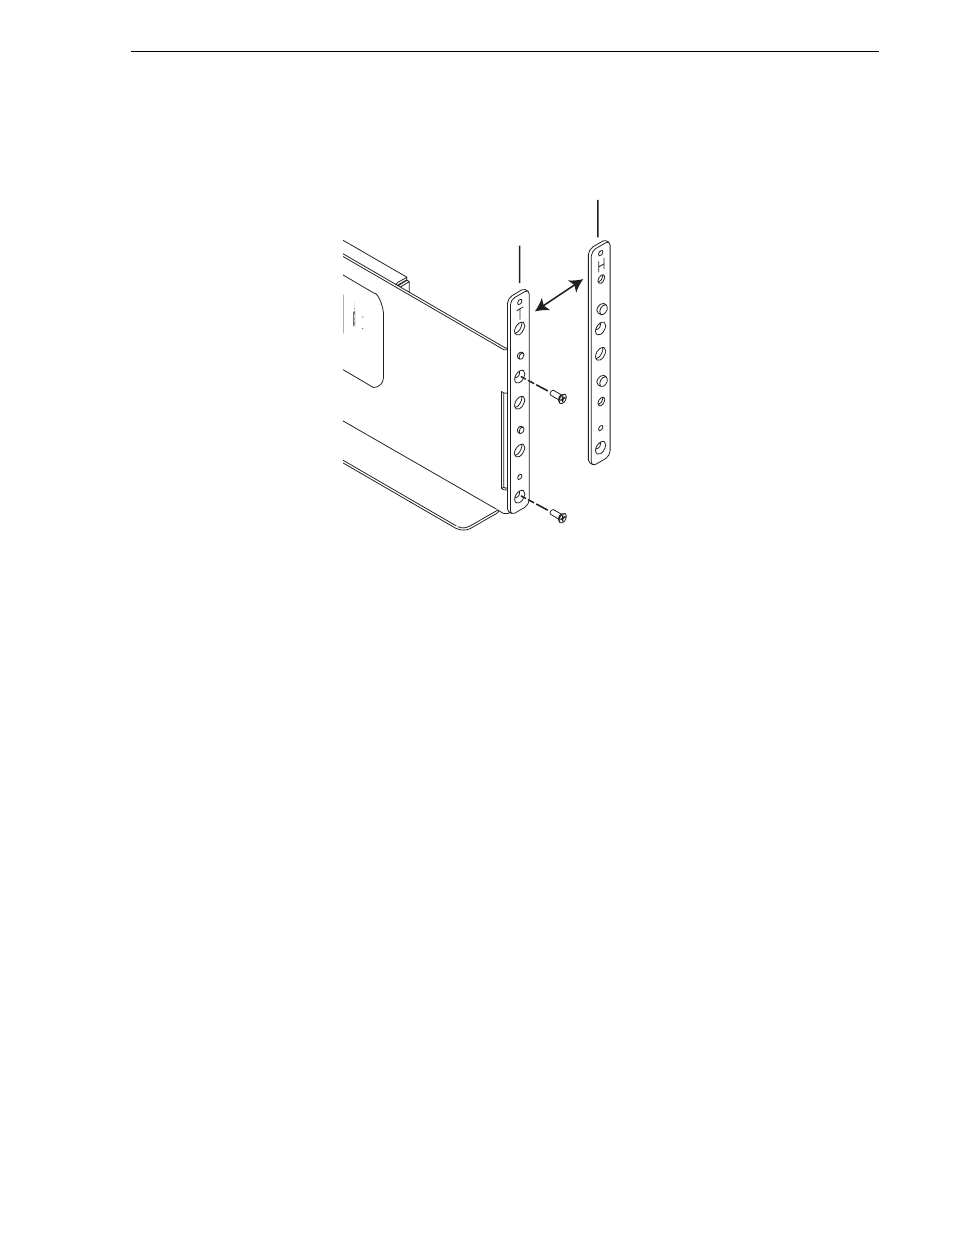
Inserting the K2 Level 2 RAID Storage chassis in the rack
1. Rest the chassis on the support angles shown. Slide the chassis back and into place
2. Secure the chassis to the rack with the 10-32 mounting screws. On racks with
threaded holes the mounting screws engage the rack’s threaded holes. On racks
without threaded holes the mounting screws engage the H type guide bracket’s
threaded holes.
Rack
Rack
Bracket
Bracket
Guide
Bracket
T type
Guide
Bracket
H type