Airaid 883-290 User Manual
Page 3
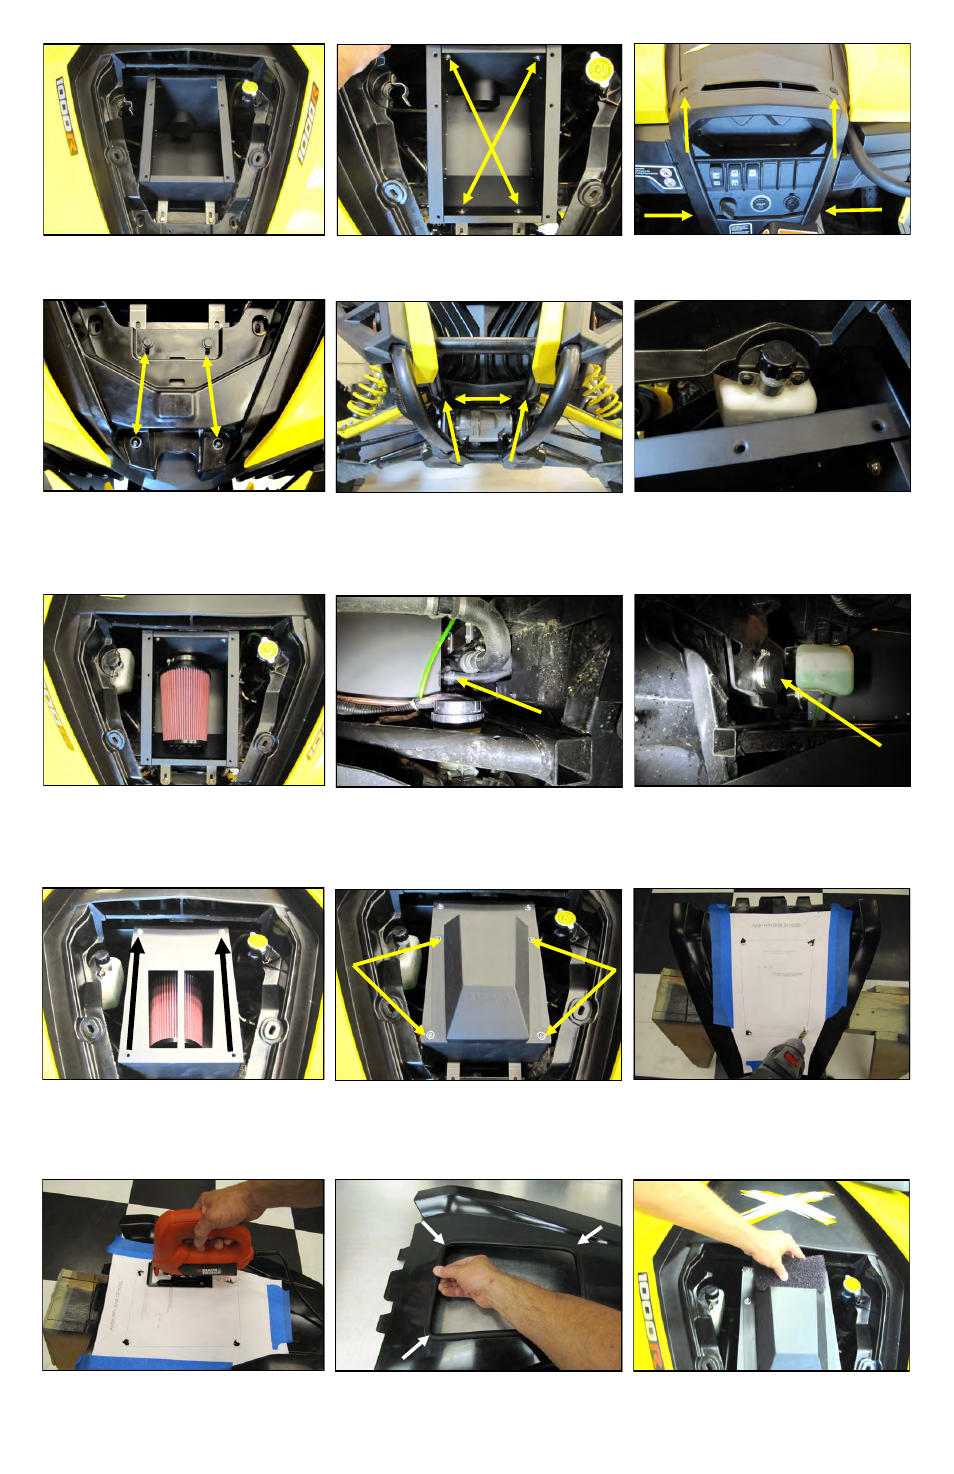
28. Insert the Plastic Rivets (#17) into the plastic cover-
ing the core support, where the factory metal rivets
were. Reinstall the OEM screws in the front plastic.
25. With the help of an assistant, insert the intake assem-
bly into the vehicle from the front while a second set of
hands guides the Coupler and Clamp onto the throttle-
body from the back.
26. Secure the Intake assembly to the Front and Rear
Brackets using the four 1/4-20 Button Head Screws (#19)
and 1/4” Flat Washers (#20).
27. Tighten the throttlebody clamp and reinstall the
center console using the factory hardware. Close the
glove box.
29. Return the bumper to its upright position and reinstall
the 8mm bolts and nuts. Reinstall the grill screws.
30. Reinstall the coolant bottle.
31. Slide the Airaid Premium Filter onto the inner Air-
Box tubing and tighten the Clamp.
32. Connect the PCV line to the Elbow Fitting on the
Intake. Note that the factory spring clamp is reused.
33. Install the Firewall Cap in the passenger side inner
fender. (See step 7). Tighten the #48 clamp on the cou-
pler from step 23.
34. Install the Top Panel (#5) onto the Airbox using two
1/4-20 Button Heads and Flat Washers as shown.
35. Mount the Hood Scoop onto the Airbox assembly a
shown using four sets of 1/4-20 Button Heads and Wash-
ers.
36. Prepare the hood for cutting by laying tape strips
side by side all across the center section for scratch
protection. Cut out the Template and tape it into posi-
tion. Using a 1/8’’ bit, drill out four pilot holes in the
hood followed by a 1/2’’ bit to finish.
37. Using a jigsaw or equivalent, cut along the template
line and connect the 1/2” holes. Remove the hood cen-
ter , Template and tape.
38. Finish the hood modification by installing the Rubber
Edge Trim (#9) onto the cut edge.
39. Compress and install the Foam Pre Filter (#7) into
the Hood Scoop.
Page 3