Airaid 883-290 User Manual
Page 2
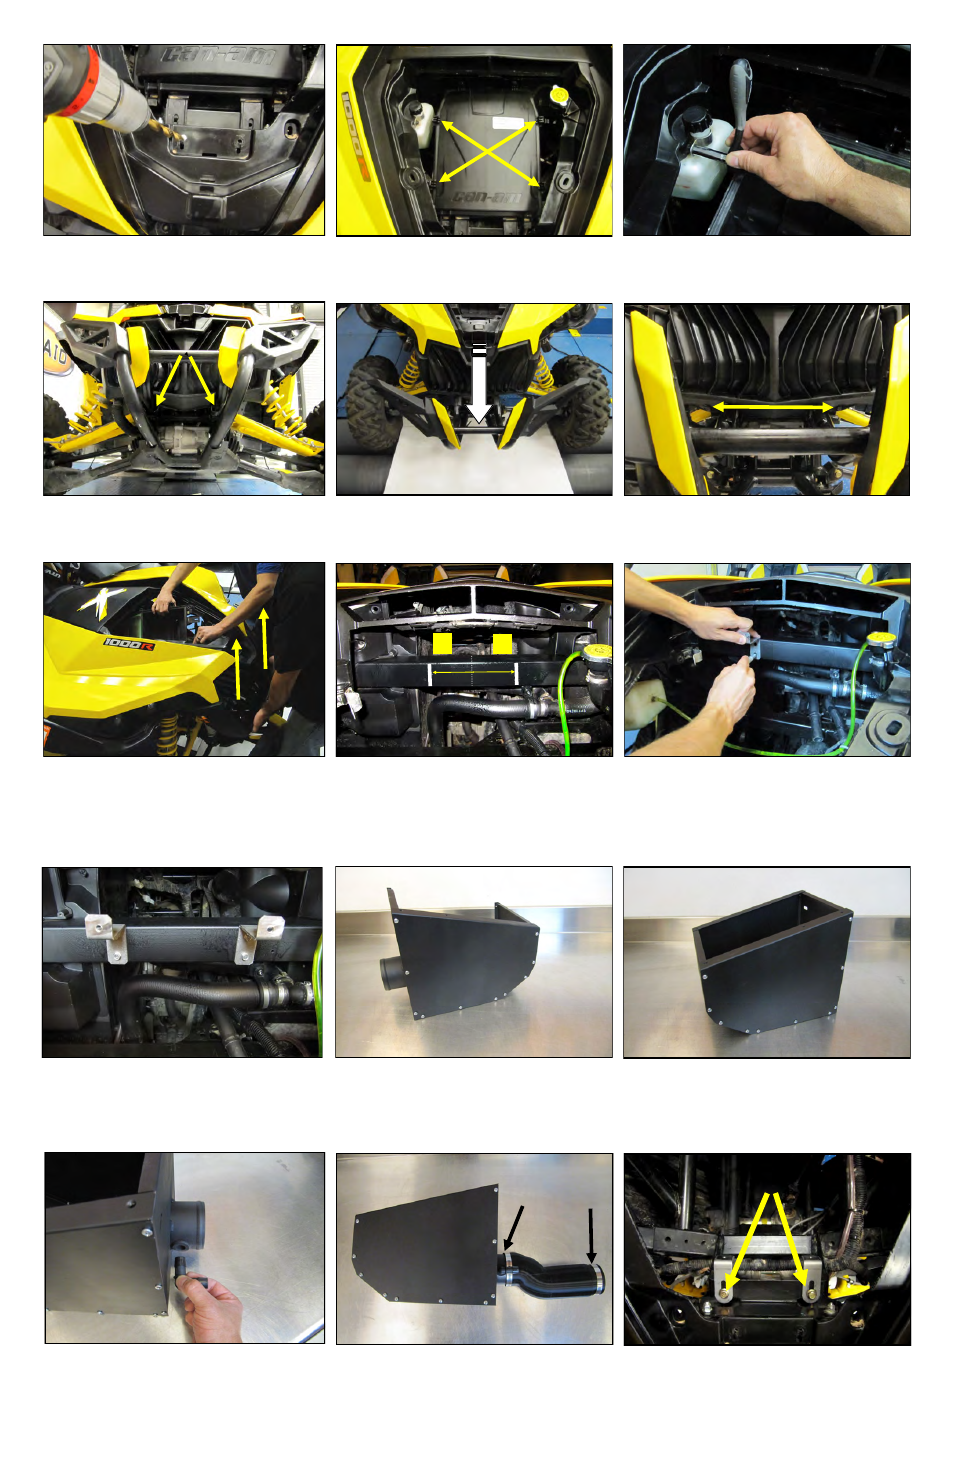
11. Unclip the upper half of the airbox and remove it
along with the air filter.
12. Remove one of the 6mm bolts in the coolant bottle
bracket to release it and set the bottle inside the compart-
ment.
13. Remove the two 8mm nuts and bolts in the upper
bumper mounts.
14. Swing the bumper out and away from the front end
as far as it will go.
15. Remove the two 6mm Torx screws in the front of the
grill.
20. Install the Left Panel (# 3 ) onto the Bottom Panel
(#2) using the #8-32 Thread Cutting Screws (#21).
19. Using a drill and a 8mm socket bit, mount the Rear
Brackets to the cross member with the four, Self Drilling
Screws (#18) .
21. Install the Right side Panel (# 4) onto the Bottom
Panel using the #8-32 Thread Cutting Screws .
10. Drill out the rivet heads holding plastic to the core
support.
23. Slide the Silicone Coupler (#8) onto the Airbox
tube as shown. Pre install the #44 and #48 Clamps
onto the Coupler without tightening them.
22. Install the Grommet (#15) and Elbow Fitting (#16)
into the Airbox Tube.
24. Mount the Front Brackets (# 10), as shown using the
OEM hardware. Leave these bolts hand tight until final
adjustment.
16. With the help of an assistant, lift the front plastic
away from the vehicle and remove the lower half of the
airbox.
17. Find the center line on the cross member underneath
the cowl and mark it . From that centerline, measure out
3” to the Left and Right and mark it.
18. Using one of the Rear Brackets (#11) and a spring
loaded punch, mark the cross member at both 3” marks.
punch the holes in the center of the Bracket slots. The
Brackets are slotted for minor vertical adjustment.
3”
3”
44
48
Page 2