2–quick start guides – Teac DP-008EX User Manual
Page 19
TASCAM DP-008EX
19
2–Quick Start Guides
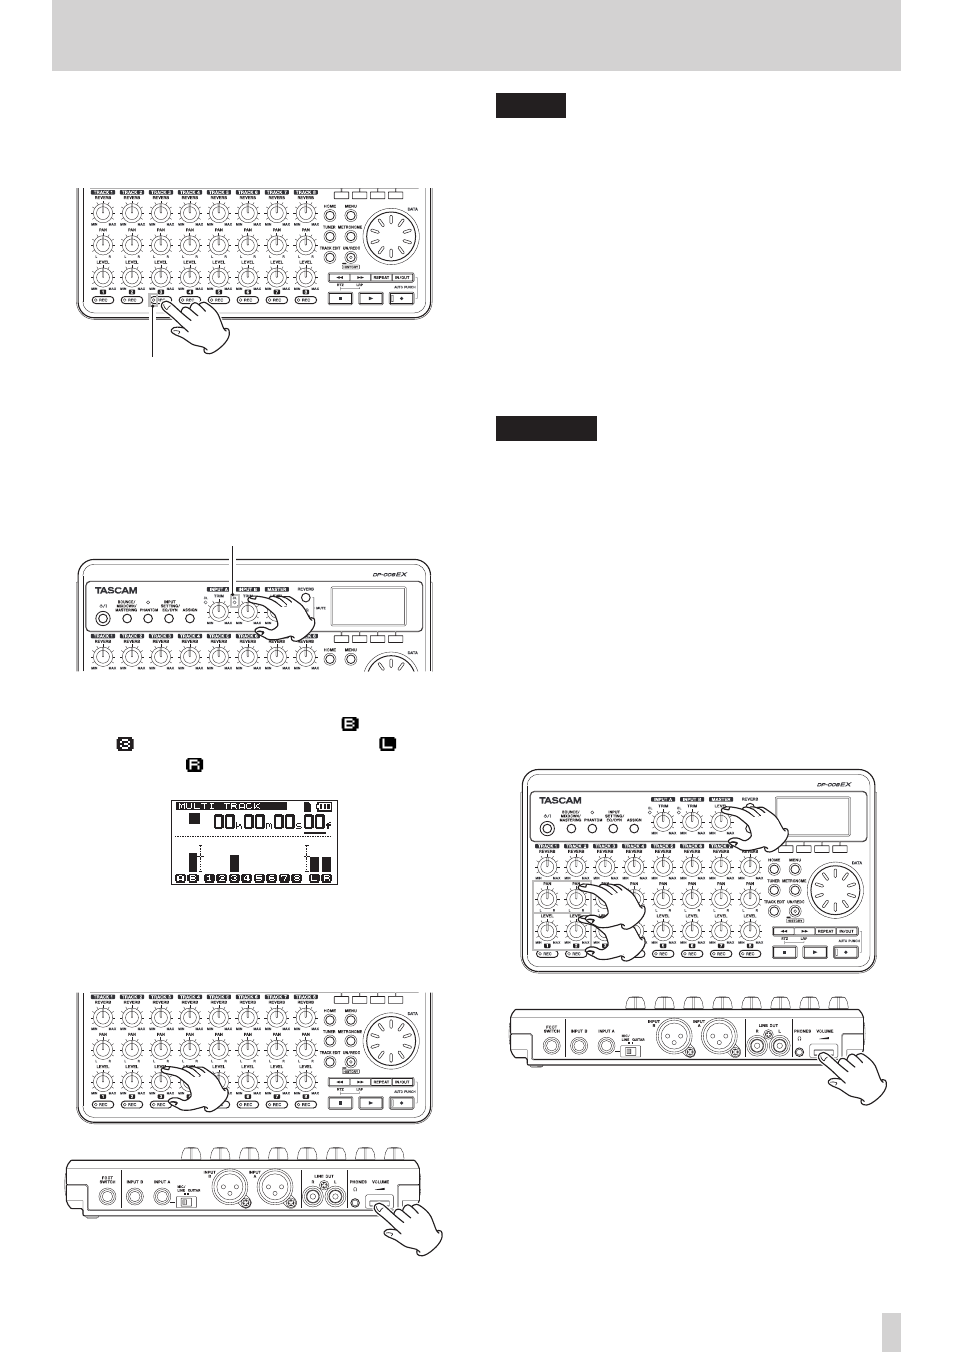
4. Press the TRACK 3 REC button to put the track
into recording standby.
The
REC indicator blinks when in recording
standby.
TRACK 3 REC indicator
5. Use the INPUT B TRIM knob to adjust the mic
input level.
Set the TRIM knob so that the INPUT B OL
indicator does not light even when the loudest
sound to be recorded is input.
OL indicator
When you input sound into the built-in mic (MIC
B), the input level is shown by the (INPUT B)
and (TRACK 3) meters as well as the (left
channel) and (right channel) meters on the
display.
With the MASTER LEVEL knob and the VOLUME
dial on the back of the unit already turned up,
turn up the TRACK 3 LEVEL knob to hear the mic
sound through the headphones
NOTE
•
If the OL indicator continues to light even when
the TRIM knob is turned down, the mic signal itself
is too loud. In this case, if the input source is set to
Internal MIC/High
, change it to
Internal
MIC/Low
.
If the OL indicator lights even when set to
Internal MIC/Low
, move the sound source
away from the mic or lower the volume at the
sound source.
•
When the input source is a built-in mic, if the REC
indicator for the TRACK that has the built-in mic
set as its input source is not lit, the input sound
cannot be heard through the headphones or
connected monitoring system.
CAUTION
Always monitor through headphones when using
a mic. If you monitor through speakers, feedback
could occur.
6. Return to the beginning of the song
(00h00m00s00f) and press the Play (7) button
to begin playback of the recordings on TRACK
1 and TRACK 2. Sing along with the already
recorded rhythm and lead guitar parts.
You can hear the guitars on TRACK 1 and TRACK
2 playing back and your singing through the
headphones.
7. As necessary, use the TRACK 1 and 2 LEVEL and
PAN knobs, the MASTER LEVEL knob and the
VOLUME dial on the back of the unit to adjust
the monitoring levels and balance.
8. When you are finished checking, press the Stop
(8) button to stop playback.