Iv. installation – SP Controls PixiePro User Manual
Page 8
IV. Installation
PixiePro may be mounted using the plastic surface-mounting box (included), or using a standard
four-gang wall box (must be purchased separately).
Warning: The PX2-MP-IR is a low-voltage device. Never install the PixiePro in an electrical back
box containing high-voltage wiring. This would cause a serious electrical danger and violate United
States’ electrical codes.
1. Wall Surface Mounting
The PixiePro may be surface mounted to masonry or drywall with the included plastic surface mount
box and anchors.
Secure the surface mount box to the wall. Bring the three-conductor cable from the cable assembly
to the back box and feed it through one of the cable channels, located at the top and bottom of the
box. Wire mold may be used to guide wiring along the wall.
To secure the PixiePro into the plastic mounting box, line the circuit board up with the box posts and
insert securely into the plastic clasps.
Cover the PixiePro face with the included faceplate and secure with the included screws.
2. Tabletop Surface Mounting
Secure the PixiePro plastic surface mount box to the table. Thread the three-conductor cable from
the cable assembly to the back box and feed it through the wiring cutout. Wire mold may be used to
guide wiring along the table. Alternately, you may cut an access hole through the table and run
wiring along the underside of the table.
To secure the PixiePro into the surface mount box, line the circuit board up with the box posts and
insert securely into the plastic clasps.
Cover the PixiePro face with the included faceplate and secure with the included screws.
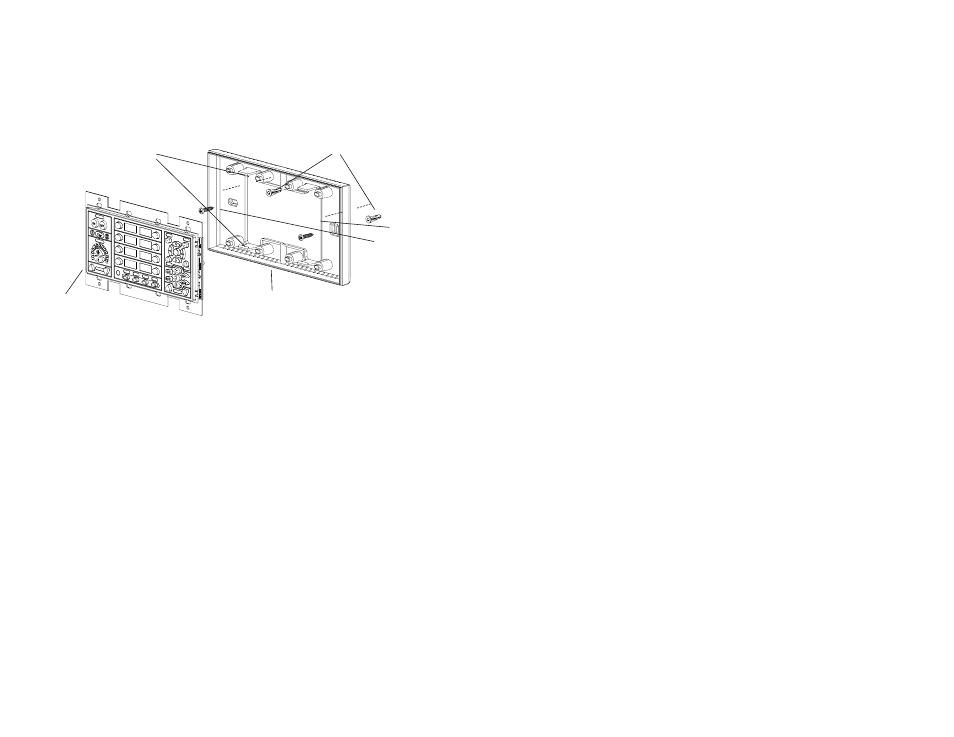
Plastic Surface
Mount Box
(included)
Release clasps to remove
PixiePro from surface box
5
Wall Anchors
(included)
Wall Anchors
PixiePro Circuit
Board
Figure 4: Assembling the PixiePro for surface mounting (surface-mount box included)