Iii. assembly – SP Controls PixiePro User Manual
Page 7
III. Assembly
1. Preparation
Note: When assembling the PixiePro, you will be working with a number of small parts. Be sure that
you assemble the PixiePro in a clean, well-lighted work area.
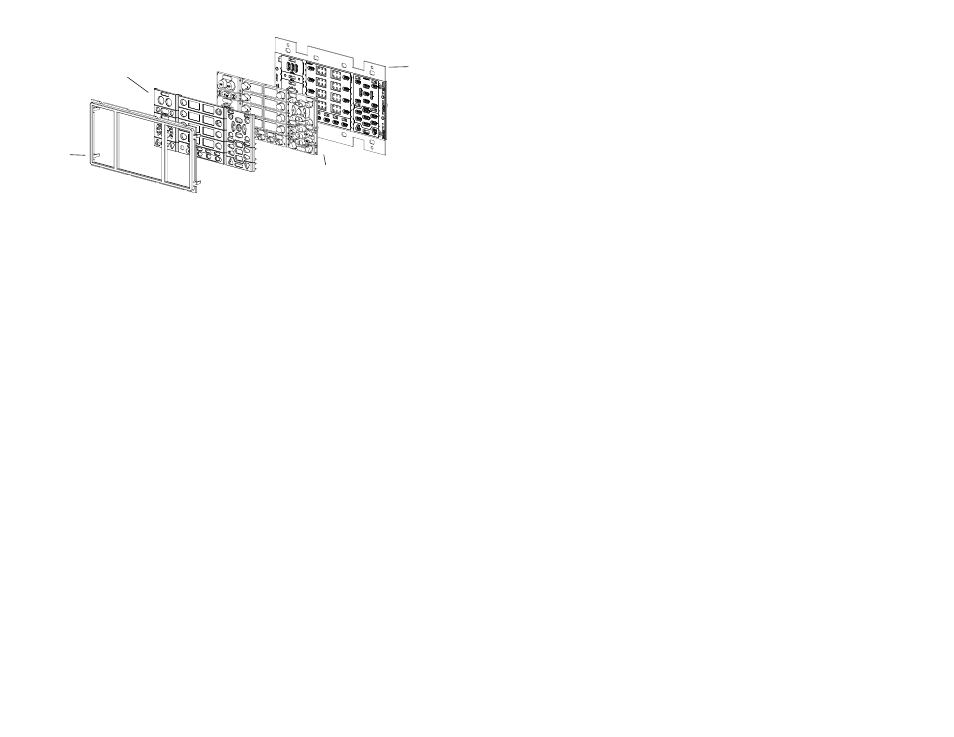
Disassemble the PixiePro (see Figure 3 for an example of a disassembled unit) and select desired
button insert modules. Most button modules may be replaced with blanks if desired. You must use
the Status LED module, at least one source selection module, and at least one power module.
Most button modules are optional and may be replaced with blanks. For example, if you do not wish
to include control of a DVD player or VCR in your installation, you may replace the VCR/DVD con-
trol module with blank inserts. You may likewise assemble the PixiePro with anywhere from 0-4 aux
control buttons and 1-8 source selection buttons.
Note: Programming and configuring the PixiePro requires use of the volume control/display module,
all four aux button modules, and at least the first seven source buttons. Be sure to include these
modules until the unit has been configured. They may then be replaced with blanks. You may clone
configuration from another unit without including these modules.
The PixiePro security feature requires use of the menu button module for entering security codes.
Several configuration settings require use of the discrete on/off power button module. See the
Configuration section on page 19 for more information.
2. Assembly
a. Select the appropriate button modules. Button modules are connected in sets, but may be easily
separated for customized configuration. To separate modules, fold the buttons away from each other
to expose the thin connecting rubber and cut with a razor knife.
b. Place the desired button modules and blanks against the circuit board.
c. Label the selected buttons. Remove the non-adhesive transparent labels from the included leg-
end sheet and inserting them in the plastic overlay legend receptacles. Be sure to verify the correct
orientation.
d. Fit the plastic overlays over the rubberized button pads and/or blanks. Secure the overlays in
place by fitting the plastic bezel over all modules. Be sure the bezel is right side up.
Bezel
Plastic
Overlay
Rubberized
Button Pads
Circuit
Board
4
Figure 3: The four basic components of the PixiePro