Viii. configuration – SP Controls PixiePro User Manual
Page 22
VIII. Configuration
Overview
Configuration Mode is used to change the various settings on the PixiePro that control its behavior.
By default, the settings on the PixiePro will be
To put the PixiePro into Configuration Mode, press and hold any button while inserting the paperclip
into the programming aperture. The PixiePro Learning Mode Indicator LED will flash and the unit will
emit a regular clicking sound to indicate it has entered Configuration Mode.
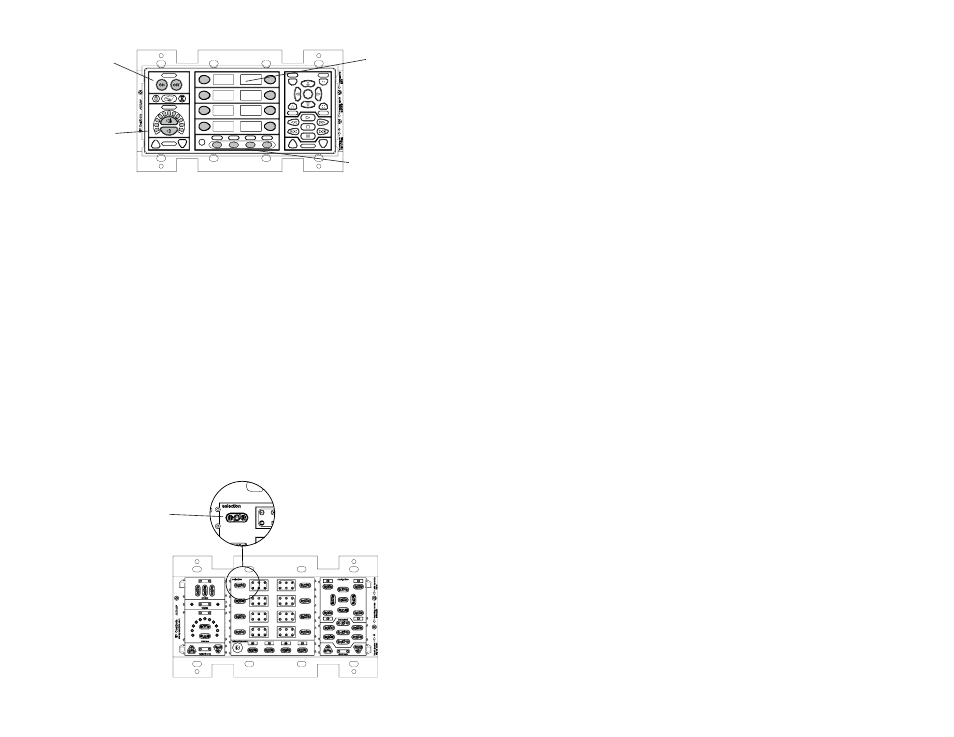
Once in Configuration Mode, use the PixiePro interface to navigate through the configuration set-
tings. The Aux buttons are used to set the configuration group. Source buttons 1-8 are used to
select the setting you wish to adjust within the current group. Volume buttons are used to select the
desired value for a given setting, with the volume display providing feedback. Power buttons are
used to confirm selections.
The Volume Control/Display module, all four Aux button modules, and at least seven Source buttons
are required to fully configure the PixiePro. Be sure to include these modules until the unit is config-
ured. After configuration, they may be replaced with blanks. You may clone settings from an
already-configured unit without including these modules.
In an emergency where the button modules are unavailable, you may simulate button presses by
removing the blanks and carefully probing the button key with screwdriver or thin metal object.
Power buttons are
used as an Enter key
in configuration mode
Use Source 1-8
to select Setting
Aux Buttons 1-4
select Configuration
Group
Volume Control and
Display used to set
Levels
If the button modules are unavail-
able, gently touch these contact
points with a fine metal implement
to simulate a button press.
19
Figure 15: Configuring the PixiePro
Figure 16: Simulating a button press when button module is unavailable