Adjusting the dryer’s media hold-down guides, Gh e f – Rena XPS-ProMail System User Manual
Page 19
SECTION 2
SETTING UP THE SYSTEM
XPS-ProMail System Operations 4-24-14.doc
11
G
H
E
F
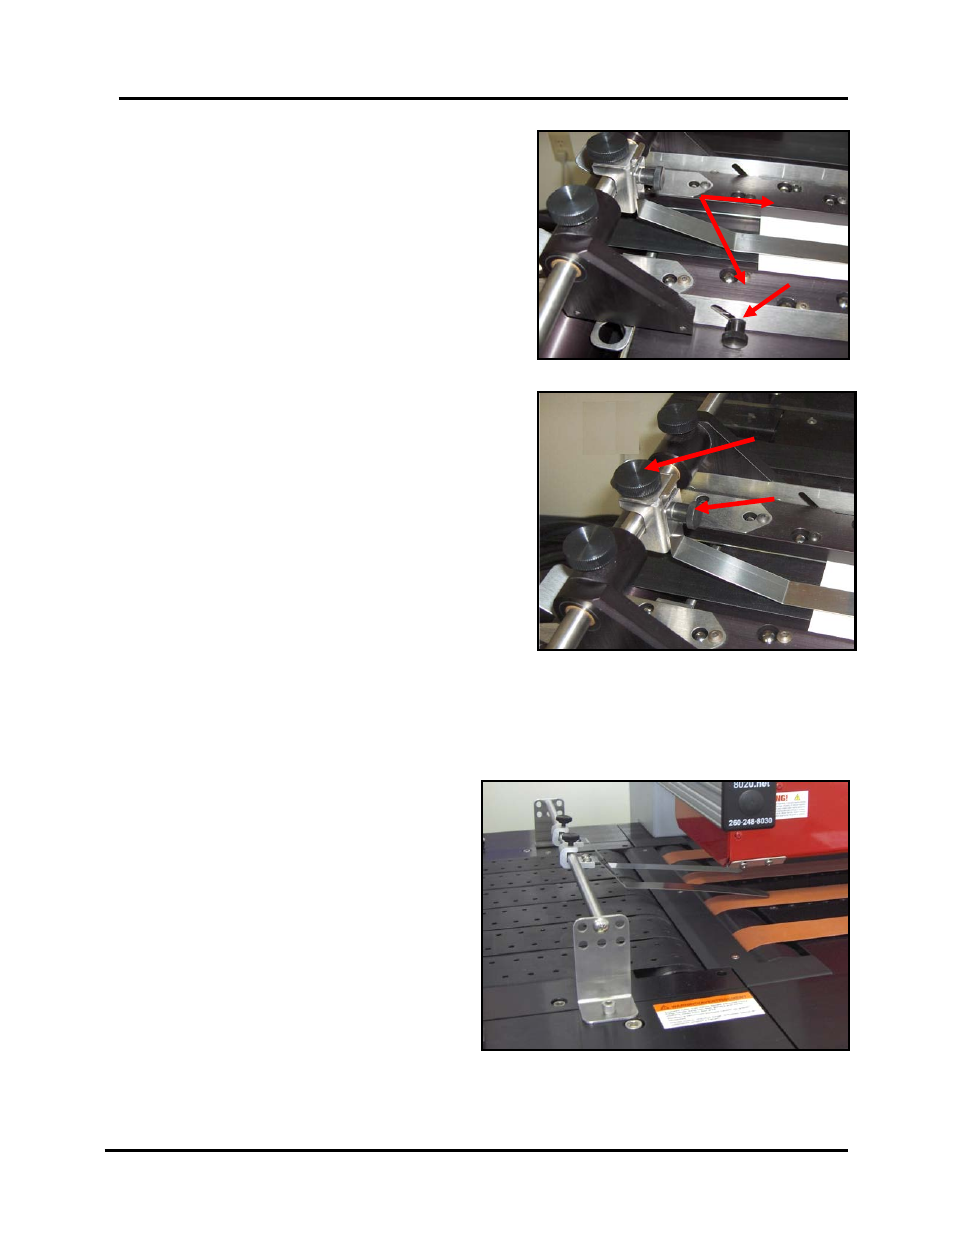
5. Loosen the two thumb screws [E], located at
the outside of each of the side guides. Then
adjust the height of the ball guide assemblies
[F] for the thickness of your media.
Lower the ball guide assemblies so the ball
bearings just rest on the media (ball bearings
will just start to be pushed up by the media).
Then secure the thumb screws [E].
6. Loosen the locking screw [G] and position the
center hold-down strap so it is approximately
centered over the media.
The pressure of the strap on the media can be
adjusted by loosening the strap height
adjustment screw [H] and raising or lowering
the strap.
Tip: Only a small amount of pressure between
the hold-down strap and the media is required.
If you apply too much pressure, this can cause
the media to hesitate or skew as it feeds.
Important: Make sure the ends of the hold-
down strap and side guides do not interfere
with the paper sensor or dryer sensor.
Adjusting the Dryer’s Media Hold-Down Guides
This device will only be present if the optional
XPS-ProDry 8.0 is also part of the system. It is
used to keep media from lifting and hitting the
dryer as it feeds from the XPS-ProMail Base
to the XPS-ProDry 8.0 Base.
The hold-down straps are normally positioned
so they are close to the outer edges of the
media. Loosen the thumb screws and
reposition the hold-down straps to the desired
location and strap angle; based on the position
and size of your media. Tighten the thumb
screws to secure.
Tip: The strap angle is normally adjusted so
the straps are just above the surface of the media (not touching media). If you apply too much
strap pressure, this can cause the media to hesitate or skew as it feeds.