Xps-promail 3.0/4.0 printer control panel, Xps-p, Rinter – Rena XPS-ProMail System User Manual
Page 11: Ontrol, Anel
SECTION 1
GETTING ACQUAINTED
XPS-ProMail System Operations 4-24-14.doc
3
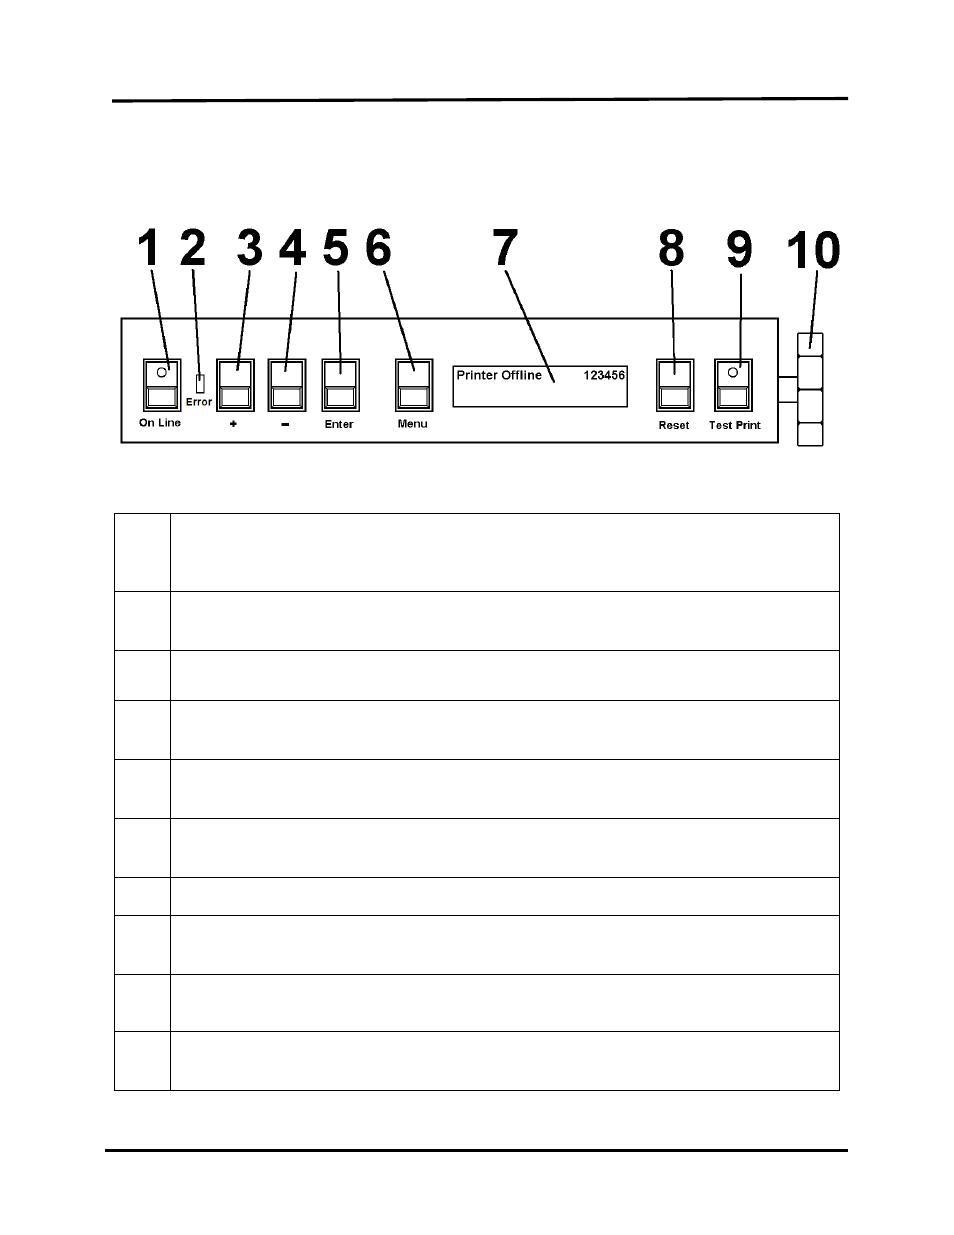
XPS-ProMail 3.0/4.0 Printer Control Panel
1.
ON LINE key – This key turns the printer on-line or off-line. The indicator, on this key,
lights when the printer is placed on-line. The indicator, on this key, blinks when the
printer is placed off-line.
2.
Error Indicator – This indicator lights when the printer detects a problem.
See message on the LCD Display for additional details.
3.
- key – When the printer is placed in the menu mode this key will scroll to the
previous menu selection.
4.
+ key – When the printer is placed in the menu mode this key will scroll to the
next menu selection.
5.
ENTER key – This key is normally used to start and stop the feeding of media. When
the printer is placed in the menu mode, this key is used to accept or make a selection.
6.
MENU key – This key causes the printer to enter the menu mode where several
operator functions can be accessed.
7.
LCD DISPLAY – Indicates the printer’s status including menus and error messages.
8.
RESET key – This key will reset the printer. Clears all data from the printer; similar to
powering the printer off/on.
9.
TEST PRINT key – Pressing this key will put the printer into the test print mode.
Note: A 6”x9” mail piece is required to print the “factory TEST image”.
10.
MEDIA THICKNESS – This knob is used to adjust the height of the print carriage and
printheads to accommodate different media thicknesses.