Remko sv, Electrical connection – REMKO SV 261 User Manual
Page 24
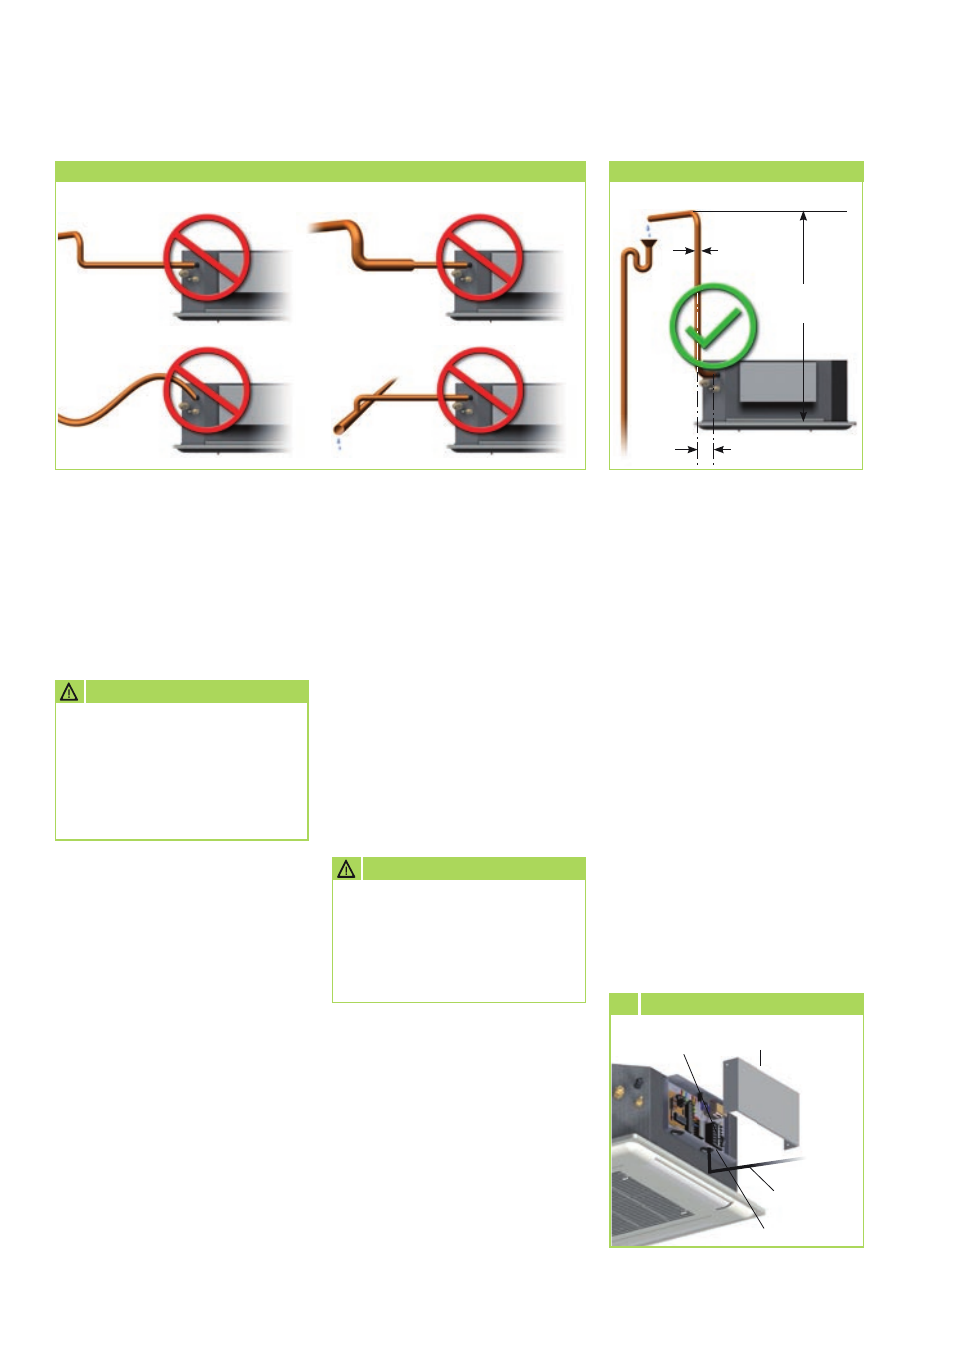
16-20 mm
min. 2% fall
Riser pipe too far away
Condensation pipe too large/small
No fall
Cannot freely drain
away
Condensation connection - Wrong!
Condensation connection - Correct!
maximum
1000 mm
max. 100 mm
Electrical connection
All electrical installation
work should be performed
by specialist contractors.
Isolate the voltage supply
when connecting the electrical
terminals.
CAUTION
■
We recommend that customers
install a main/repair switch
in the vicinity of the outdoor
component.
■
The terminal blocks for making
the connections are located at
the rear of the unit. When the
unit is installed, measurements
can be made from the front by
removing the cover.
■
If an optional condensation
pump is used in conjunction
with the unit, it may be
necessary to install an
additional relay with a higher
contact rating after the switch-
off contact on the pump to
A protected mains supply
cable and control cable should
be connected to the outdoor
component and indoor unit
respectively.
Connecting the indoor unit
Make the connection as follows:
1. Open the air intake guard.
2. Unfasten the cover on the right
side and at the bottom right
rear (Fig 12).
3. Connect the unit to the
control cable from the outdoor
component.
See electrical connection
diagram
4. Re-assemble the unit.
switch off the compressor.
■
Control cables should be
screened if laid in areas exposed
to strong magnetic fields.
■
Details concerning the electrical
protection of the system are
given in the section on technical
data.
Check all plugged and clamped
terminals to verify they are
seated correctly and making a
permanent contact. Re-tighten
as required.
CAUTION
Terminal block
for control
cable
Cover
Control cable
from outdoor
component
Strain relief
12
Connecting the indoor unit
REMKO SV
24