QuickLabel R-310 QuickWrap User Manual
Page 12
12
CARRIAGE ADJUSTMENT AND PRODUCT PLACEMENT
SET CARRIAGE AS FOLLOWS
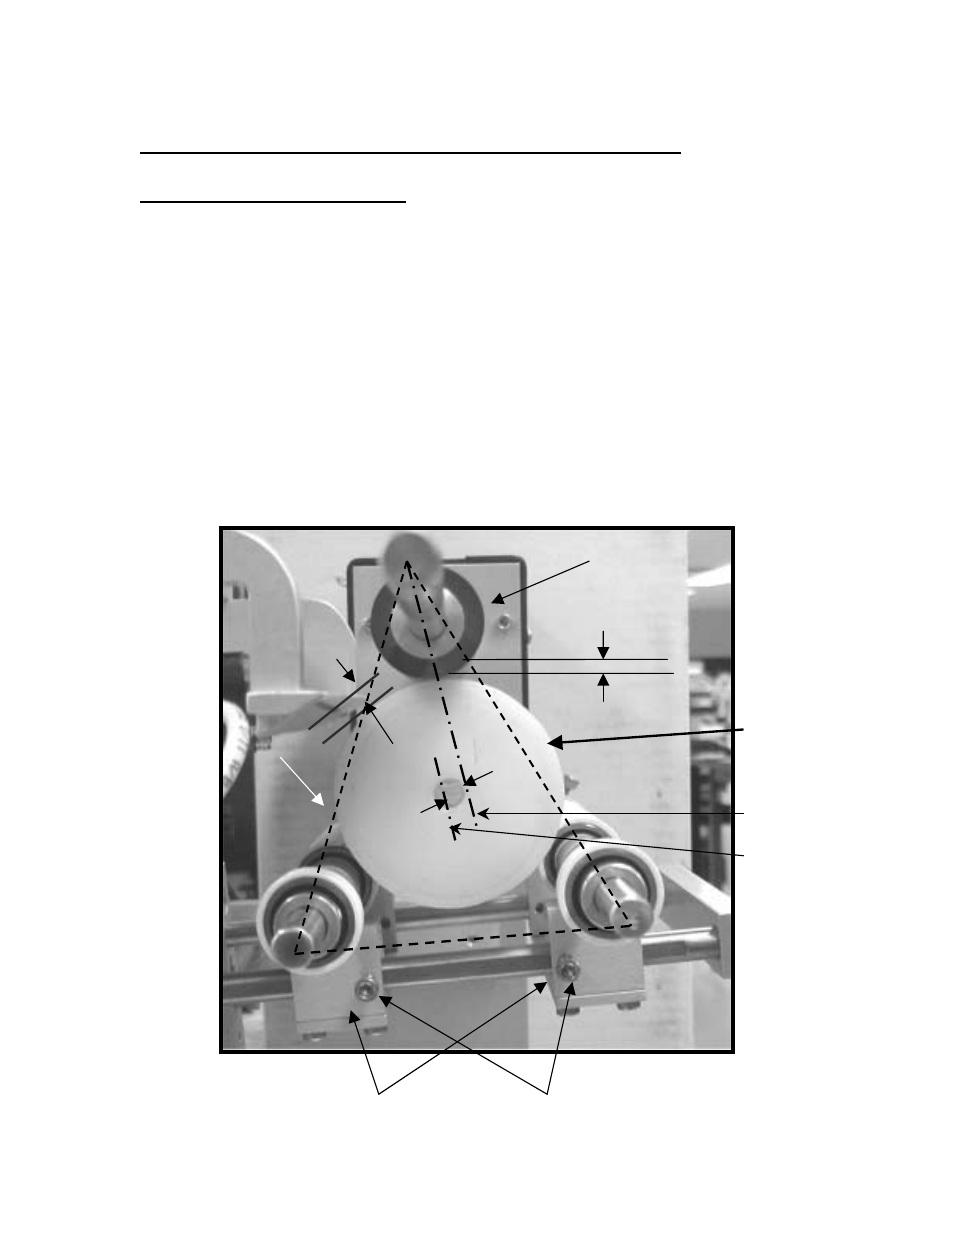
1. The product centerline should be slightly behind drive roller centerline (a
1/32” or less) when carriage is up, as shown by ‘Y’ in Fig 6;
2. When product “A” is against drive roller, you should have a minimum 3/16”
distance (see ‘Z’ Fig 6) between product and peeler plate for product to sit
well down between carriage idler rollers (see ‘B’ Fig 6).
Use a 9/64 Allen wrench to loosen 4 cap screws “C” and relocate carriage
blocks. Also keeps in mind that moving the lower carriage roller assembly
forward or back in the actuator arm will affect values of ‘Y’ and ‘Z’. Refer to Fig 7
on page 13 for this adjustment. You will have achieved close to equal spacing if
roller centers visually form a triangle as shown by dotted lines in Fig 6.
After verifying that a product works well at a given setting, it would be a good
idea to mark the rods where carriage blocks are set.
Product “A”
X
Drive
Roller
Y
Drive Roller Centerline
Product Centerline
Z
B
“C” Cap Screws
Carriage Blocks
Fig 6