K-Patents PR-23-SD Generation 1 User Manual
Page 21
Safe-Drive™ Process Refractometer PR-23-SD Best Practices, Generation 1
© Copyright K-Patents 2013. All rights reserved.
21
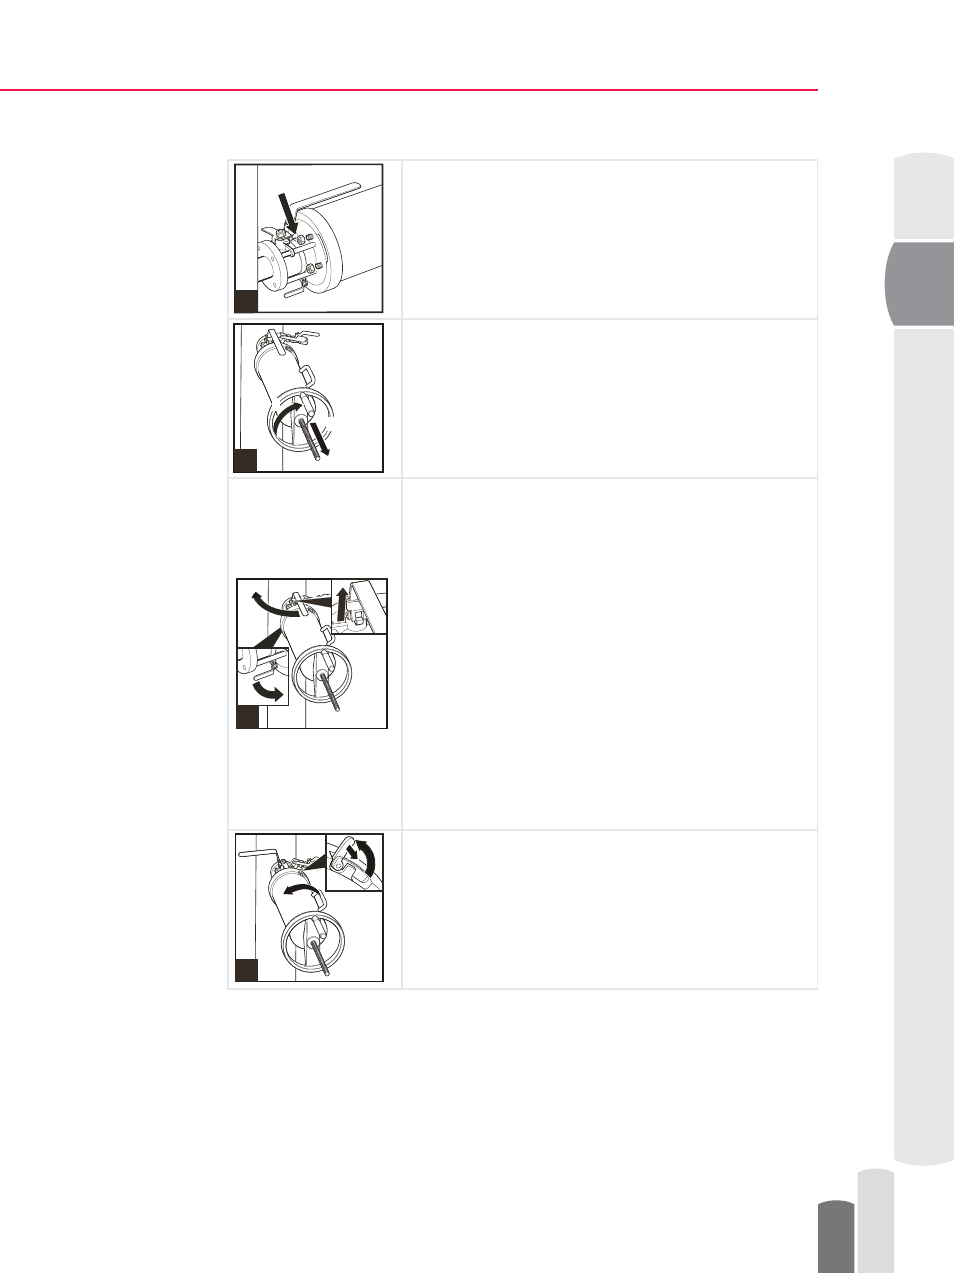
Open and remove the four M12 nuts on the bolts holding the
sensor to the isolation valve using a 19 mm or 3/4” wrench.
Turn the hand wheel clockwise until it stops to remove the
sensor from process.
WARNING: If you detect leaking, revert immediately to the
previous step. Do not continue removal until the reason for
leakage has been cleared and fixed.
1. Lift up the isolation valve handle locking plate.
2. Close the isolation valve on by turning the handle a quarter
turn to the left.
IMPORTANT: The isolation valve is properly closed
when the handle points away from the sensor and the
locking plate drops down over the handle.
3. Open the blow-out valve under the isolation valve.
Some process liquid should leak from the valve. If there is
none, the valve may be defective.
WARNING: Watch out for splashing!
4. Carry out box flushing to get rid of any process liquid
inside the isolation valve. See chapter 4.9 Box Flushing
for instructions.
1. Lift the outer casing locking latch.
2. Turn Outer casing a 1/6 turn to the left so that the handle
comes up on top.
4 x M12
6
1
140 mm
(5.5")
7
1
2
8
3
1
2
9