Ivoclar Vivadent IPS e.max CAD Abutment Solutions User Manual
Page 21
21
Optional
– Clinical T
ry-In
Hybrid abutment crown
The following procedure should be observed during the clinical try-in:
– The prepared and cleaned hybrid abutment crown (provisionally secured with in place with Virtual Extra Light Body Fast
Set) is laid out.
– Remove the provisional restoration.
– Place the hybrid abutment crown on the implant intraorally in order to check and adjust the proximal contacts, if necessary.
Note: No occlusal functional inspection must be performed at this stage.
– Screw the hybrid abutment crown in manually with the dedicated screw.
– Check the geometry of the hybrid abutment crown (e.g. fit, gingival anaemia) in relation to the gingiva.
– Check the occlusion/articulation and make adjustments with suitable grinding instruments, if necessary (see separate
IPS e.max recommended grinding instruments for ceramics – use in the dental practice).
– Carefully remove the hybrid abutment crown.
– Rinse the implant site, e.g. with Cervitec Liquid (antibacterial mouth rinse containing chlorhexidine), to clean and
disinfect it.
– Place the temporary restoration.
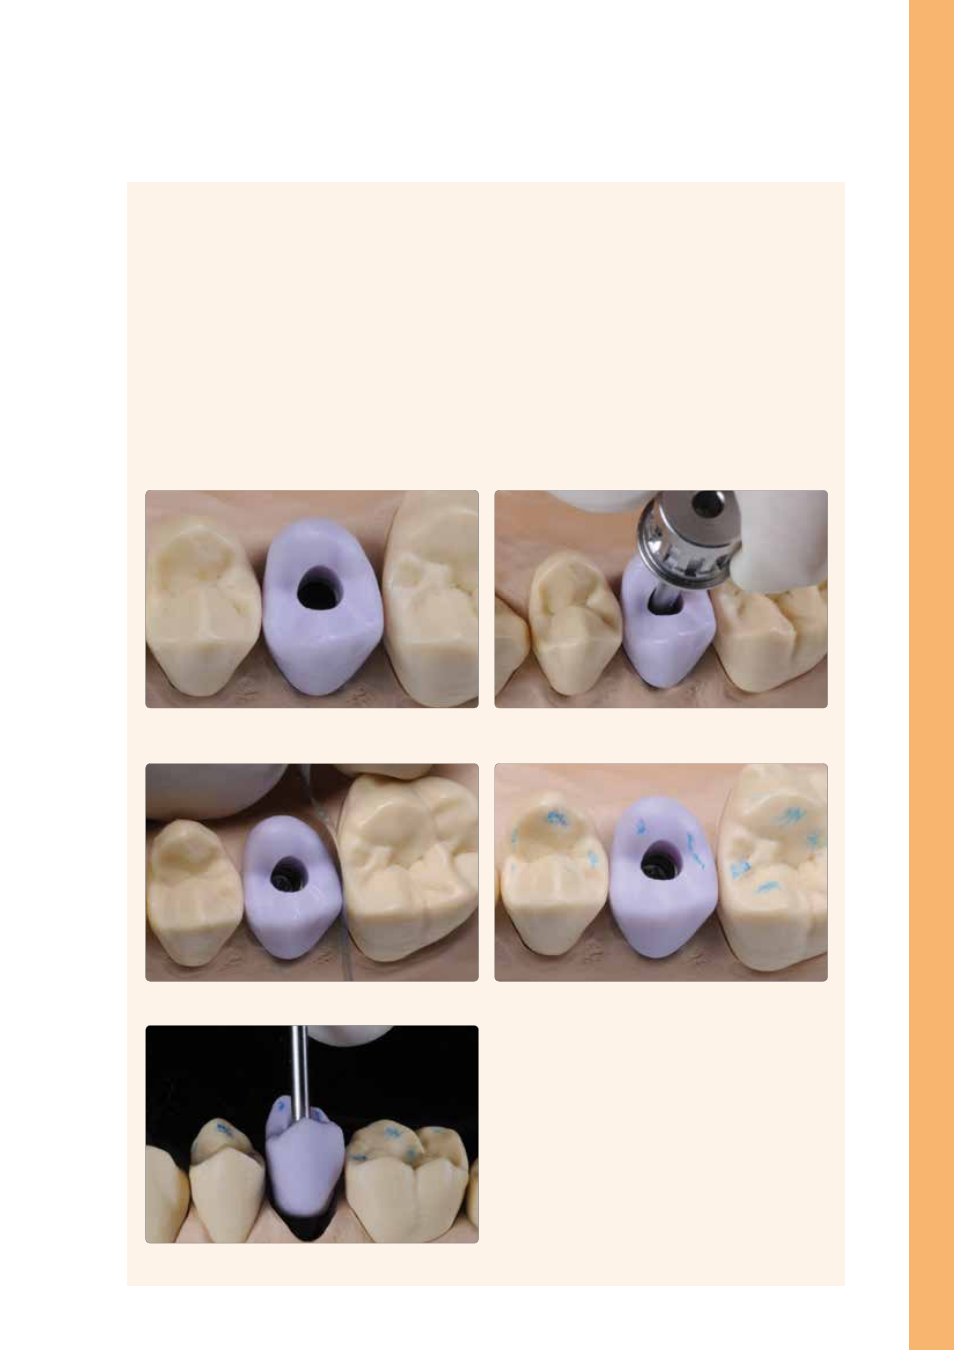
The hybrid abutment crown is placed on the implant intraorally in order to check and
if necessary adjust the proximal contacts. Note: No occlusal functional inspection
must be performed at this stage.
The geometry of the hybrid abutment crown is checked (e.g. fit, gingival anaemia) in
relation to the gingiva.
The hybrid abutment crown (including base) is carefully removed.
The hybrid abutment crown is screwed in with the dedicated screw.
The occlusion/articulation is checked and if necessary adjustments are made with
suitable grinding instruments.