Harken 1807, 1807HL System A Battcars: built before 2005 User Manual
Page 9
9
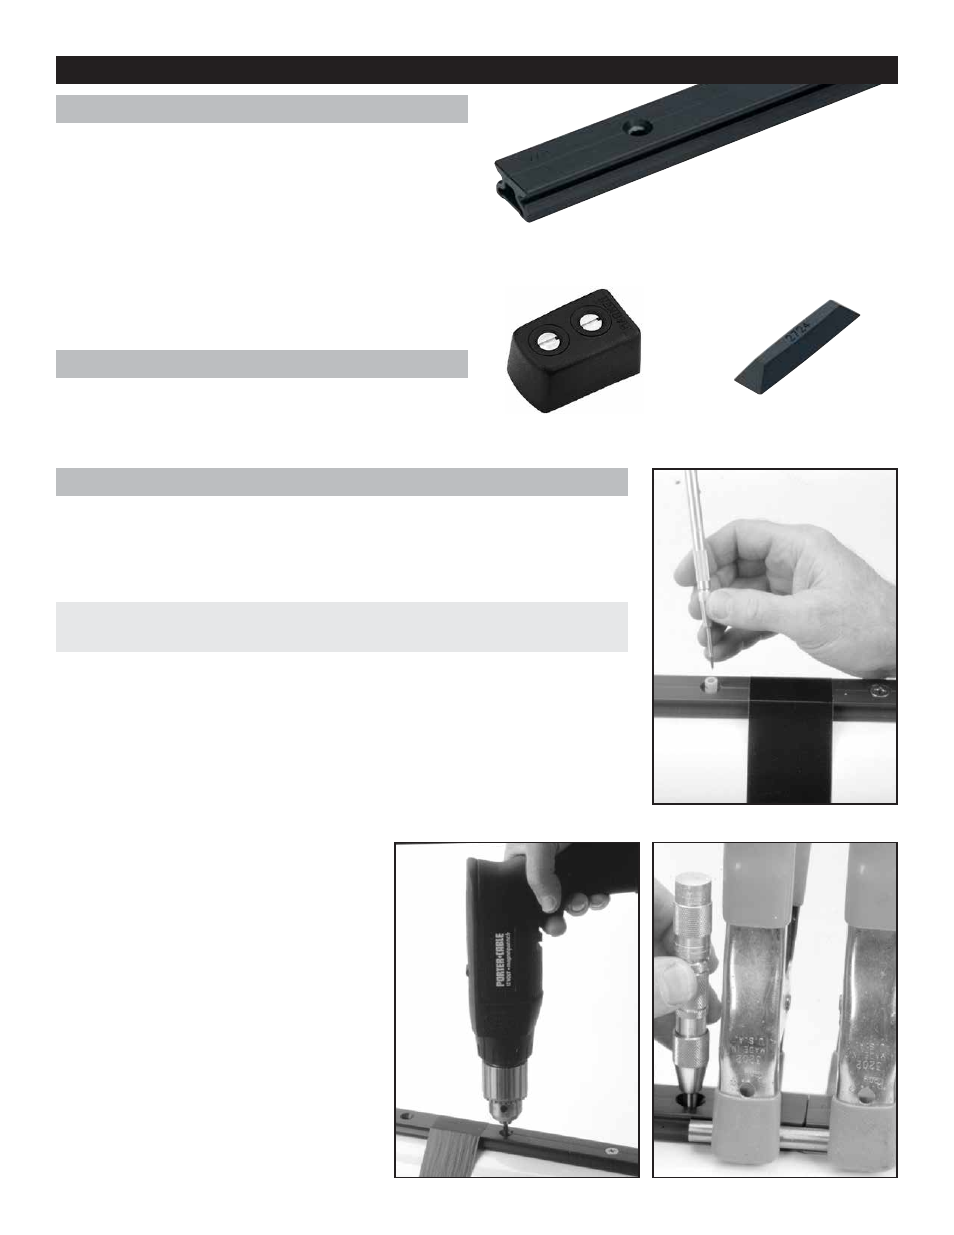
Installing Track by Drilling and Tapping
Start at one end of track and work down: drilling, tapping and screwing. Do not drill and tap
both track ends and then expect to drill and tap the center holes.
Clamp or duct tape track in place on mast. Center punch hole being careful to locate center
of track hole.
Drill through track hole, making sure drill is perpendic-
ular to face of mast. Take care to not let the chuck hit
the track. Tap threads and install screws using blue
Loctite.
Aligning track at joints: The 2724 splice pieces will
help align the track as you are installing the track. In
addition, use round rods or dowels to align tracks.
Use spring clamps or “C” clamps to hold them in
place until the track is drilled, tapped and screwed
in place.
Follow instructions on page 10 regarding loading
cars and installing bottom track.
Tip: For accuracy and ease of punching use a spring loaded machinist’s center punch. Use
the narrow shaft model with a centering tube fashioned from a piece of plastic tubing.
Required Parts
Before You Remove Old Track
Before taking old track off, scribe a pencil line down either side of
track to use as a guide for keeping track straight. If the track is off
the mast, use a string attached to the mast to help line up the track
while installing.
Drilling and Tapping
2720 Track
See page 4, Determining Track Length. The bottom track length
needs to be short enough to remove easily to put cars on or
take them off the track. We recommend an 18" to 24" (457 mm
to 609 mm) bottom track length.Do not use 1800 track for
drilling and tapping.
#10 (5 mm) Flathead Screws (not included)
Number of fasteners needed:
2720 Track — 10 fasteners/meter of track
2724 Splice Pieces
263 End Stop Set
263
2720
2724
- 1792, 1792HL System A Battcars: built before 2005 1777 System A Battcars: built before 2005 1825, 1825HL System A Battcars: built before 2005 1894, 1894HL System A Battcars: built before 2005 1901, 1901HL System A Battcars: built before 2005 1944, 1944HL System A Battcars: built before 2005 1976,1976HL System A Battcars: built before 2005 1977, 1977HL System A Battcars: built before 2005 1802 System A Battcars: built before 2005 1803 System A Battcars: built before 2005 1823 System A Battcars: built before 2005 1805 System A Battcars: built before 2005 1806 System A Battcars: built before 2005 1824 System A Battcars: built before 2005 1800 System A Battcars: built before 2005 2720 System A Battcars: built before 2005 1793, 1793HL System B Battcars: built before 2005 1794HL System B Battcars: built before 2005 1826, 1826HL System B Battcars: built before 2005 1895, 1895HL System B Battcars: built before 2005 1902, 1902HL System B Battcars: built before 2005 1946, 1946HL System B Battcars: built before 2005 1978, 1978HL System B Battcars: built before 2005 1979, 1979HL System B Battcars: built before 2005 1980, 1980HL System B Battcars: built before 2005 1810 System B Battcars: built before 2005 1811 System B Battcars: built before 2005 1813 System B Battcars: built before 2005 1814 System B Battcars: built before 2005 1808 System B Battcars: built before 2005 1616 System B Battcars: built before 2005