Figure 3 on – Gasboy 9800K User Manual
Page 7
MDE-4650 CPU Heater Kit Installation Instructions for 9800K Series Pumps · April 2007
Page 7
Installation of the CPU Heater Kit
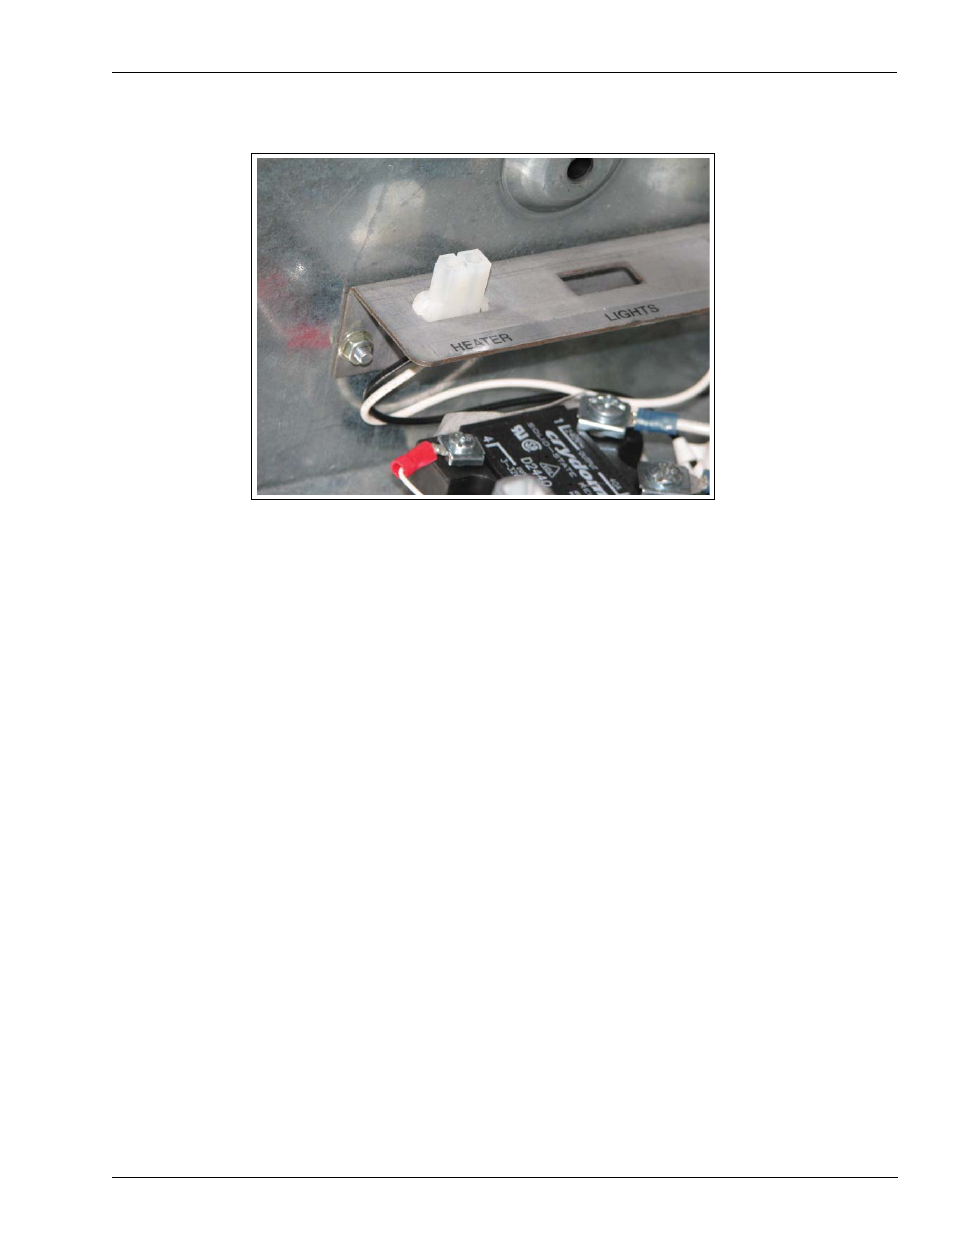
Figure 3: Heater Cable Connection
13
Connect the new heater cable to the heater connector on the power bracket (see
Note: If the unit has an existing battery heater cable, unplug it from the connector on the
bracket and plug it into the mating connector on the new heater cable.
14
Reinstall the CPU board and connect all cables that were removed in step
15
Reinstall the pulse output or RS-485 board, if needed.
16
Reassemble the dispenser after the assembly and testing is complete.
The installation of the CPU Heater Kit for 9800K Series pumps is complete.
See also other documents in the category Gasboy Hardware:
- 216S (18 pages)
- Atlas Fuel Systems Site Prep Manual (42 pages)
- Atlas Technician Programming Quick Ref (2 pages)
- ATC M05819K00X Kits (28 pages)
- Atlas Fuel Systems Owner Manual (80 pages)
- Gilbarco Global Pumping Unit Operation Manual (42 pages)
- 26 (7 pages)
- Atlas Valve Replacement Kits (10 pages)
- Atlas Fuel Systems Installation Manual (100 pages)
- 9120K (8 pages)
- 9820K (6 pages)
- Atlas Single Std. Inlet Centering Kit (8 pages)
- 8800 Atlas (1 page)
- 9120K Series Service Manual (40 pages)
- 9800A Atlas (6 pages)
- 9800 Atlas (20 pages)
- 9800 Atlas (14 pages)
- M08400 (6 pages)
- 9100 Series (8 pages)
- 9820K Series Installation (62 pages)
- 9853K (8 pages)
- 9216KTW (36 pages)
- Recommended Spare Atlas (14 pages)
- DEF Atlas (28 pages)
- 9820K Series (12 pages)
- 9800Q (1 page)
- Q Series (3 pages)
- 8753E (2 pages)
- 9152AXTW2 (1 page)
- 8800E (2 pages)
- 8800E (1 page)
- 9820Q Series (1 page)
- Atlas Start-up (230 pages)
- 215A (1 page)
- 9800A (4 pages)
- 9820A (1 page)
- 2600A (3 pages)
- 2600A (12 pages)
- 2600A (2 pages)
- 9800Q Front Load Vapor (2 pages)
- 9800Q Vapor (2 pages)
- 216A (31 pages)
- 215A (2 pages)
- Lamp Kit (2 pages)
- 9120Q Pulser (1 page)