Installing the rain baffle air gap kits, Preparing for the installation, Installing the rain baffle air gap kit – Gasboy Atlas Rain Baffle Air Gap Kit User Manual
Page 7: 1 remove the lower door panel
MDE-4548 Atlas™ Rain Baffle Air Gap Kit M06804K002 Installation Instructions • February 2006
Page 7
Installing the Rain Baffle Air Gap Kits
Installing the Rain Baffle Air Gap Kits
Preparing for the Installation
1
Request permission from the manager/owner to remove power from the unit and then remove
power using normal procedures. Perform the lockout/tagout safety procedures.
2
Ensure that you have the proper kit for the model unit to be retrofitted.
3
Follow all applicable safety rules and procedures.
Installing the Rain Baffle Air Gap Kit
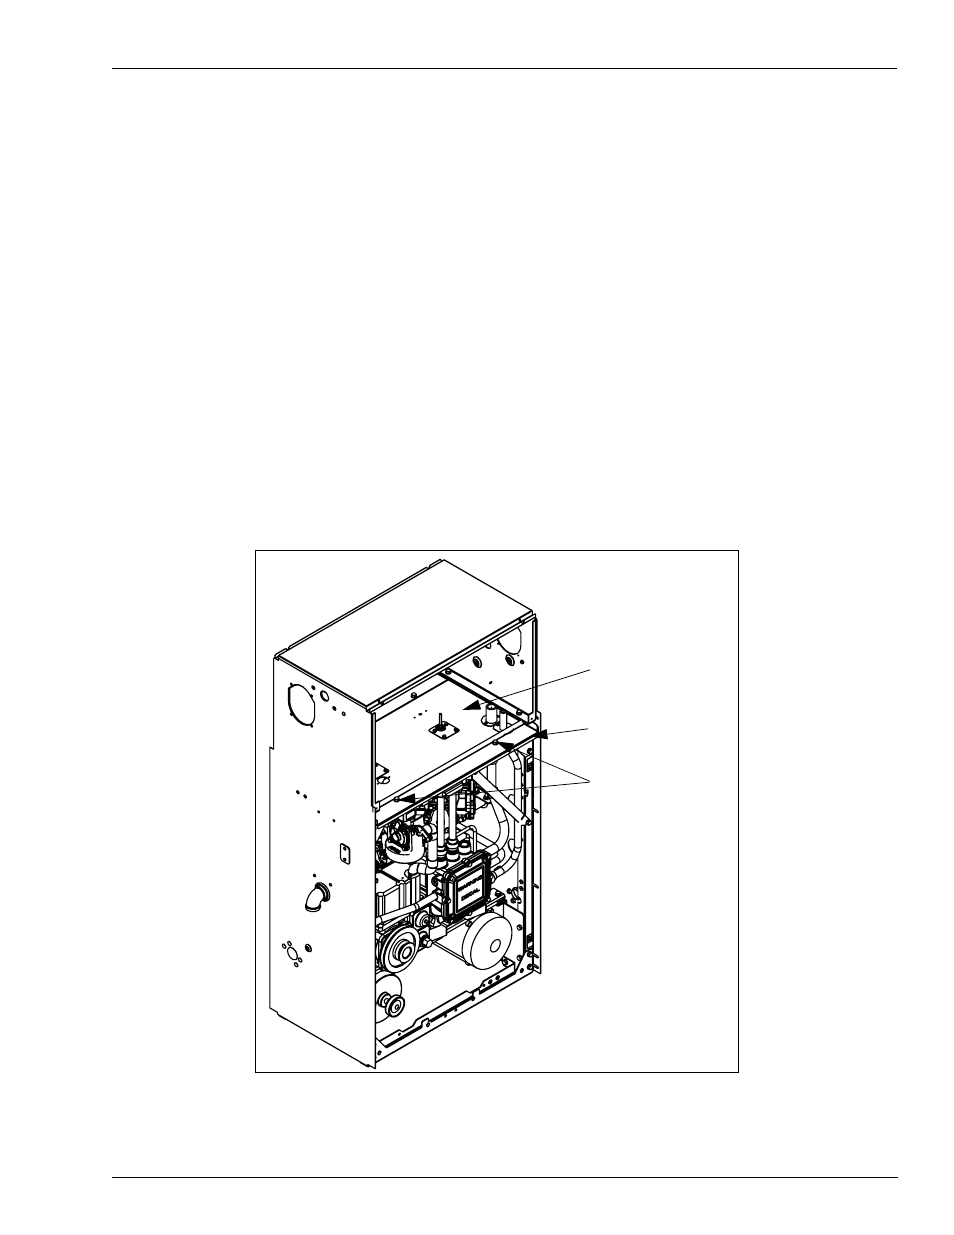
1
Remove the lower door panel.
2
Remove and retain the two M8x16 flanged screws (M00415B009) that hold the lower air gap
plate in place. Refer to
Figure 6:
Rain Baffle Air Gap
Plate
M8x16, Flanged
Screws
Lower Air Gap Plate
Note: The upper air gap
plate and electronics
module are not shown in
this view.
Rain Baffle Air Gap Kit Installation - Electronic Models Only
3
Place the rain baffle air gap plate (M06690B001) on top of the lower air gap plate. Insert the
two M8x16 flanged screws (M00415B009), removed in step 2, and tighten them.