1 removal – Flowserve MX-85 Actuator User Manual
Page 30
Flow Control
Limitorque Actuation Systems
22
MX-85/140 Maintenance and Spare Parts
FCD LMAIM1341-00
4.2.1 Removal
NOTE: The declutch assembly may be removed and remounted without other subassembly removal.
STEP 1
a
WARNING: Potential to operate while danger-
ous mechanical parts are exposed during
subassembly removal. To prevent injury, turn
off all power sources to actuator before remov-
ing side-mounted handwheel assembly. Power
sources may include main power or control
power.
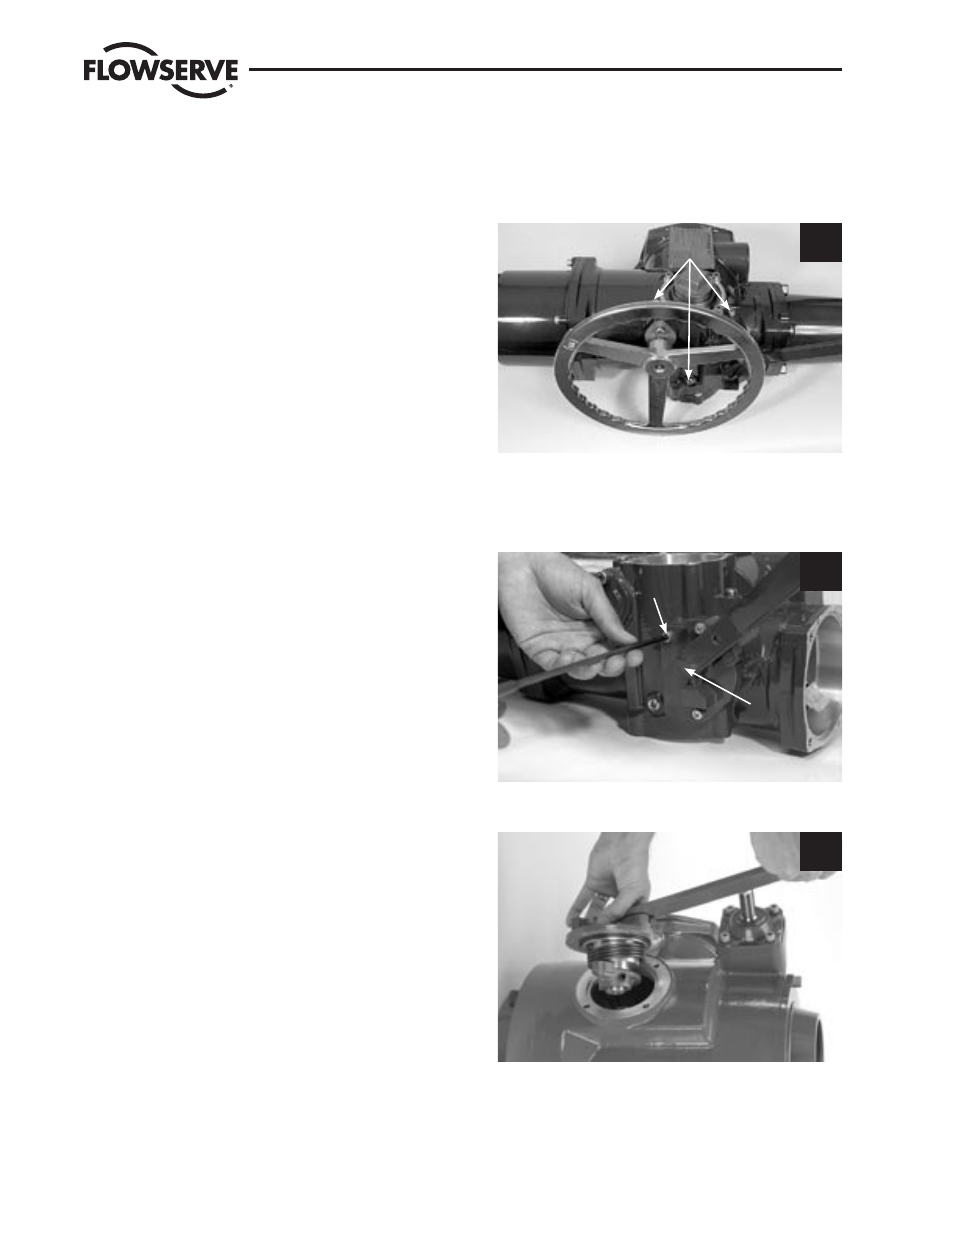
Drain oil from actuator using the lowest of three
plugs in your application mounting orientation.
NOTE: Oil removal is not necessary on if actuator is
mounted with declutch lever up.
1
Oil Plug Drains
STEP 2
a
WARNING: Potential to operate while danger-
ous mechanical parts are exposed during
subassembly removal. To prevent injury, turn
off all power sources to actuator before remov-
ing declutch assembly. Power sources may
include: main power or control power.
Using a 6 mm hex key, remove the four M8 screws
that retain the declutch assembly cover (#5-1) on
the actuator housing.
2
5-12
5-1
STEP 3
Withdraw the complete declutch assembly, slightly
twisting, if necessary, to remove. Note the O-ring
(#5-15) with the declutch assembly cover (#5-1).
Replace at remounting.
Picture 3 is a typical MX-85/140.
3