Chapter 3. operations, 1 establishing the communications link – Comtech EF Data CiLink User Manual
Page 23
3–1
Chapter 3. OPERATIONS
3.1
Establishing the Communications Link
Before proceeding further, the transceiver installation must be powered on. Note that the
transceiver does not contain a ‘Power On/Off’ switch; the transceiver is powered ON by
connecting the J3 “AC Power” connector to the appropriate prime power source.
WARNING
Never turn the CSAT-5060 or XSAT-7080 ON or operate the unit without proper
waveguide termination on the J2 “RF OUTPUT” port. Individuals can be exposed
to dangerously high electromagnetic levels.
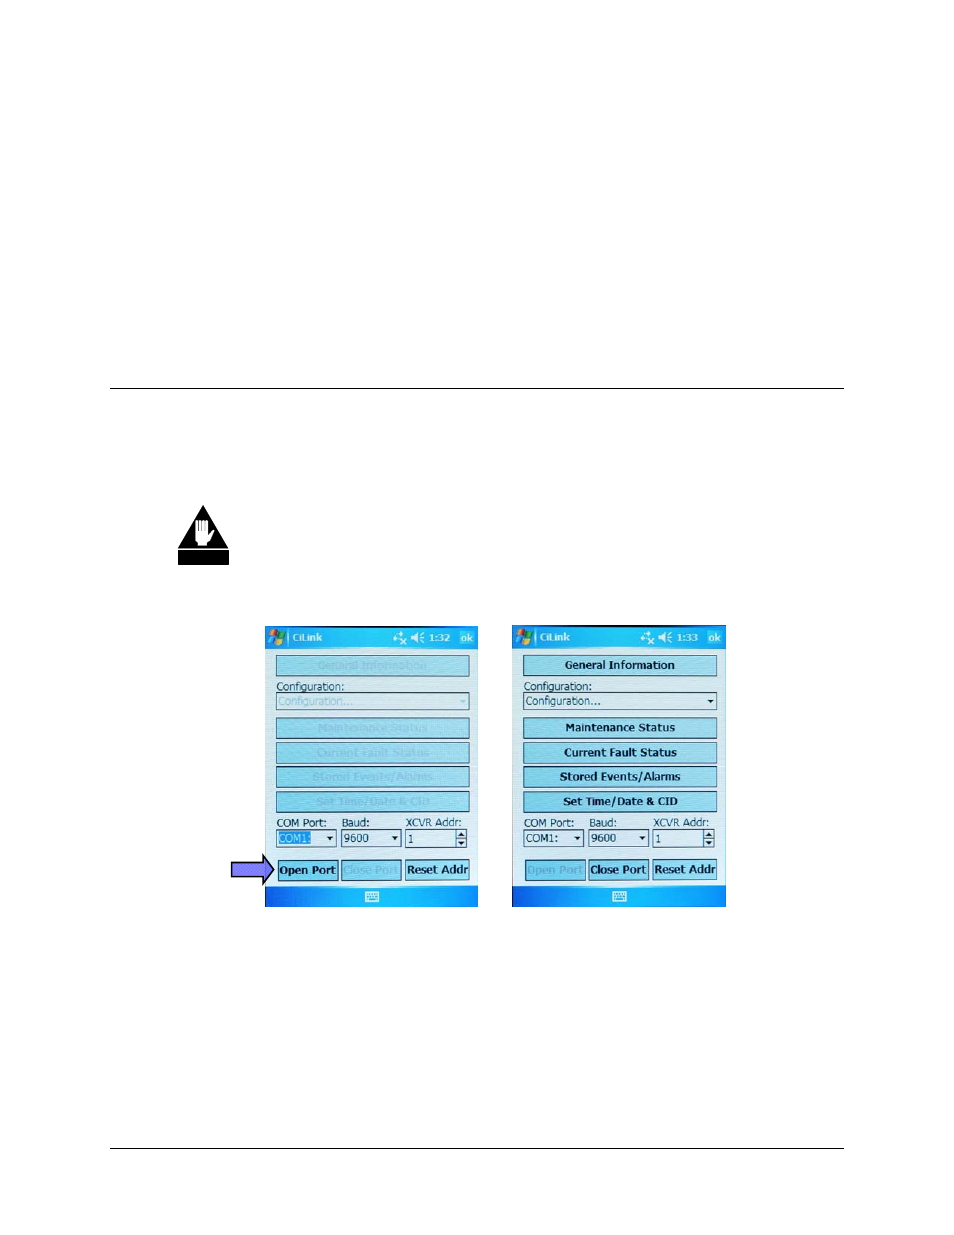
Once all connections are properly established between the handheld device and the transceiver,
and the transceiver is powered ON, select
Open Port
from the CiLink main page [Figure 3-1(a)].
Figure 3-1. Establishing the transceiver communications link
CiLink functionality is enabled and the command bars activate once the communications link
with the transceiver is established [Figure 3-1(b)]. This functionality is available for as long as
the transceiver remains ‘online’ with CiLink. Conversely, select
Close Port
[Figure 3-1(b)] to
terminate the session and disable CiLink’s functionality.
(a) Connecting to transceiver
(b) Connection active / system online