2 adding a nec projector – Doremi DSV-J2 User Manual
Page 39
To perform the projector setup, follow the steps below:
1. Specify a projector identifier in the first field – especially if you setup several projectors.
2. Choose the correct projector model (Christie).
3. Enter the DLP Head IP address, then click on the test button located at the right, that should
have been activated. This is an IP 'ping' test to the DLP head to verify ethernet connectivity.
4. Enter the Vendor IP value in the corresponding field. It should be set to the TPC address.
5. Enable or disable subtitles if needed using the corresponding radio buttons on the bottom of
this GUI.
6. Specify if this is the primary projector or not using the corresponding radio button. This is
useful mainly when there are several projectors configured.
Note: The DLP Username and Password are used for specific projectors only and cannot be
changed.
7. Make sure that the Enabled check box is selected at the top right corner of the GUI.
8. Click on Save to record these settings. You should be asked for a password.
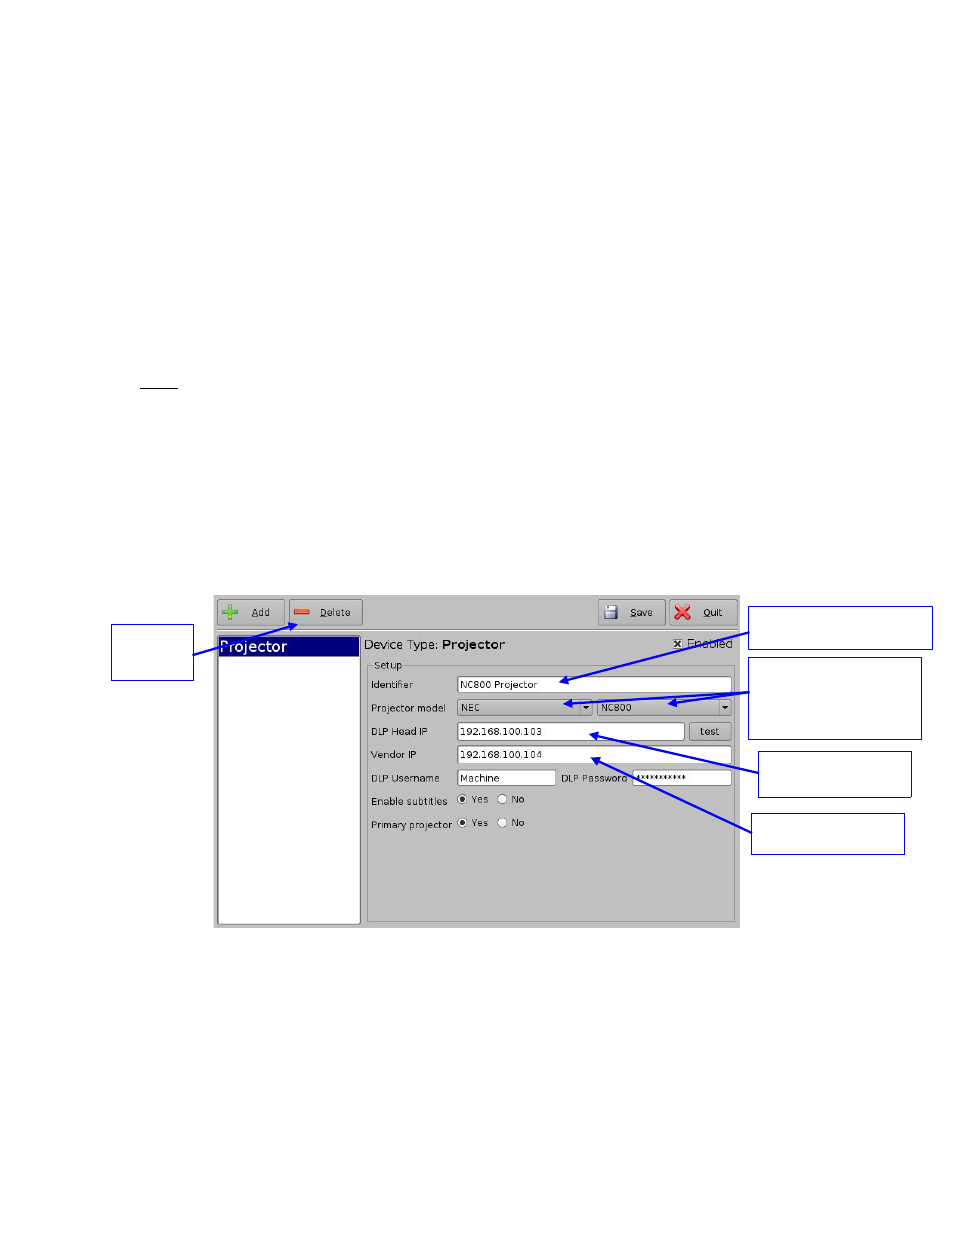
9.2 Adding a NEC Projector
To add a NEC projector, perform the same procedure as in the previous paragraph using NEC
for the Projector Model field and choose the appropriate NEC projector model (Figure 47):
Figure 47: Device Manager GUI – NEC Projector Setup Fields
Click the Save button to record these settings. You should be asked for a password.
DSV.OM.000391.DRM
Page 39 of 68
Version 1.3
Doremi Labs
Delete
button
Projector Identifier
Projector model set
to NEC and NEC
model number
Vendor IP field
DLP Head IP field