Genie Pro max PMX-IC B Series User Manual
Page 26
1. Install light bulb(s) into socket(s).
Do Not
use short neck bulb(s).
•
Use bulb(s) rated for:
–
rough service
–
vibration
–
appliances
•
100 watt maximum
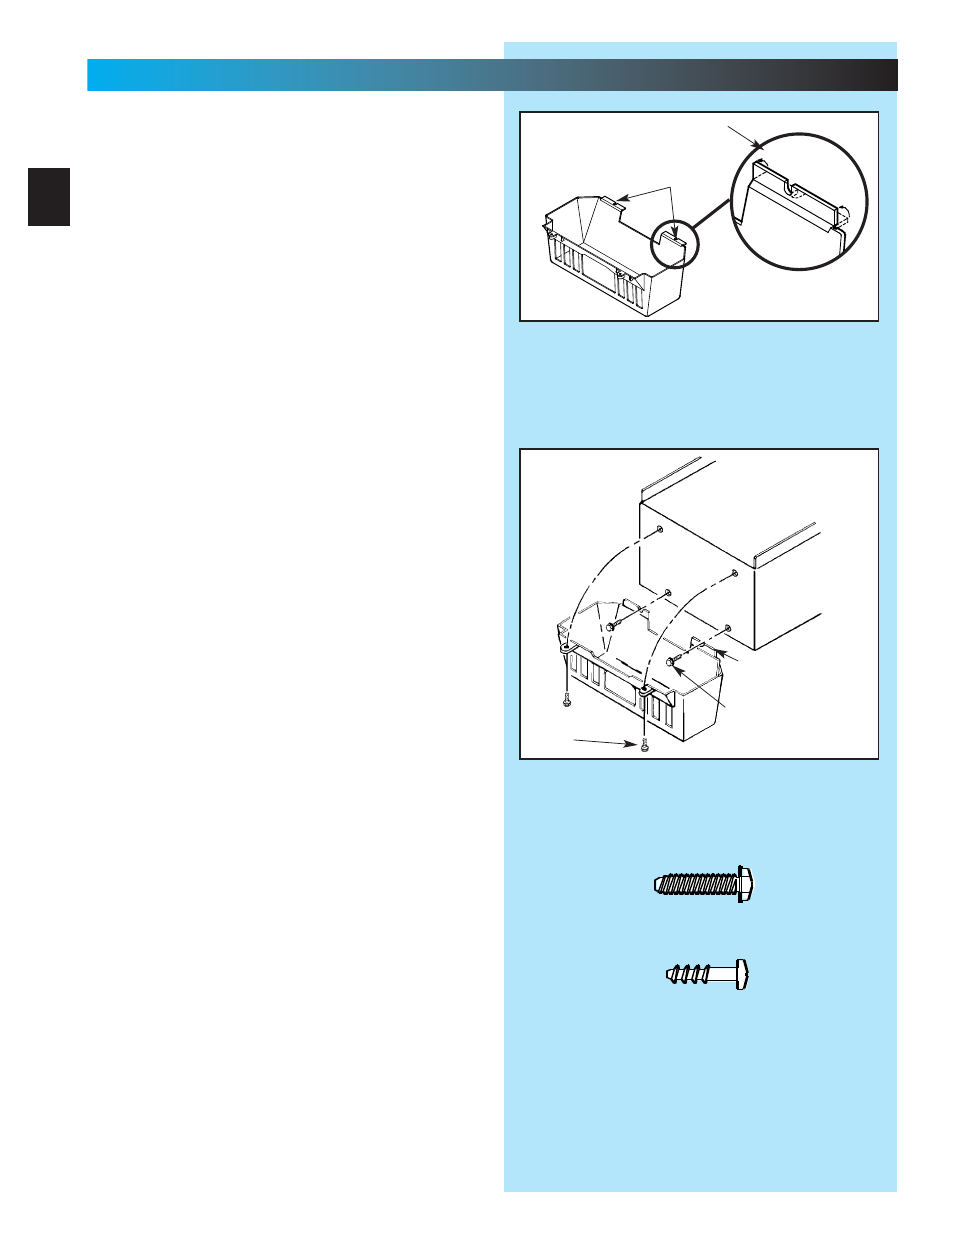
2. Bend two (2) slotted tabs up.This will activate
the
”
living hinge
”
of the lens (Fig. 11-1).
NNNOOOOTTEE:: TThhee ffoolllllloowwiinnnggg ssstteeeppss uuuussssee tthhee ssssccrrrreeeewwss fffrrrroooommmm tthhhheeee
BBBlllluuee PPaaaarrttss BBBBaagggg tthhhhaaaatt wweeerree ssseett aasssiiddddeeee eeaarrlliieeeerr..
3. Start two (2) No. 8 x 3/4
”
hex head screws into
bottom holes of panel (Fig. 11-2).
•
Slide slotted tabs up behind hex head screws.
•
Tighten hex head screws.
4. Align lens holes and holes of panel.
•
Insert and tighten a No. 8 x 5/8
”
pan head
screw into each round lens hole and tighten,
NNOOTE: Scrreew hheeads fiit compplleetelly innttoo rreecess ooff
llennss tabb..
Fig. 11-2
Fig. 11-1
Pan head
screws
Bend tabs up
Slotted tabs
Bend tabs up (2)
Hex head
screws
11111111
......
LIIGHHTT BBUULLB AANNDD LLENNSS IINSSTAALLLAATTIONN
FFOR HELP-1.800..3554.36433 OR GEENIEECCOOMPANY.CCOOM
26
[10]
[10]
[9]
Hex Head Screw
No. 8 x 3/4
”
Pan Head
Phillips Screw
No. 8 x 5/8
”
[9]