Hot water generator connections cont, Hot water generator startup, Plumbing installation – WaterFurnace 7 Series User Manual
Page 12
12
7 SERIES 50Hz 700A11 INSTALLATION MANUAL
Hot Water Generator Startup
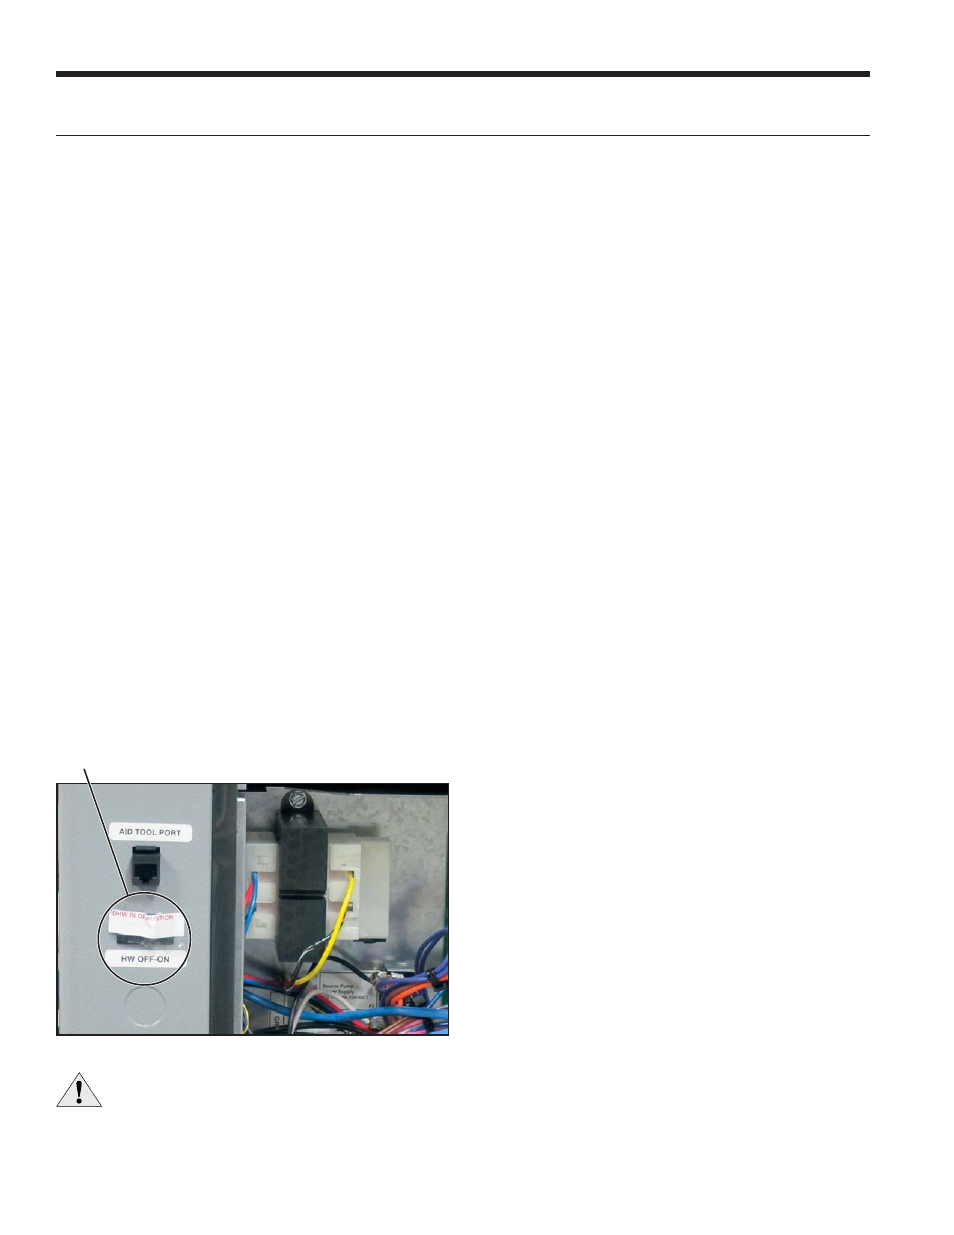
1. Turn the hot water generator switch to the “ON”
position. The hot water generator switch will allow the
hot water generator pump to be enabled or disabled by
the service technician or homeowner.
2. Close the drain valve to the water heater.
3. Open the cold water supply to the tank.
4. Open a hot water faucet in the building to bleed air from
the system. Close when full.
5. Open the pressure relief valve to bleed any remaining air
from the tank, then close.
6. If so equipped, turn the venting (burping) screw in the
center of the pump two (2) turns open (water will drip
out), wait until all air is purged from the pump, then
tighten the plug. Use vent couplings to bleed air from
the lines.
7. Carefully inspect all plumbing for water leaks and
correct as required.
8. Before restoring electrical supply to the water heater,
adjust the temperature setting on the tank.
• On tanks with both upper and lower elements,
the lower element should be turned down to
the lowest setting, approximately 37.8°C. The
upper element should be adjusted to 48.9°C to
54.4°C. Depending upon the specific needs of
the customer, you may want to adjust the upper
element differently.
• On tanks with a single element, lower the
thermostat setting to 48.9°C.
9. After the thermostat(s) is adjusted, replace the access
cover and restore electrical supply to the water heater.
10. Make sure that any valves in the hot water generator
water circulating circuit are open.
11. Use an AID Tool to enable HWG and select the desired
water heating set point. Selectable set points are 37.8°C
– 60°C in 5°C increments (default 54.4°C). From the
Main Menu of the AID Tool select Setup, then AXB Setup.
12. Turn on the unit to first stage heating..
13. The hot water generator pump should be running. When
the pump is first started, turn the venting (burping)
screw (if equipped) in the center of the pump two (2)
turns open until water dribbles out, then replace. Allow
the pump to run for at least five minutes to ensure that
water has filled the circulator properly. Be sure the
switch for the hot water generator pump is “ON”.
14. Allow the unit to heat water for 15 to 20 minutes to be
sure operation is normal.
Plumbing Installation
1. Inspect the dip tube in the water heater cold inlet
for a check valve. If a check valve is present it must
be removed or damage to the hot water generator
circulator will occur.
2. Remove drain valve and fitting.
3. Thread the 19.1mm NPT x 88.9mm brass nipple into the
water heater drain port.
4. Attach the center port of the 19.1mm FPT tee to the
opposite end of the brass nipple.
5. Attach the 12.7mm copper to 19.1mm NPT adaptor to the
side of the tee closest to the unit.
6. Install the drain valve on the tee opposite the adaptor.
7. Run interconnecting tubing from the tee to hot water
generator water out.
8. Cut the cold water “IN” line going to the water heater.
9. Insert the reducing solder tee in line with cold water “IN”
line as shown.
10. Run interconnecting copper tubing between the unit hot
water generator water “IN” and the tee (12.7mm nominal).
The recommended maximum distance is 15.24 meters.
11. To prevent air entrapment in the system, install a vent
coupling at the highest point of the interconnecting lines.
12. Insulate all exposed surfaces of both connecting water
lines with 9.5mm wall closed cell insulation.
NOTE: All plumbing and piping connections must comply
with local plumbing codes.
CAUTION: Never operate the HWG circulating
pump while dry. If the unit is placed in operation
before the hot water generator piping is
connected, be sure that the pump switch is set
to the OFF position.
Hot Water Generator Connections cont.
Hot Water Generator Switch
The hot water generator switch is taped in the disabled
position at the factory.