Ubiquiti Networks Rockeac User Manual
Page 15
12
Chapter 3: Wireless
airOS®7 User Guide
Ubiquiti Networks, Inc.
•
Search
Enter the keyword to search for the desired AP.
•
Lock to AP
Select the AP from the list. Click Lock to AP
to allow the station to always maintain a connection to
an AP with a specific MAC address.
•
Select
Select the AP from the list and click Select for
association.
•
Scan
Click Scan to refresh the list of available wireless
networks.
Selected SSIDs must be visible, have compatible channel
bandwidth and security settings, and must be compatible
with airMAX AC technology. In addition:
• If Access Point PTMP mode is selected on a station
operating in Station PTP mode, the station’s mode will
automatically be changed to Station PTMP mode (the
following warning will be displayed: “Wireless Mode:
Warning: New wireless mode selected!”).
• If Access Point PTP is selected on a station operating
in Station PTMP mode, the station’s mode will
automatically be changed to Station PTP mode (the
following warning will be displayed: “Wireless Mode:
Warning: New wireless mode selected!”).
The list of Scanned Frequencies for the Site Survey is
determined by the Frequency List option, if the option is
enabled.
Lock to AP MAC
(Available in Station PTP or Station PTMP
mode only.) This allows the station to always maintain a
connection to an AP with a specific MAC address. This is
useful as sometimes there can be multiple APs using the
same SSID. Enter a MAC address in the Lock to AP MAC
field, and the station will lock to the AP with this specific
MAC address and not roam between several APs with the
same SSID.
Country
Each country has their own power level and
frequency regulations. To ensure the device operates under
the necessary regulatory compliance rules, you must select
the country where your device will be used. (The country
is selected upon initial login, as described in “Getting
Started” on page 2.) The channels, frequencies,
and output power limits will be tuned according to the
regulations of the selected country.
Note:
For the Country setting, U.S. product versions
are restricted to a choice of Canada, Puerto Rico,
or the U.S. to ensure compliance with FCC/IC
regulations.
Channel Width
Displays the spectral width of the radio
channel. You can use this option to control the bandwidth
consumed by your link.
Using higher bandwidth increases throughput. Using
lower bandwidth does the following:
• Reduces throughput proportional to the reduction in
channel size. For example, as 40 MHz increases possible
speeds by 2x, the half-spectrum channel (10 MHz)
decreases possible speeds by 2x.
• Increases the number of available, non-overlapping
channels, so networks have better scalability.
• Increases the Power Spectral Density (PSD) of the
channel, so you can increase the link distance – more
robust links over long distances.
Available channel widths depend on the selected Wireless
Mode. Here are the options for each mode:
•
Access Point PTP
Supported wireless channel
spectrum widths: 80 MHz, 60 MHz, 50 MHz, 40 MHz, 30
MHz, 20 MHz, and 10 MHz.
•
Access Point PTMP
Supported wireless channel
spectrum widths: 40 MHz, 30 MHz, 20 MHz, and 10 MHz.
•
Station PTP
Supported wireless channel spectrum
widths: Auto 20/40/80 MHz (recommended), 60 MHz, 50
MHz, 30 MHz, and 10 MHz.
•
Station PTMP
Supported wireless channel spectrum
widths: Auto 20/40 MHz (recommended), 30 MHz, and
10 MHz.
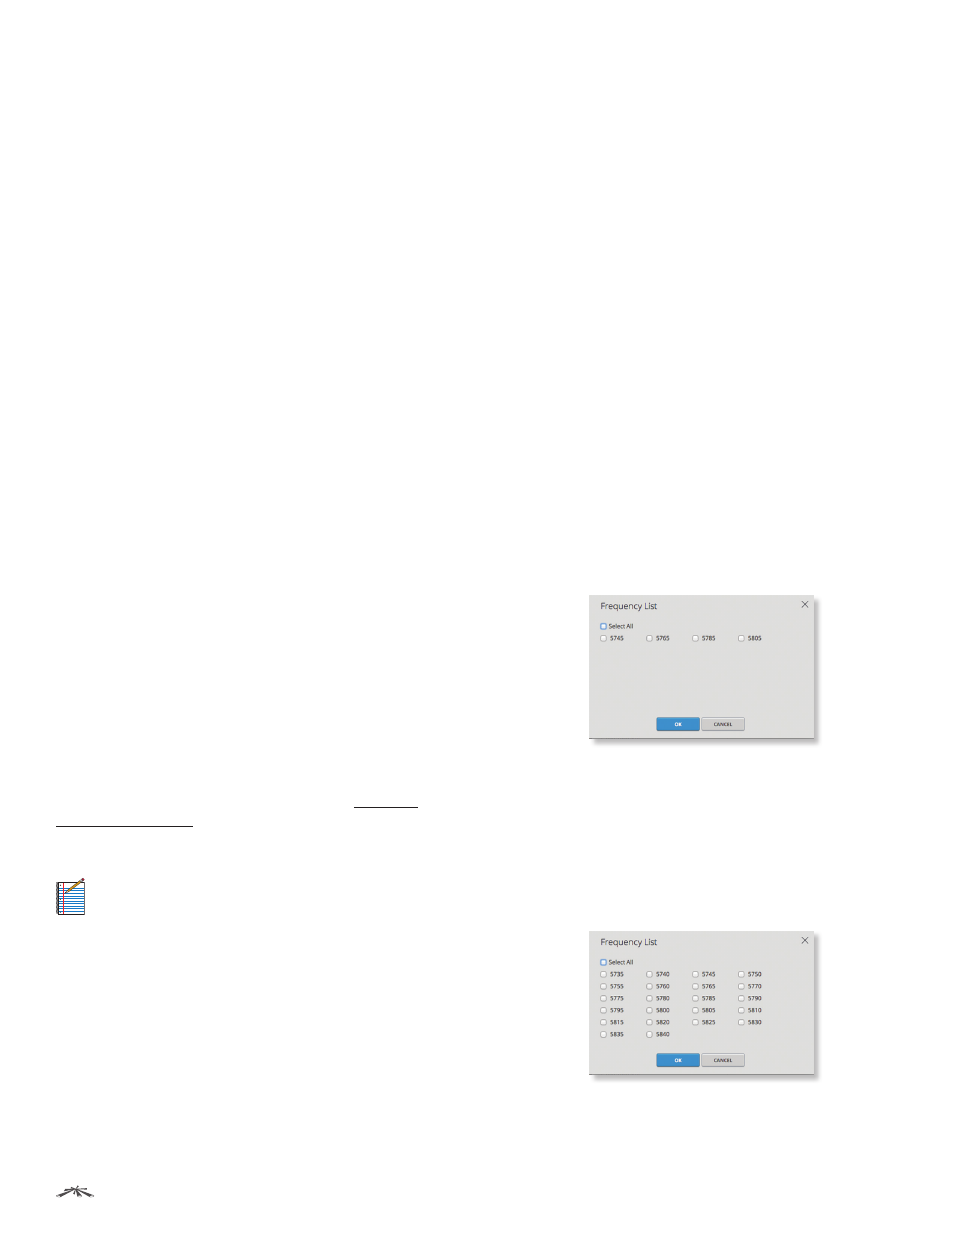
Frequency List, MHz
The use of this option varies
depending on the Wireless Mode:
•
Access Point PTP or Access Point PTMP
Multiple
frequencies are available to avoid interference between
nearby APs. The frequency list varies depending on
the selected Country and Channel Width options. Once
enabled, click Edit to open the Frequency List window.
Select the frequencies and click OK, or click Cancel to
close the window without any selections.
•
Station PTP or Station PTMP
This restricts scanning
to only the selected frequencies. The benefits are faster
scanning as well as filtering out unwanted APs in the
results. The Site Survey tool will look for APs using only
the selected frequencies. Once enabled, click Edit to
open the Frequency List window.
Select the frequencies that you want to scan and click
OK, or click Cancel to close the window without any
selections.