SOR Calibration Manager Software User Manual
Page 6
6/12
Form 1459 (01.13) ©SOR Inc.
Calibration
To calibrate a device, begin by clicking
the “Calibration wizard” button. Simply
follow the guided steps to complete the
calibration. New Zero & Span Set Points
can be entered to re-range the device if
needed.
The guided calibration wizard will
provide step-by-step instructions on
how to calibrate the device. Follow these
instructions to guide you through the
calibration process.
NOTE: Take care to ensure the USB cable
remains connected during calibration. If the
USB cable should become disconnected at
any point during the calibration, it may be
necessary to exit the Calibration Manager
and restart the Calibration Wizard.
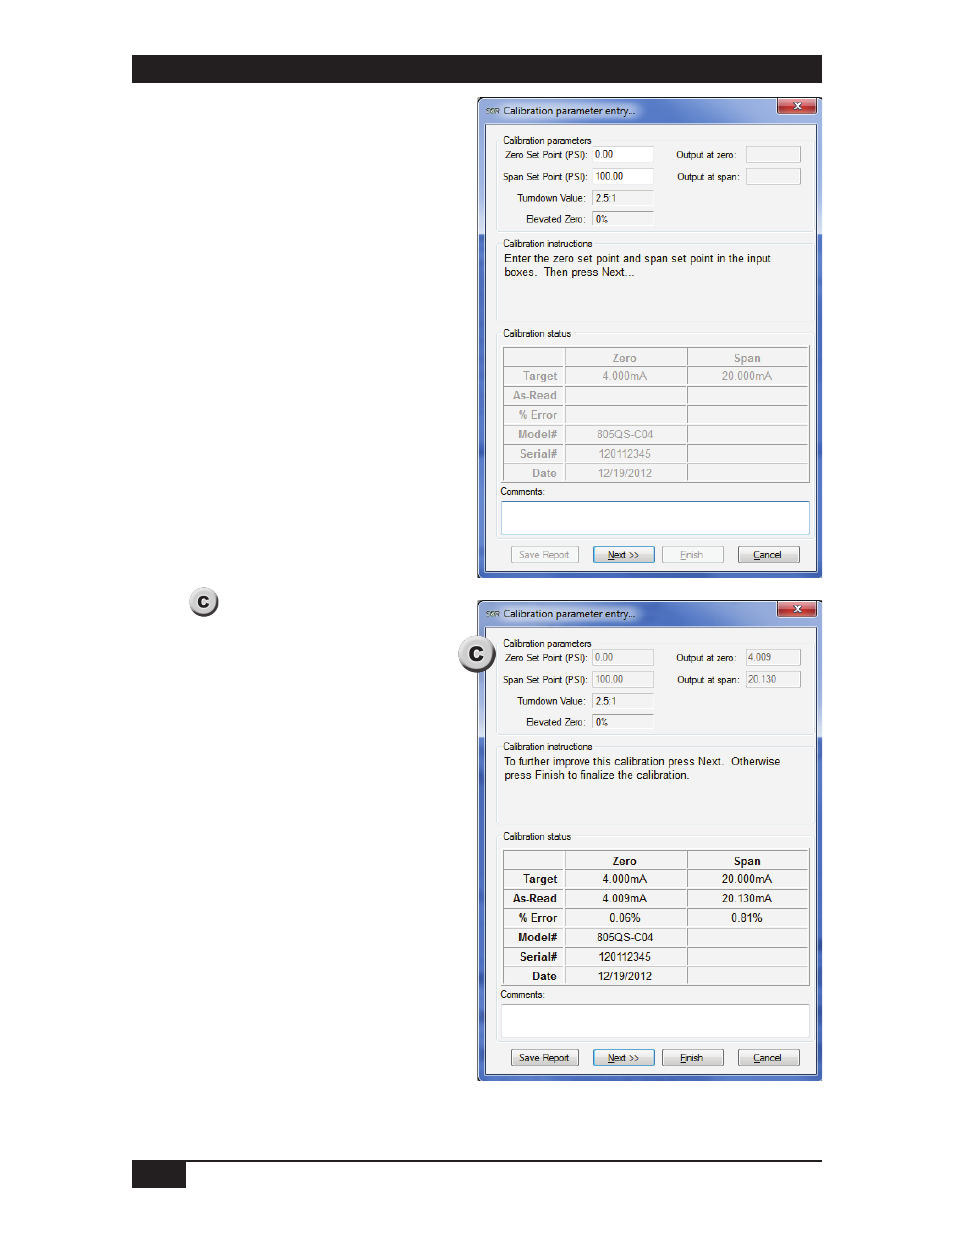
After the first attempt to calibrate a
device is completed, the summary
screen is displayed to show how
closely the device is calibrated to the
target settings.
Press the “Next” button to further adjust
the Zero and Span Set Points. Once the
device is calibrated to a satisfactory
precision, press the “Finish” button to
complete the calibration.
NOTE: It may be desirable to save an
archive of the device calibration when the
device has been calibrated to a satisfactory
zero and span output. To do this, press the
“Save Report” button. You will be prompted
for a directory to save the file. Once the
directory is chosen, it will automatically be
recalled upon subsequent saves.