Important notes, Calibrating the thermostat, Fault codes access – Bonaire LV User Manual
Page 33: View the fault codes, Controls – installation / setup / commissioning
Multi-Appliance Manual Control
Controls – Installation / Setup / Commissioning
I
MPORTANT
N
OTES
Things to note when connecting new products to a manual control
1. Central Heating will have a default configuration that includes add-on cooling.
2. When a ducted evaporative air conditioner is added to a ducted central heater, the add-on
cooling functions are no longer available for use.
3. The auto coding process can only discriminate between a single central heater and a
single evaporative air conditioner
C
ALIBRATING THE
T
HERMOSTAT
.
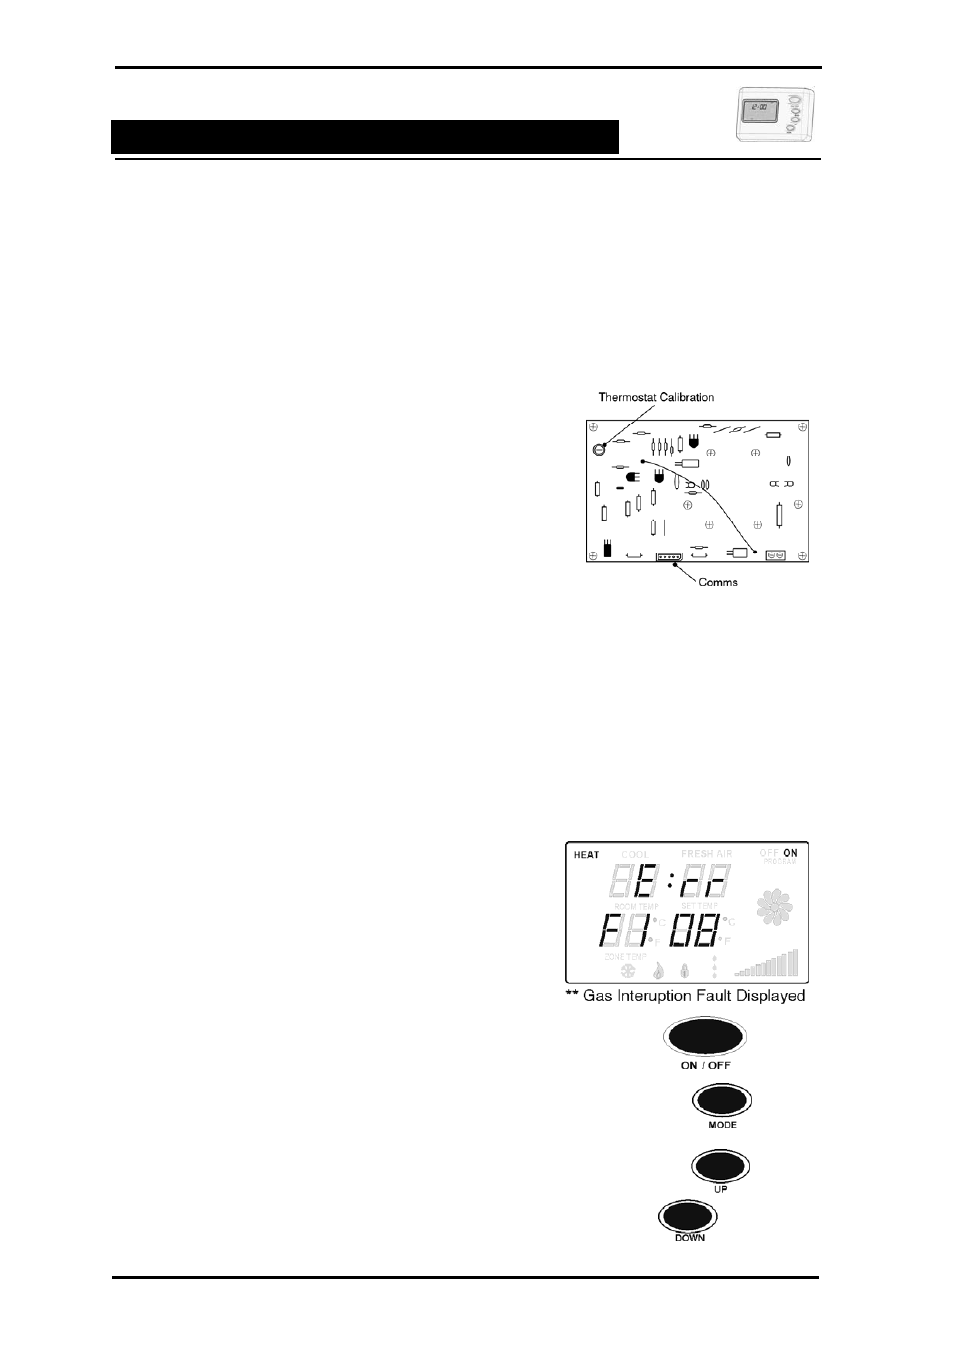
The thermostat comes pre-calibrated from the manufacturer. However, should the thermostat
require re-calibrating, the following is the procedure.
S
TEP 1
Remove the control from the mounting panel
STEP 2
Power down the thermostat by disconnecting
the comms loom.
STEP 3
Reconnect the comms loom to the thermostat
.
STEP 4
Wait 10 seconds for the control to complete
the autocode and then press the ON/OFF to
enter the temperature setting
STEP 4
On the control board adjust the room temperature by rotating the temperature
calibration knob.
There is only 20 seconds available after power up to make the adjustment. To
further adjust repeat steps 2 and 3.
STEP 5
Replace the thermostat to the mounting base.
F
AULT
C
ODES
A
CCESS
The manual control can recover the last 5 faults that the unit diagnostics has stored when viewed
through the auto mode. Fault code F1 is the current registered fault flashing on the screen, while
F2, F3, F4 & F5 is the fault code history. Once the current fault is viewed and the unit is reset, the
fault becomes part of the last 4 fault code history.
•
To reset the unit, simply turn the control OFF then
ON. Where possible the unit will resume operation
.
V
IEW
T
HE
F
AULT
C
ODES
There are a number of fault codes that can be registered
subject to the failure or the product associated.
STEP 1
Select the product using the mode
button e.g. HEATER
STEP 2
To enter the fault code log, press the
DOWN and MODE buttons together.
STEP 3
Using the UP DOWN buttons scroll
through the fault log.
The last fault code number will be
displayed with number F1 and the fault
code. Number F1 is always the most
recent fault. See the fault code table
below.
STEP 4
To exit press the ON / OFF button.
STEP 5
Reset the unit by turning the control
OFF then ON.
Bonaire Control Systems
Page 33