Operating instructions – American Energy Systems Country Flame Little Rascal User Manual
Page 13
13
OPERATING INSTRUCTIONS
(Using self igniter systems, if auto ignition system (optional) has been installed)
NOTE: Before the stove is started, the firepot must be checked for debris and clear air holes.
Some fuels will cause the firepot to build up more frequently making it necessary to stir and
clean the firepot more often. Do not allow ash to build up underneath the firepot area or in the
ash pan as it will block off the air flow to the firepot.
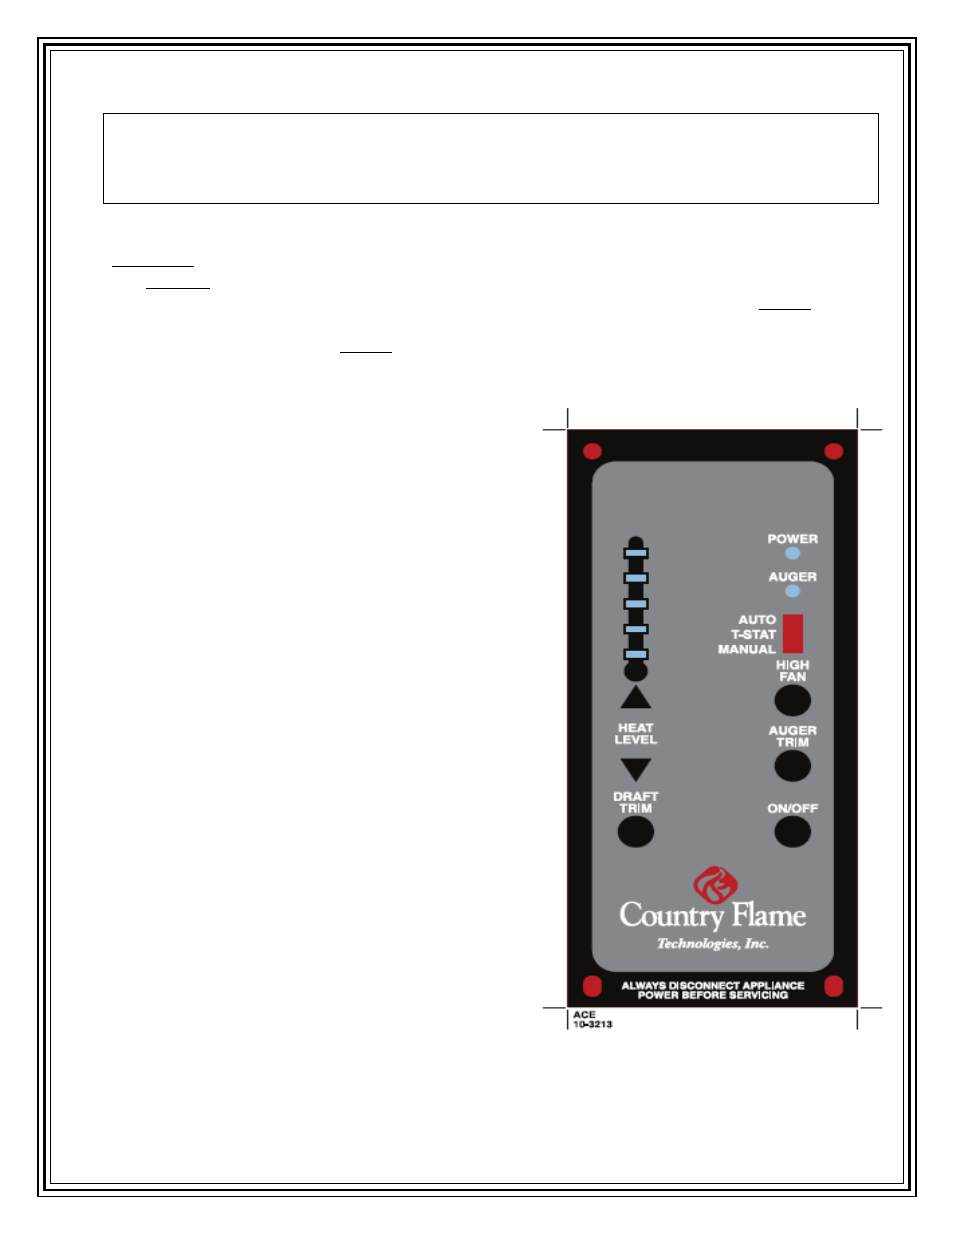
Your control panel has three (3) separate modes of operation (switch located on top of board). The
MANUAL setting allows the operator to choose heat level setting changes without a thermostat.
The T-STAT setting allows the operator to set the highest heat level setting desired and when the
thermostat is satisfied, the unit will automatically go to the low heat level setting. The AUTO setting
allows the unit to shut completely off when the thermostat is satisfied and re-start when the
thermostat calls for heat. The AUTO setting can only be used with wood pellets
Before lighting your Country Flame for the first time make sure that all items are out of the hopper and firebox
area. Note: If using a wall thermostat, make sure that the thermostat is turned up above room temperature. The
unit will operate on low fire if the thermostat is turned down.
9
Load the hopper with fuel (Wood Pellets only on LR-01).
9
Close the door
9
Push the “On/Off” button.
9
Turn the air intake butterfly damper to approximately ¼
inch open. (More or less as needed.)
NOTE: Priming the auger is required when the unit is new or
when the hopper has completely run out of fuel. This can be
done approximately 1 minute after pushing the on/off start
button. Press and hold the “auger” button until fuel begins to
drop into the firepot. When fuel begins to drop regularly,
release auger button, the auger is primed.
NOTE: The viewing door, ash pan door and hopper door
must be closed and/or latched during operation or vacuum
will not be established. If vacuum can not be established the
stove will shut down and the #2 heat level setting light will
blink. The ON/OFF button must be held for app. 6 seconds
to reset.
The unit starts automatically on a pre-set heat level setting.
After the unit has been turned on, and the 1 minute
diagnostics has run, you may select a desired heat level.
However, the heat level feed rate will not change until the
unit has completed the 15 minute startup sequence. It is
recommended to burn the unit on the number #2 or #3 heat
level setting for the first 30-45 minutes.
If the fire temperature has not reached proper
operating temperature within the minimum cycle time
(15 min.) the auger will stop feeding, the stove will
shut down and the #3 heat level setting light will blink.
You will need to press and hold the ON/OFF button
for 6 seconds to start the cycle over again. If the
system is set on auto start it will attempt two startups on its own.
The draft and room air blower speed varies with each feed rate. The “Draft Trim” button will
override the variable fan function +/- 5 volts on all heat levels. To override, press and hold the