American Energy Systems PP-1502 Auger Weldment User Manual
Auger weldment assemble part #pp-1502
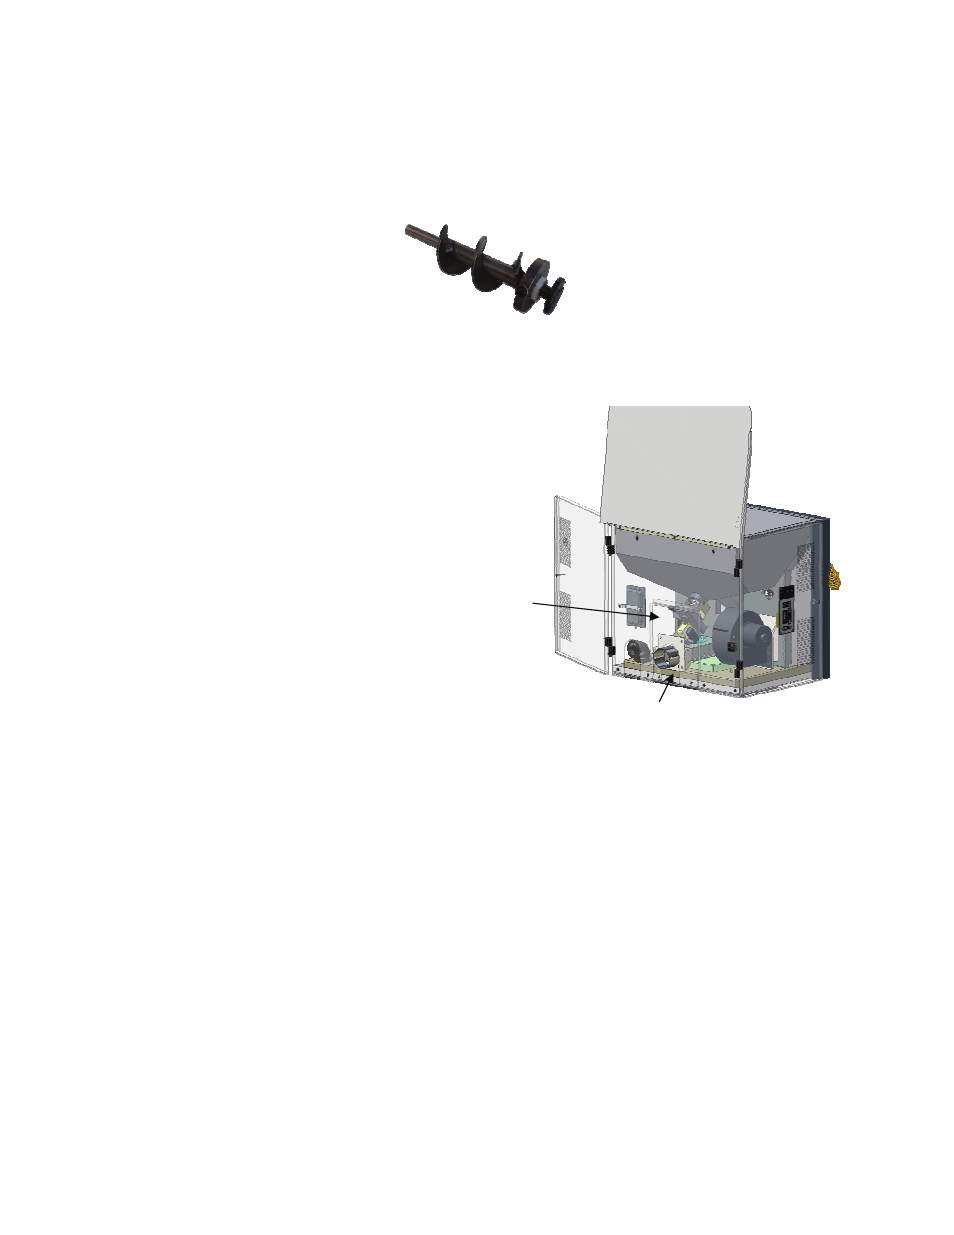
Auger Weldment Assemble
Part #PP-1502
used on LR01
• Turn power off unit and unplug from wall.
• Remove auger motor access panel using
1/8” allen wrench located on the back of
the unit.
• With access panel removed using a 1/8” allen wrench remove the 2 – allen screws holding the
complete auger assemble as soon in figure #1.
• Make sure you keep the spacer and the male drive assembly. They will be used when you
replace the auger PP-1502.
• Prior to installing a new auger motor inspect the auger tube to insure no deep scratch or
gouges are in the walls of the tubing.
• Inspect the auger bushing located in the top auger housing weldment replace if damaged CF-
114 auger bushing.
• Carefully insert the auger weldment into the tube as shown.
• Install the spacer and male drive assembly so that the pins on the male drive assembly line up
with the slots on the auger weldment.
• Line up the hole for auger weldment to the holes on the auger housing. Insert the 2-1/4-20 x
½” screws into holes and tighten. Make sure the auger motor is equally spacered from top to
bottom.
access panel
¼-20 x ¾” AH Cap