3xLOGIC VIGIL Client User Manual
Page 17
3xLOGIC’s VIGIL Client - Users Guide Page 17
Doc# 12031914
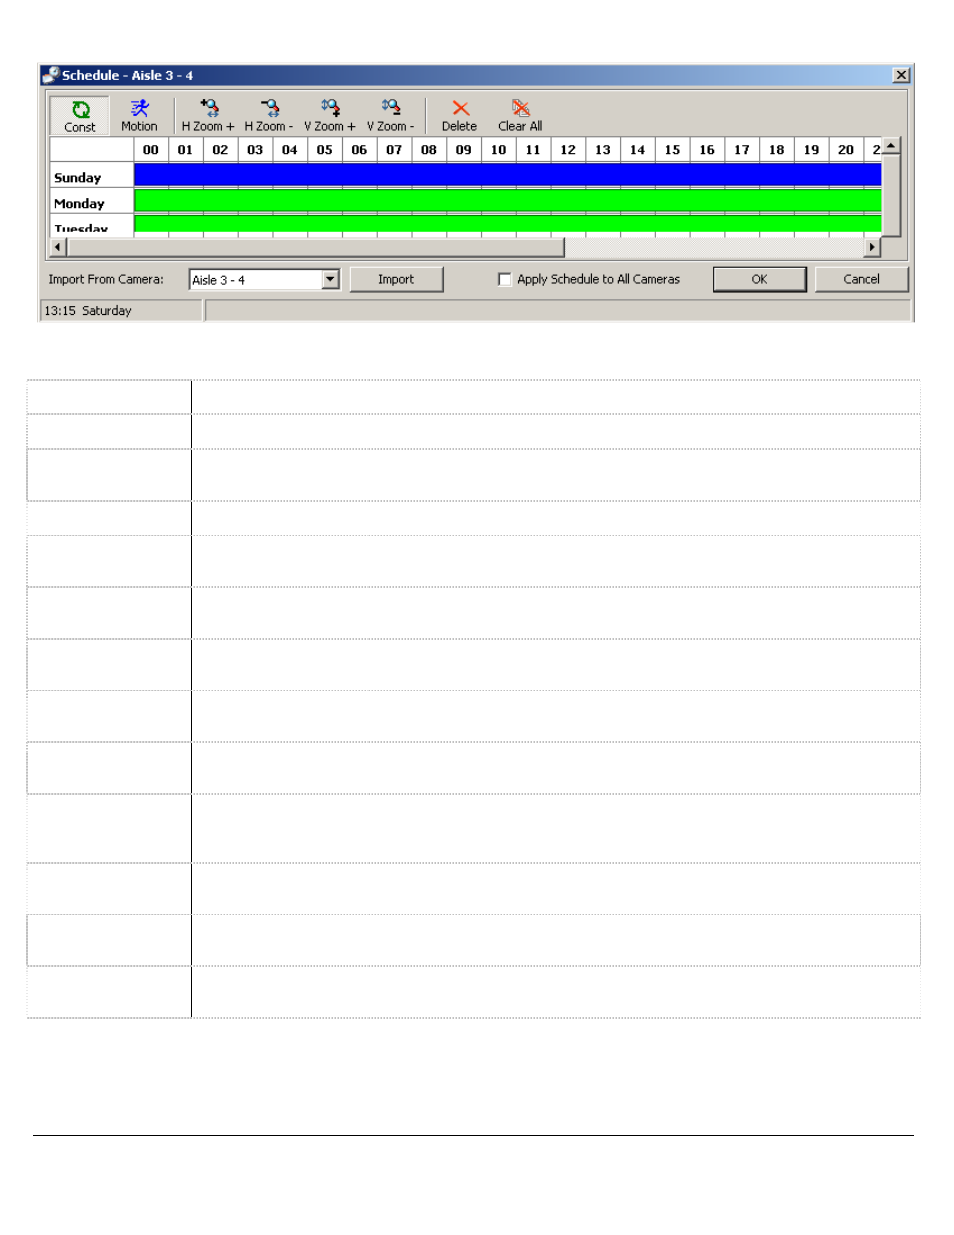
Note: The smallest time interval that can be used is a 15 minute period.
Const
Sets or changes the section to Constant recording mode; these time periods are colored
green
.
Motion
Sets or changes section to Motion recording mode; these time periods are colored
blue.
HZoom+/-
Expands and contracts the schedule horizontally; this allows for better precision in setting time
periods.
VZoom+/-
Expands and contracts the schedule vertically.
Move a time
period
Click and hold the Shift key, then click-and-drag the section.
Copy a time
period
Click and hold the Ctrl key, then click-and-drag the section.
Change record
mode
Click a section of the schedule, and then click the appropriate button (Const or Motion) to change
the recording mode for that section.
Change the
start/end time
Select the section by clicking on it and then click-and-drag the right or left edge of the section.
Importing from
another camera
Select the camera from the Import From Camera drop-down menu, and then click Import. This will
overwrite the current schedule.
Viewing start and
end times of a
section
Select the section by clicking on it. The start and end times of the section are displayed near the
bottom left corner of the Schedule window. Hover the mouse over any part of the section to display
the time.
Deleting a time
period
To select a section, click on it and then click Delete.
Deleting a
schedule
Click the Clear All button to delete the entire schedule.
Apply Schedule To
All Cameras
When marked, this checkbox will apply the created schedule to all cameras that have been set to
Schedule recording mode.